
Im Maileon Help-Center finden Sie umfassende Dokumentationen zu unserem System.
Beliebte Suchanfragen: Importe | Rest-API | Integrationen | SMS
Marketing Automation Template Gallery
1. Introduction
Maileon Marketing Automation provides pre-built templates that help you create automation workflows more quickly. You can also save your own automations as templates and reuse them later.
1.1. Why is this feature useful?
| Status before | Solution with the Template Gallery |
| Every automation had to be built from scratch | You can now start from pre-built templates |
| Existing workflows could not easily be reused for new automations. | Your own automations can be saved as templates and reused later |
| It was hard to standardize the setup across the team | Saved templates can be shared/exported among partner-level users |
1.2. How can you use it?
Open Automations under Campaigns → Automations, then click + Create automation (fig. 1).

fig 1: Click ‘+Create automation’ in ‘Campaigns’ → ‘Automations’ to start the process.
Name the new automation, then click Next (fig. 2).
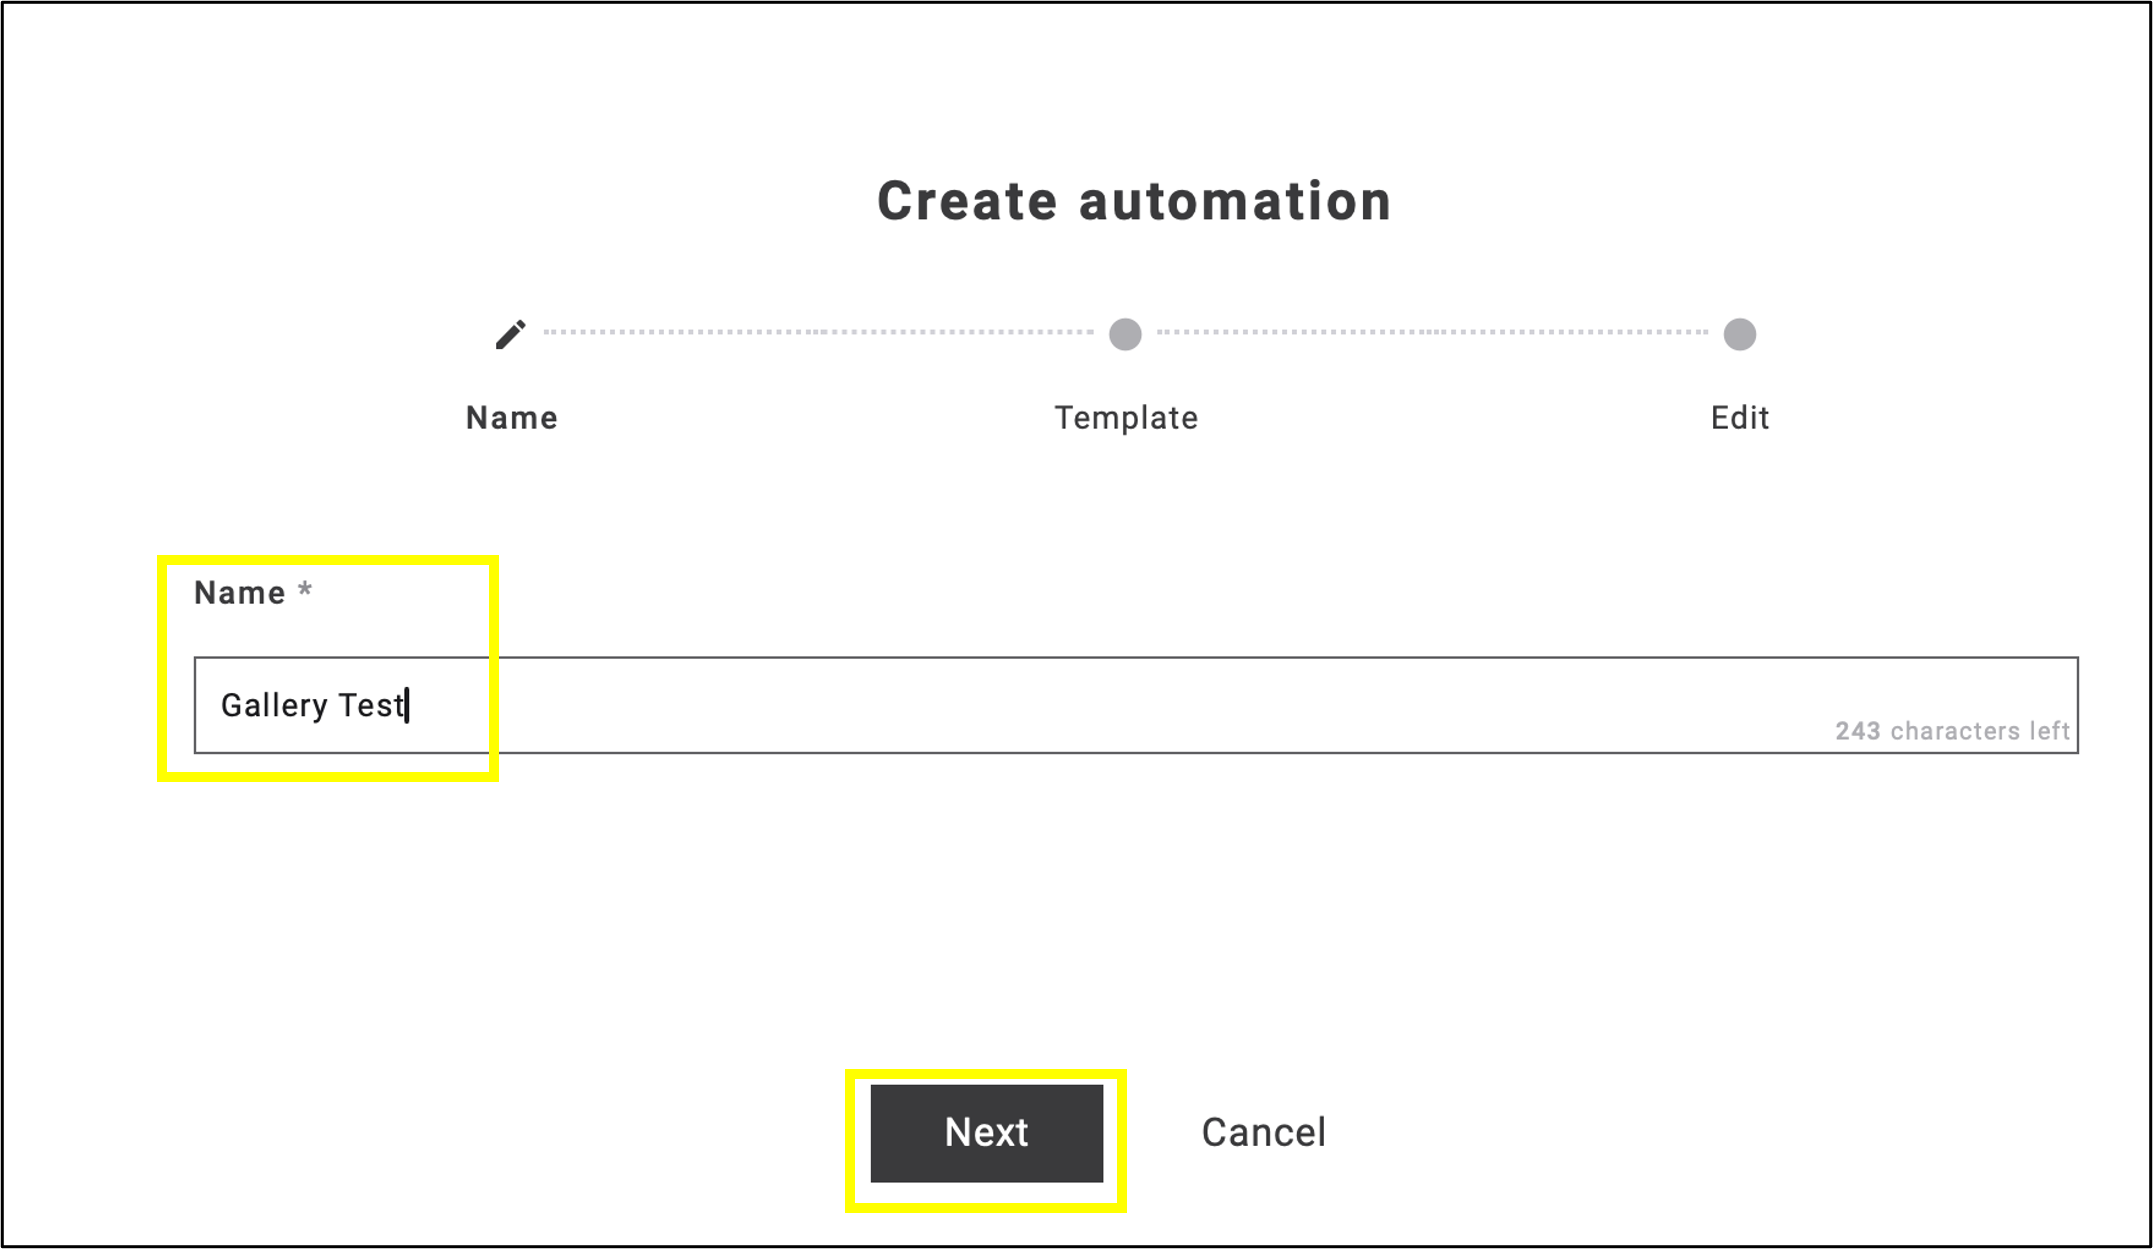
fig. 2: Name the automation and click ‘Next’ to access the galleries.
At the next step, you can choose between From scratch, Saved templates, and Automation gallery (fig. 3).
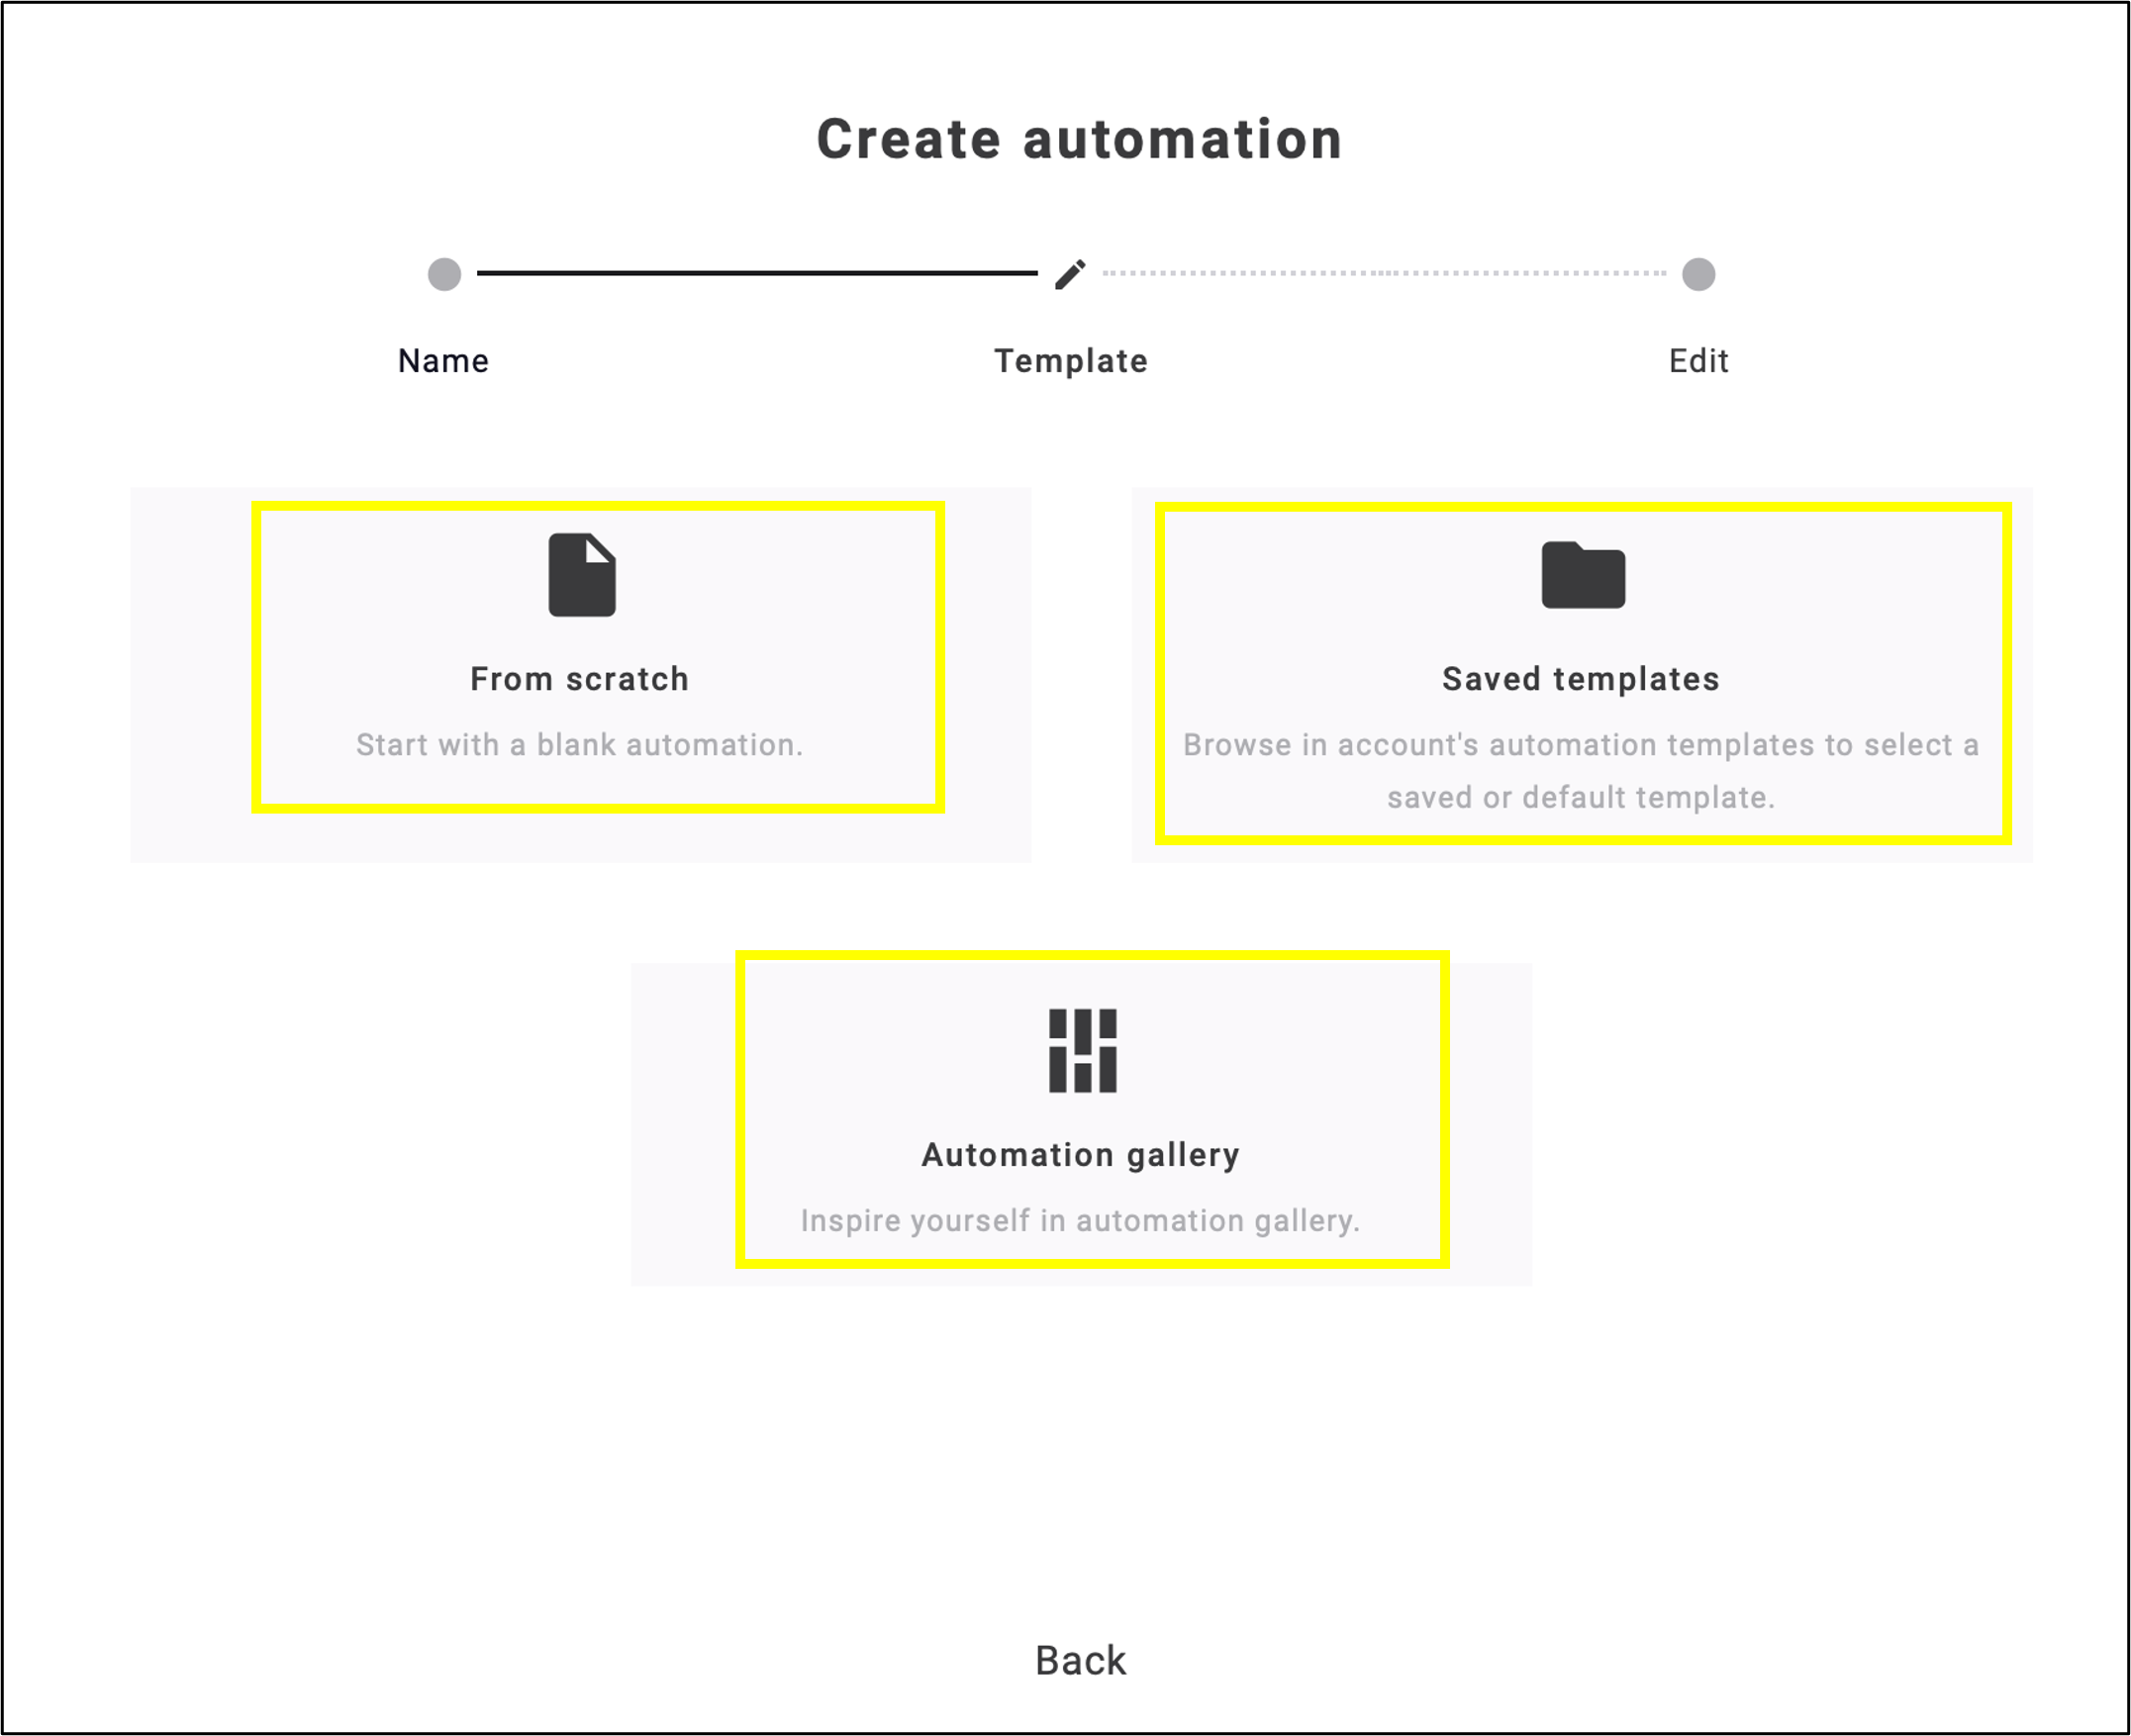
fig. 3: Choose between ‘From scratch’, ‘Saved templates’ and ‘Automation gallery’.
2. Saved templates
⚠️ Permission restriction: Upload and download functions in the Template gallery are available exclusively to users with partner-level permissions or above. At the standard user level, these actions are not available. Only selecting and using templates when creating a new automation is possible.
For requests or questions regarding these steps, please contact us at support@xqueue.com.
Click Saved Templates to show the templates you’ve already saved. Clicking the three dots next to the search box also lets you upload new templates (fig. 4).
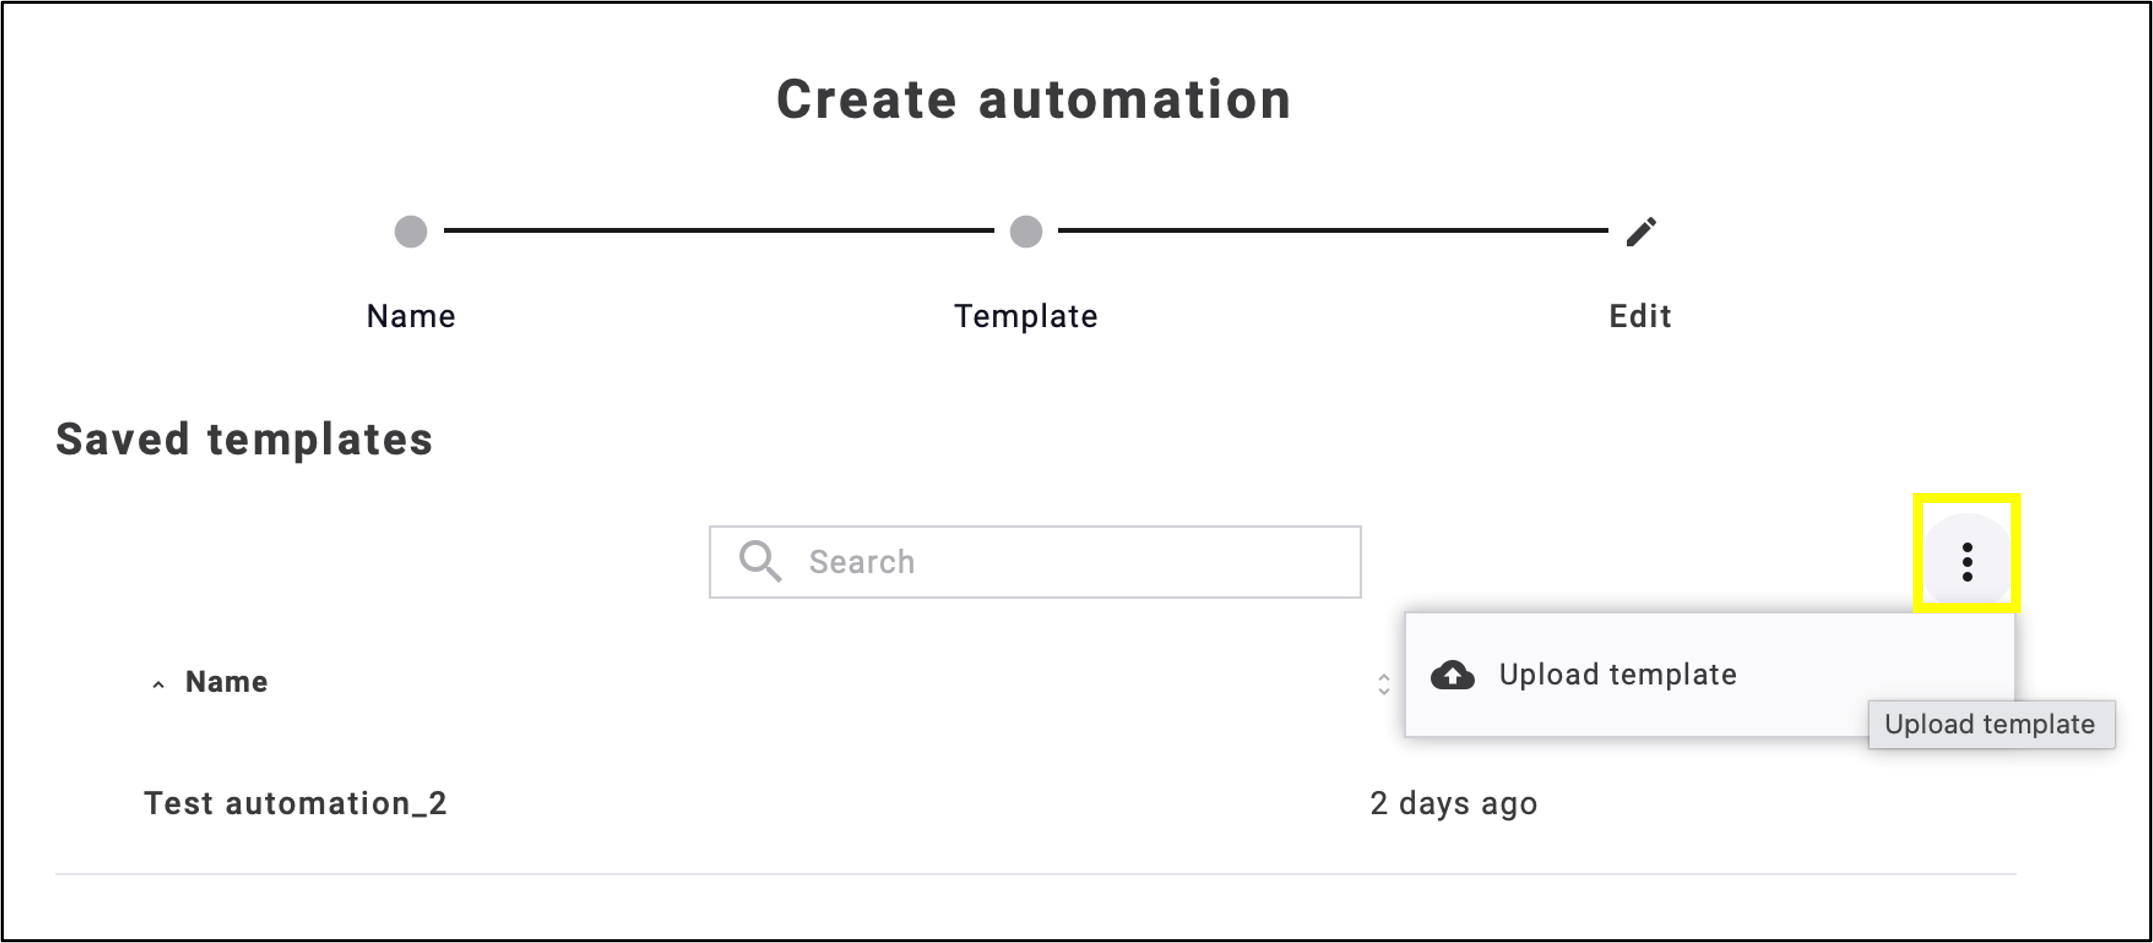
fig. 4: Click the three dots next to the search box to upload new templates.
After clicking the three dots, upload the template in the pop-up window by drag and drop the file or click browse to select the file from your device (fig. 5).
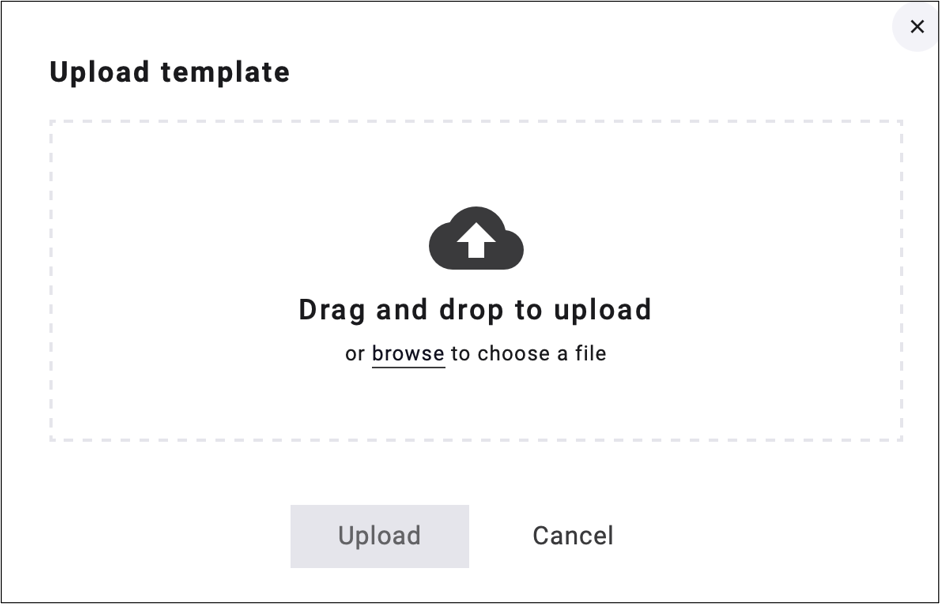
fig. 5: Drag and drop the template or browse the file in the pop-up window.
To download a saved template, click the cloud icon with the arrow. To delete it, click the bin icon. To edit the template, click on the selection (radio) button (fig. 6).
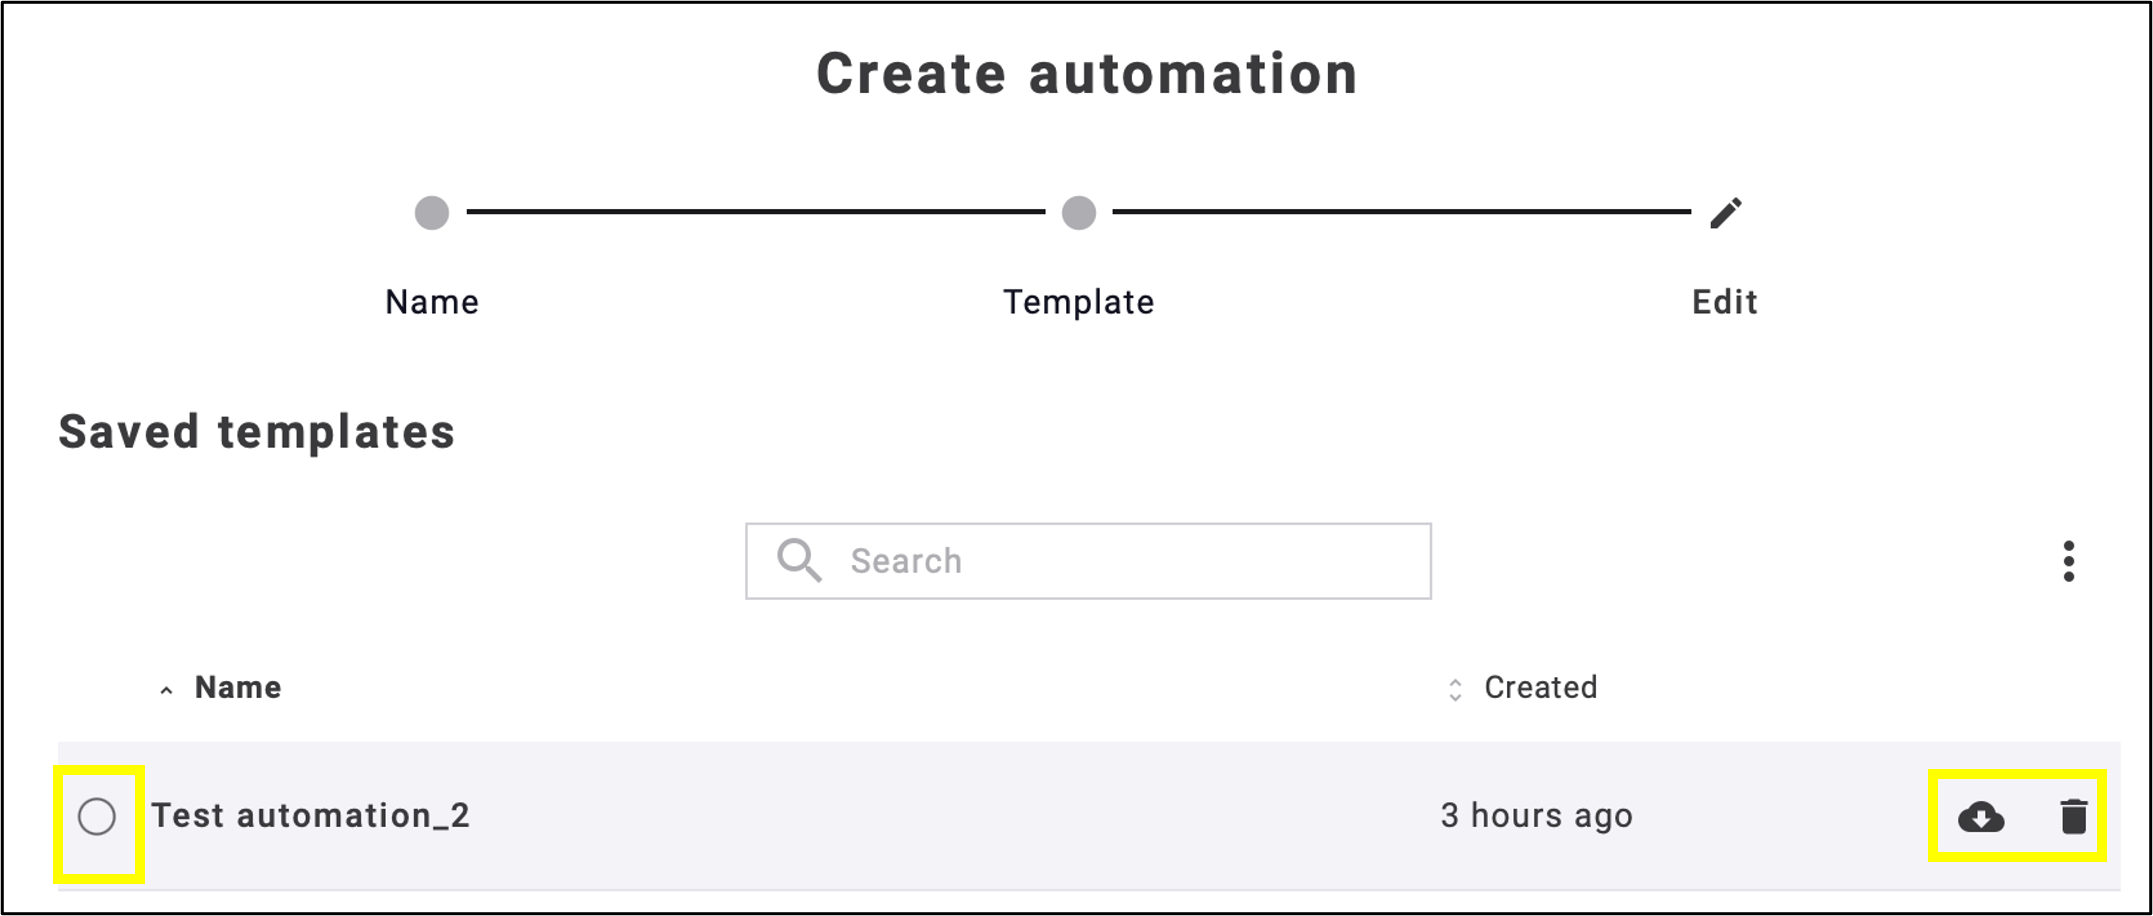
fig. 6: Download, delete, or edit the template using the icons next to its name.
This step opens the automation and the editing options. Click Create to proceed (fig. 7).
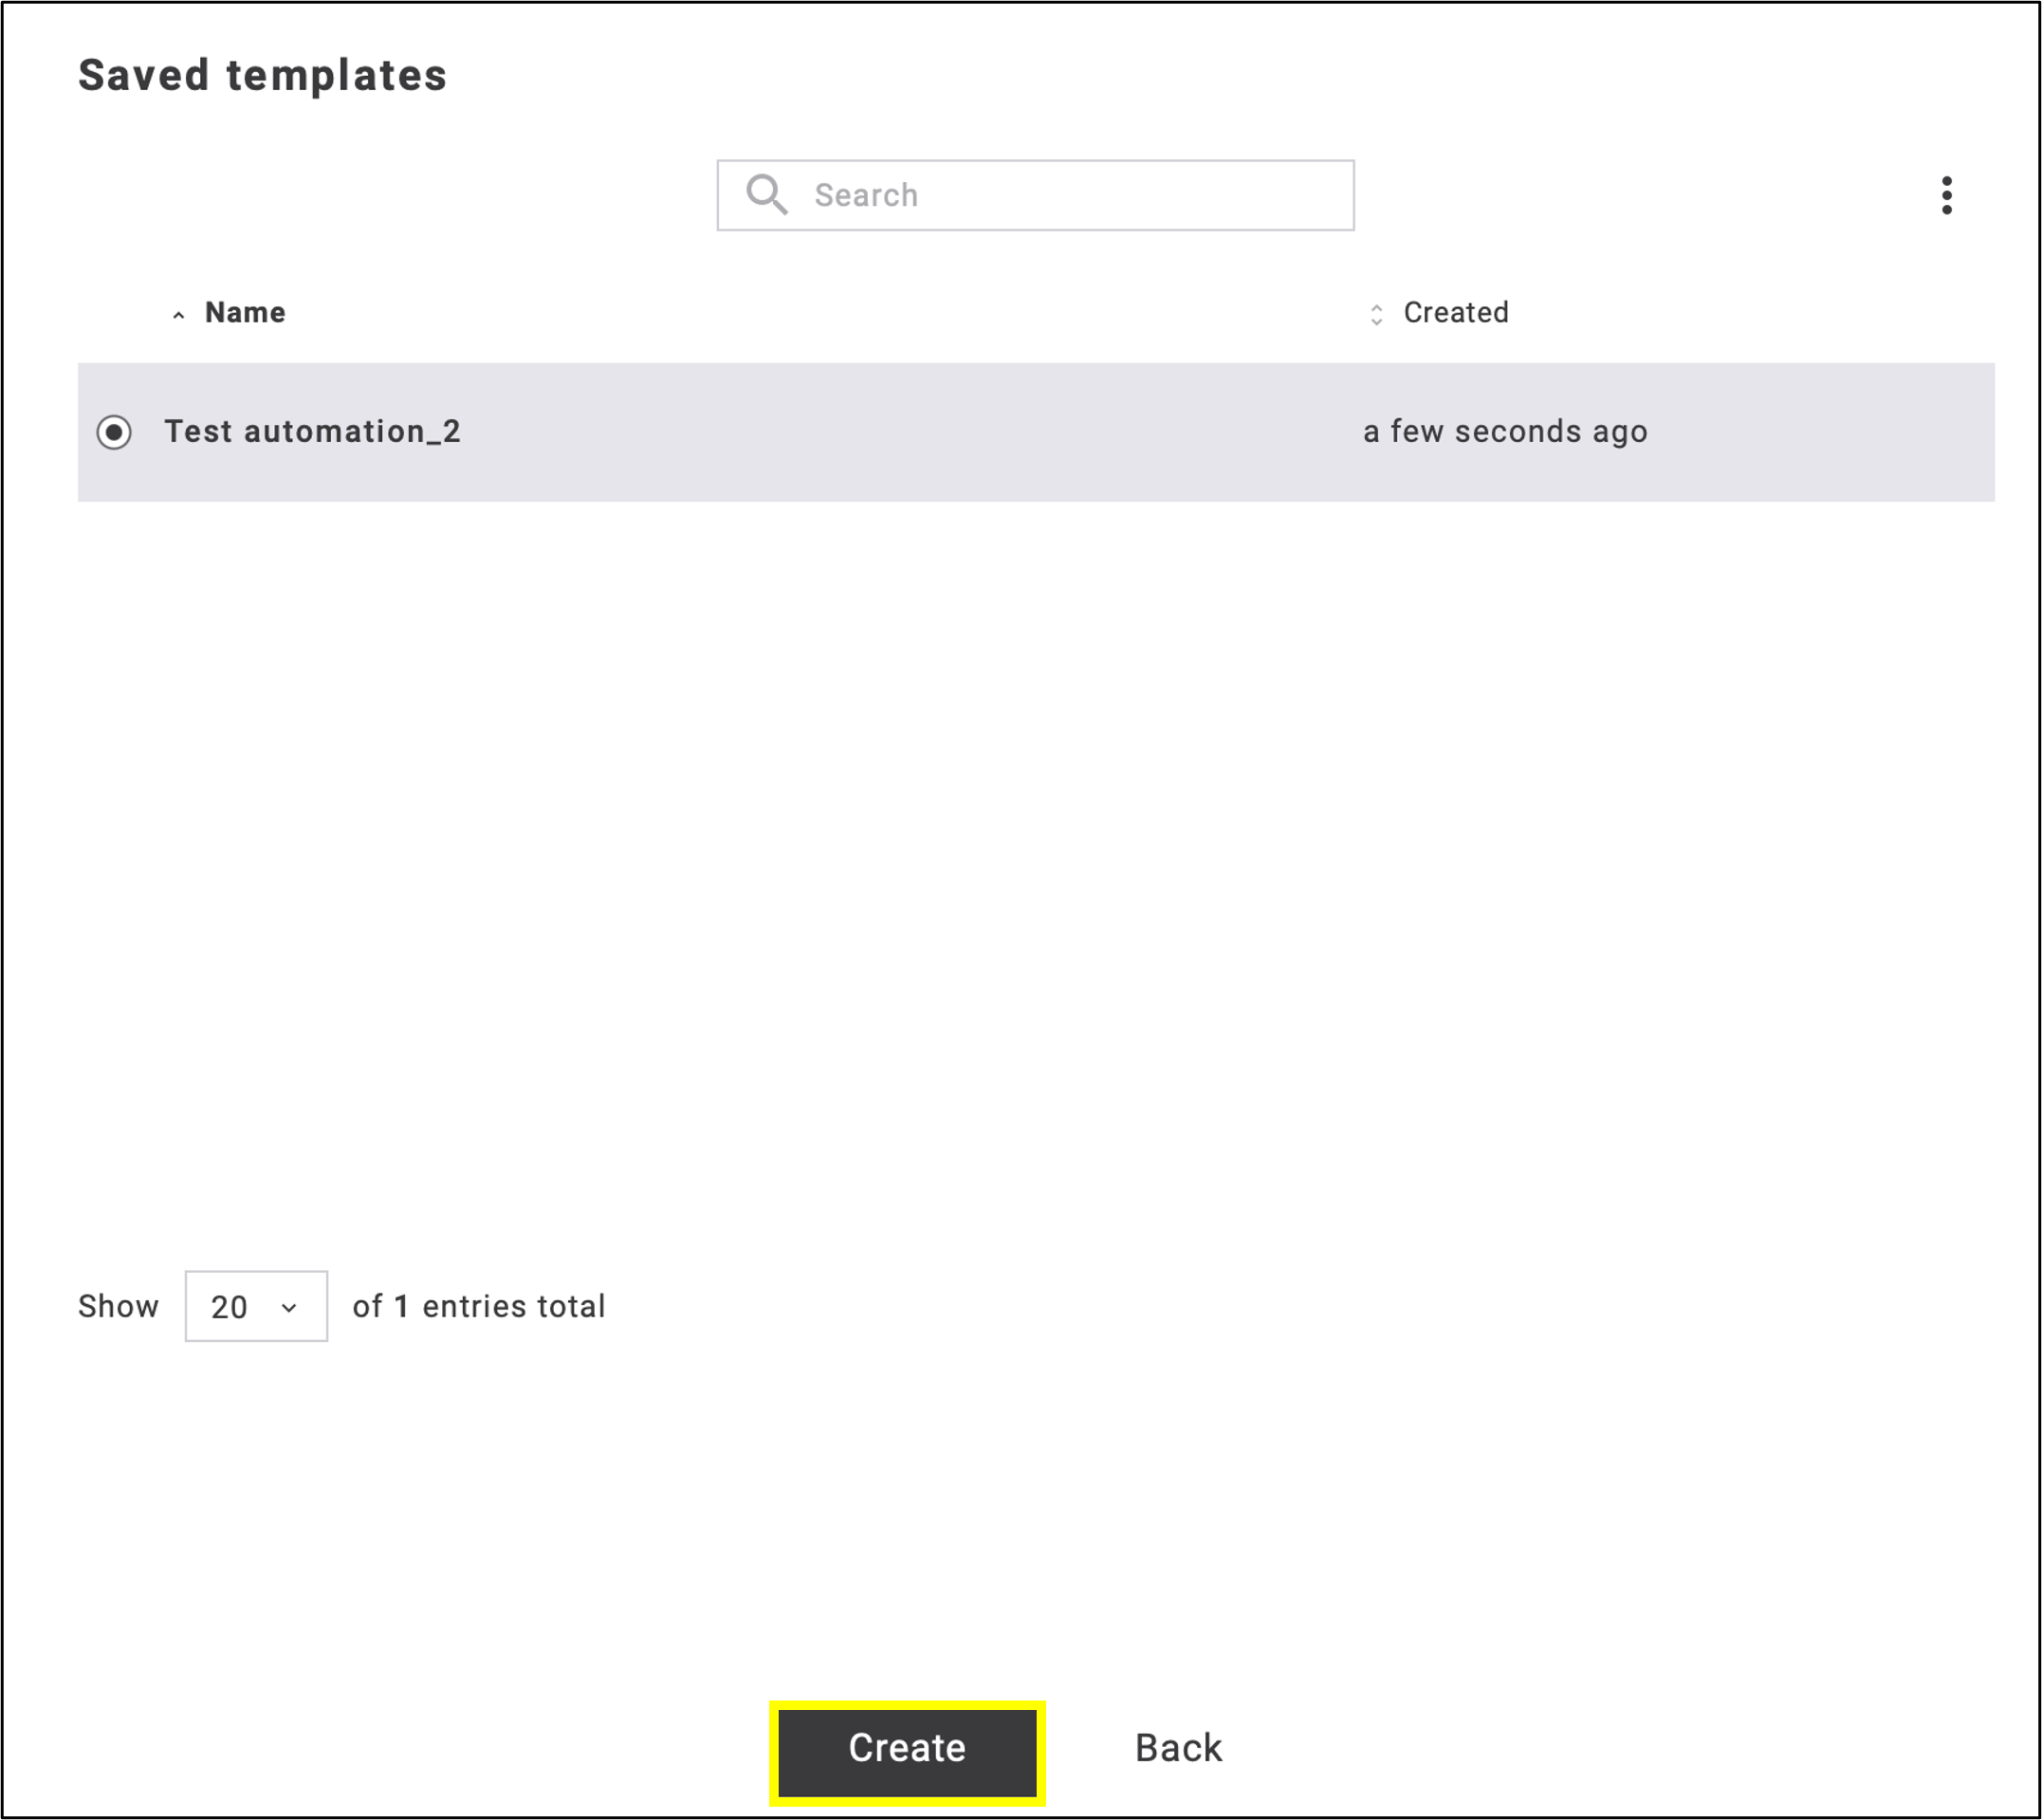
fig. 7: Click ‘Create’ to open the editing option in the automation.
After this step, the saved automation can be edited or modified. To save it under a new name and add it to the gallery, click the three dots next to the Activate button and select Add to saved templates from the drop-down menu (fig. 8).
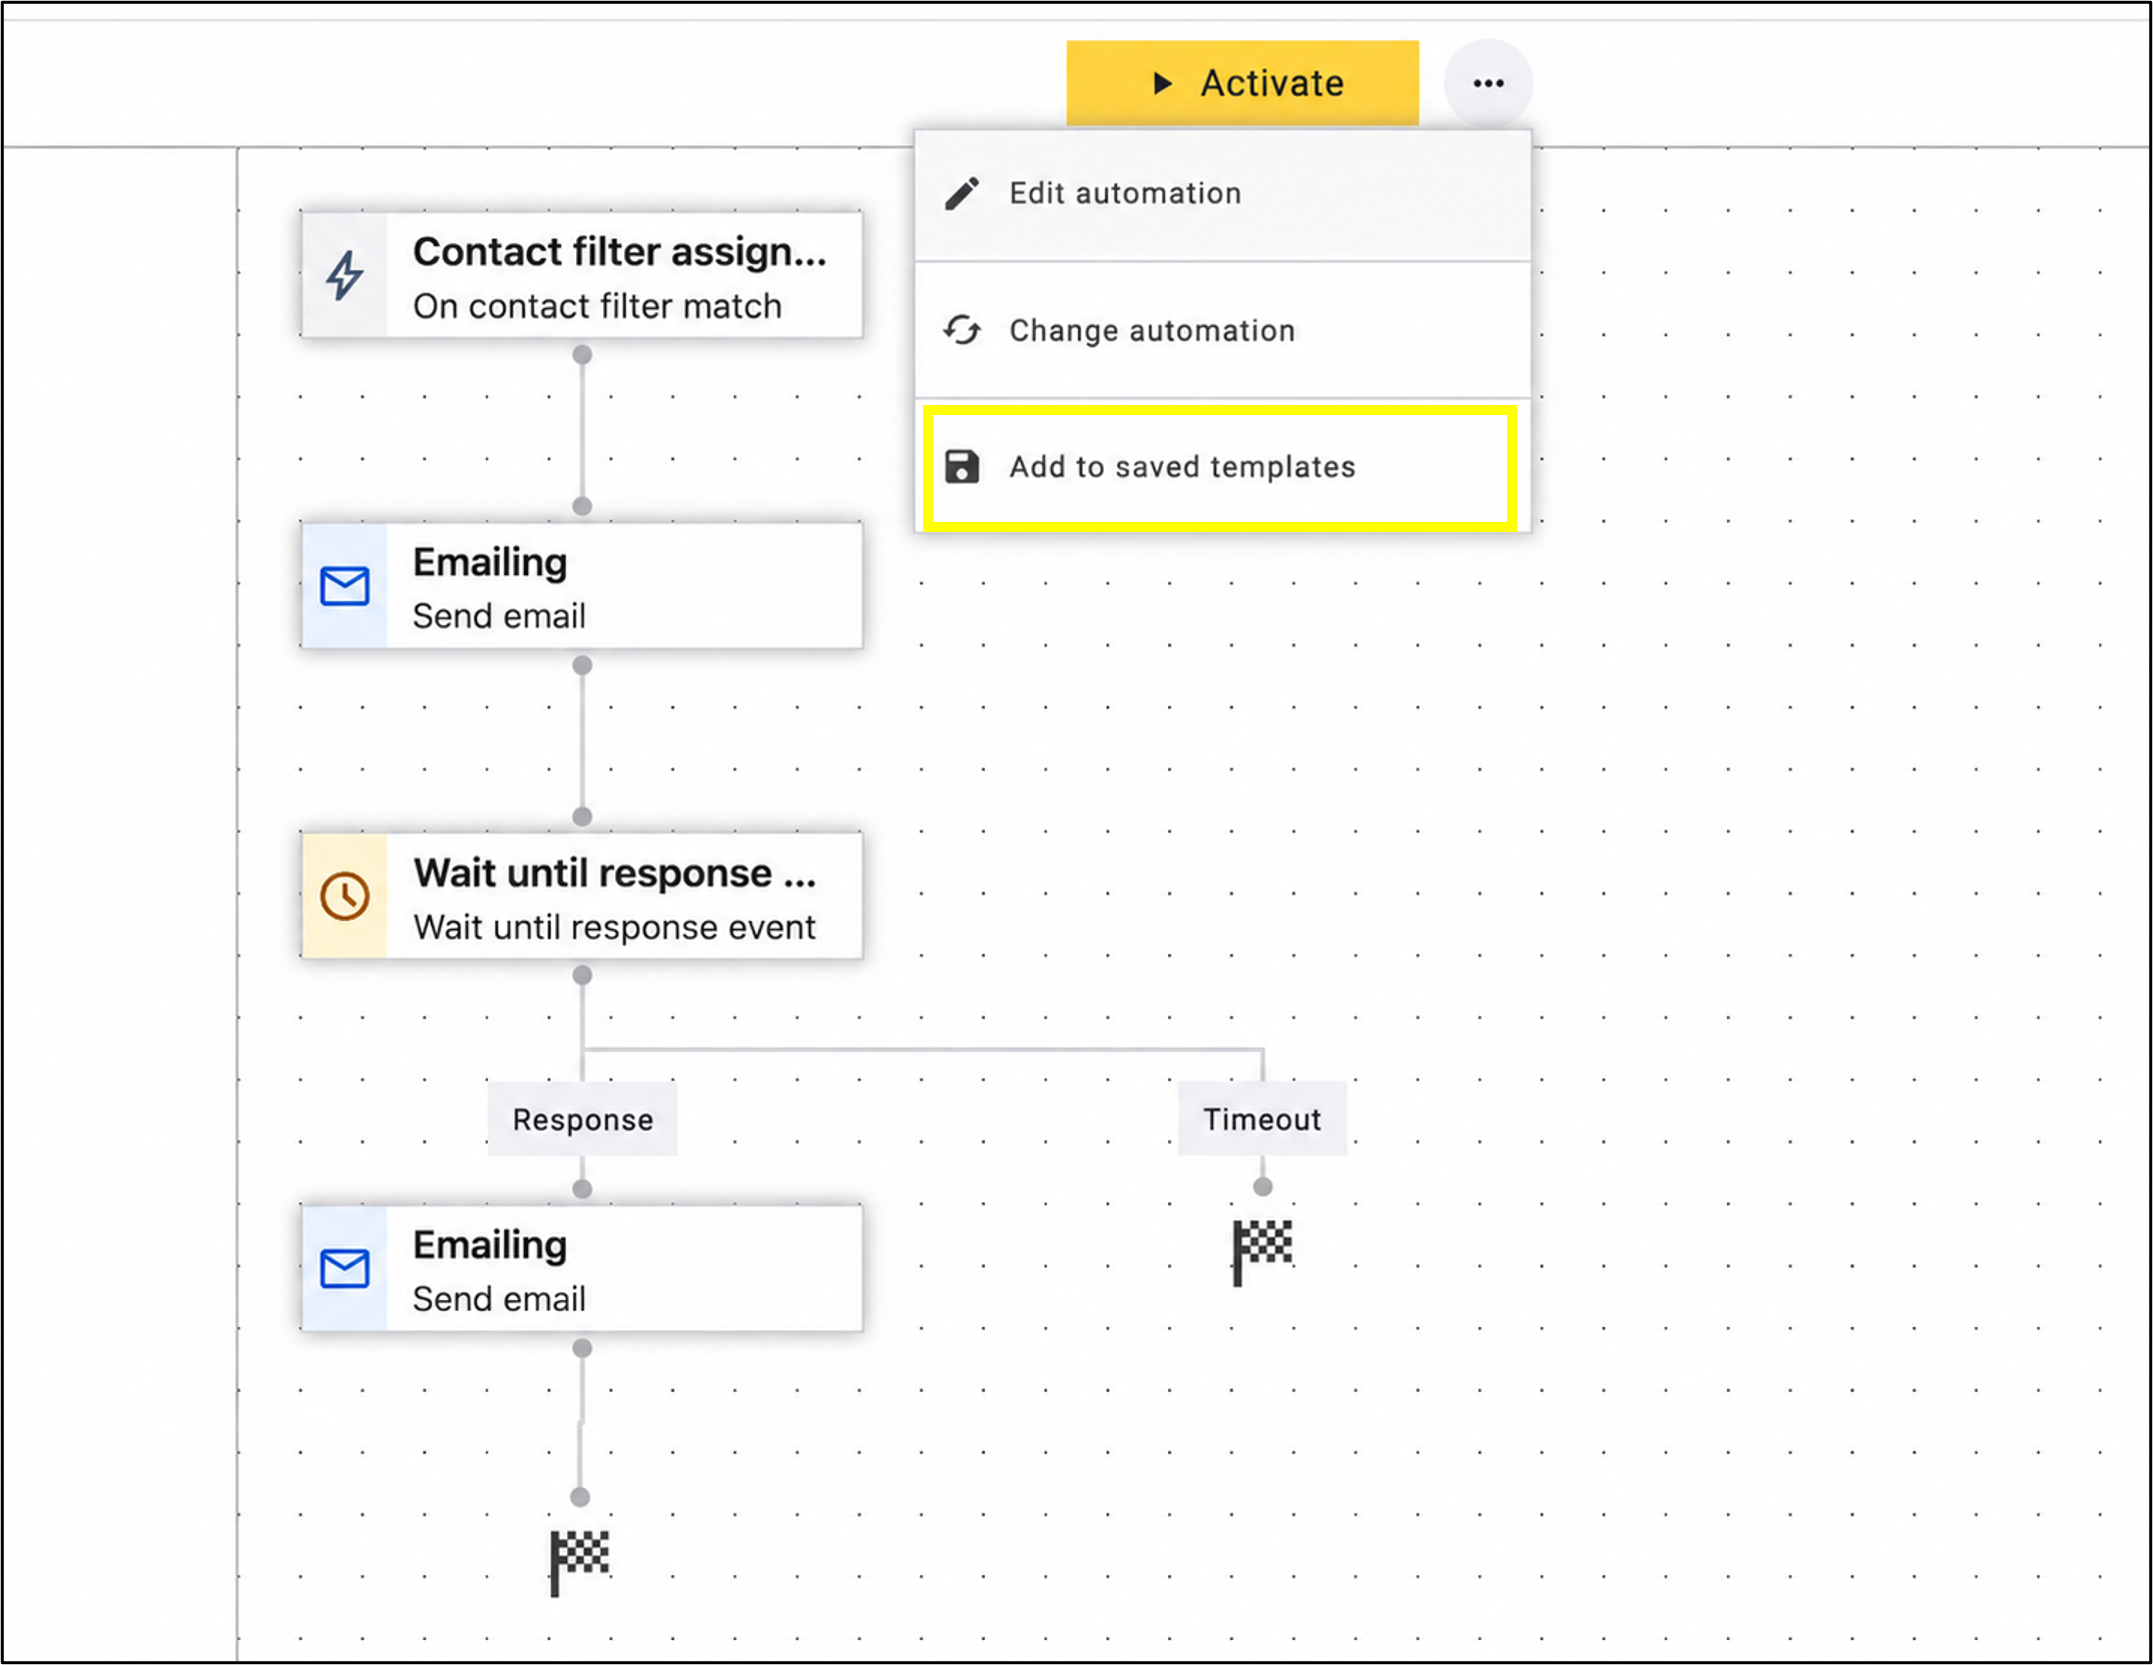
fig. 8: Click the three dots and select ‘Add to saved templates’ from the drop-down menu to save the automation under a new name.
Clicking Add to saved templates lets you save the modified version as a new template under a new name. After renaming the template in the pop-up window, click Save (fig. 9). The automation will be added to Saved templates and can be modified again at any time.
Note 1: Make sure to use clearly identifiable names.
Note 2: Any automation created in your account can be saved in the same way.
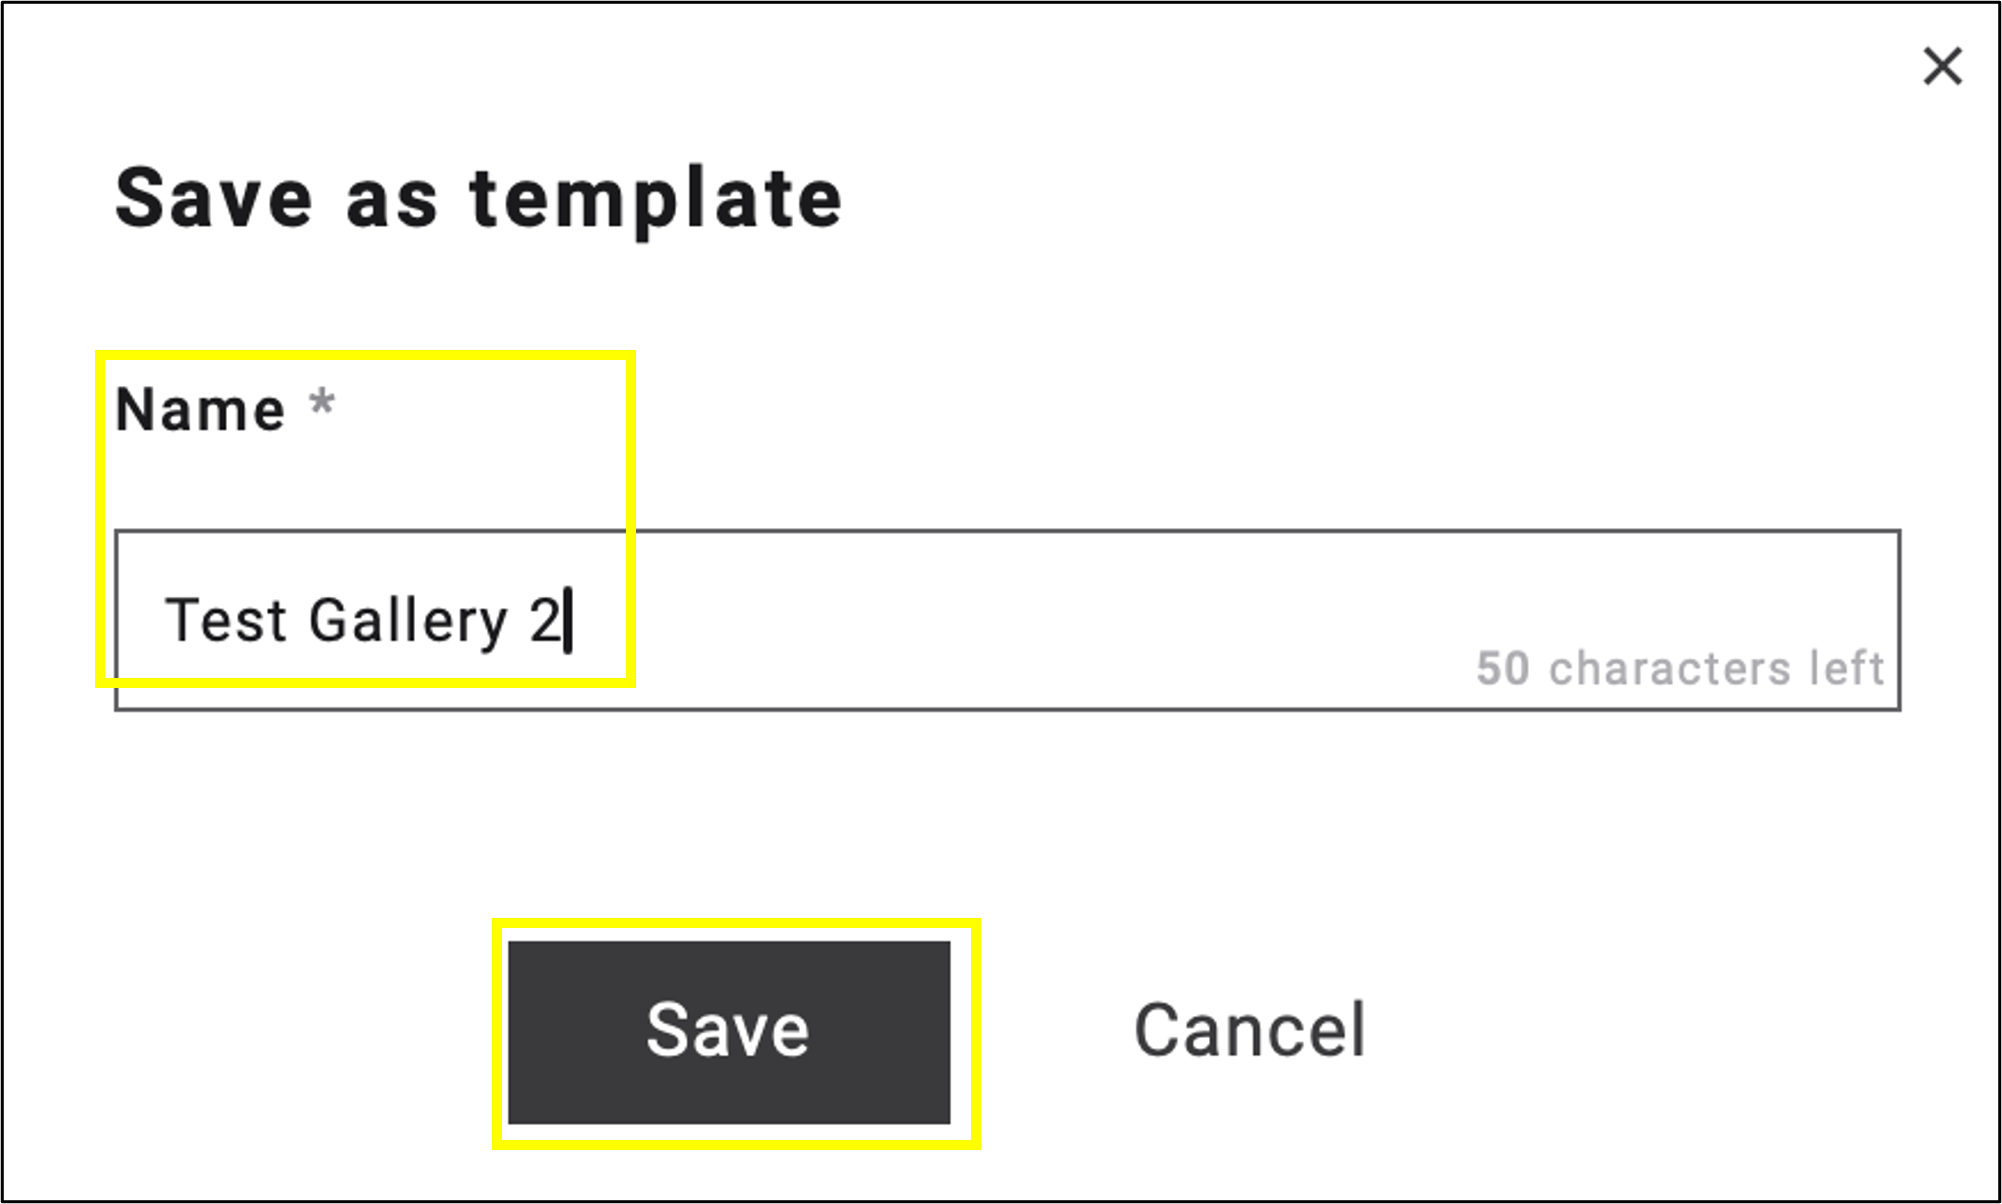
fig. 9: Click ‘Save’ after renaming the template to add it to your saved templates gallery.
The saved template will then appear among your own (non-default) templates, and you can start a new automation from it at any time, without having to build it from scratch.
3. Template Gallery
The Template Gallery is available at the very start of creating an automation (see fig. 3).
In the gallery that opens, you can browse among the 12 currently available, pre-built templates, each labeled by function (fig. 10).
The list of pre-prepared templates is as follows:
- Birthday and anniversary
- Cart abandonment flow
- Customer feedback collection
- Double opt-in welcome flow
- Engaged customer nurturing
- Event registration and follow-up
- Inactive subscriber re-engagament
- Lead magnet follow-up
- New subscriber lead nurturing
- Personalized recommendation
- Post-purchase follow-up
- Welcome series with preference
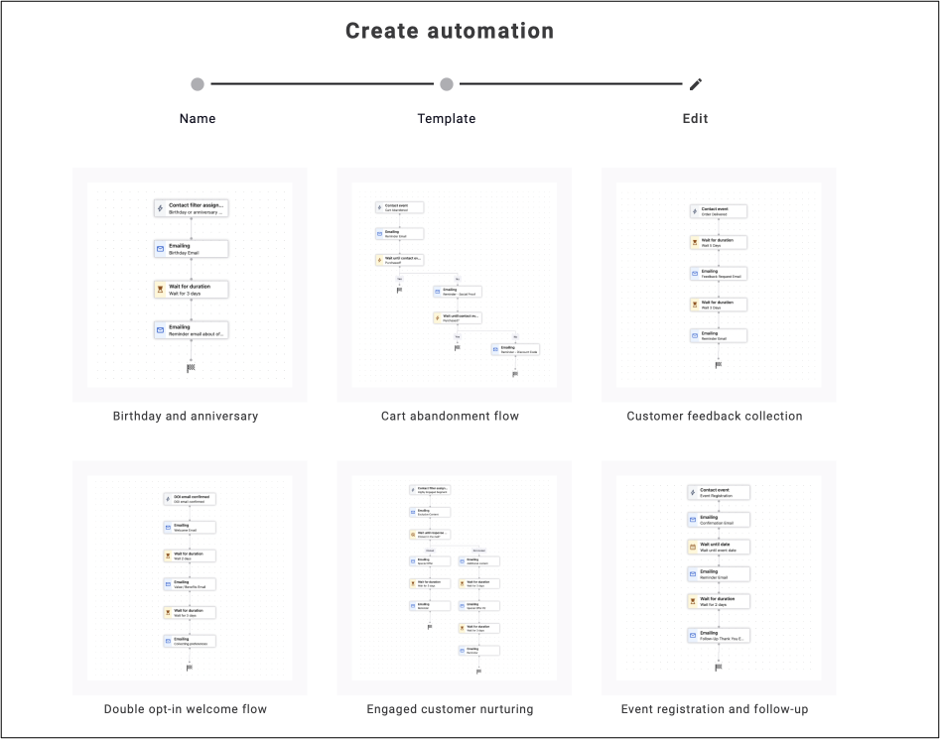
fig. 10: In the ‘Template Gallery’, browse the 12 available templates, each labeled by function.
Selecting And Customizing a Template
- Select the template that best matches the automation flow you would like to build. E.g., a welcome series, cart abandonment, or a reactivation campaign.
- Click Create to open the automation, pre-filled with the template’s logic (nodes, conditions, wait times, draft email content) (fig. 11).
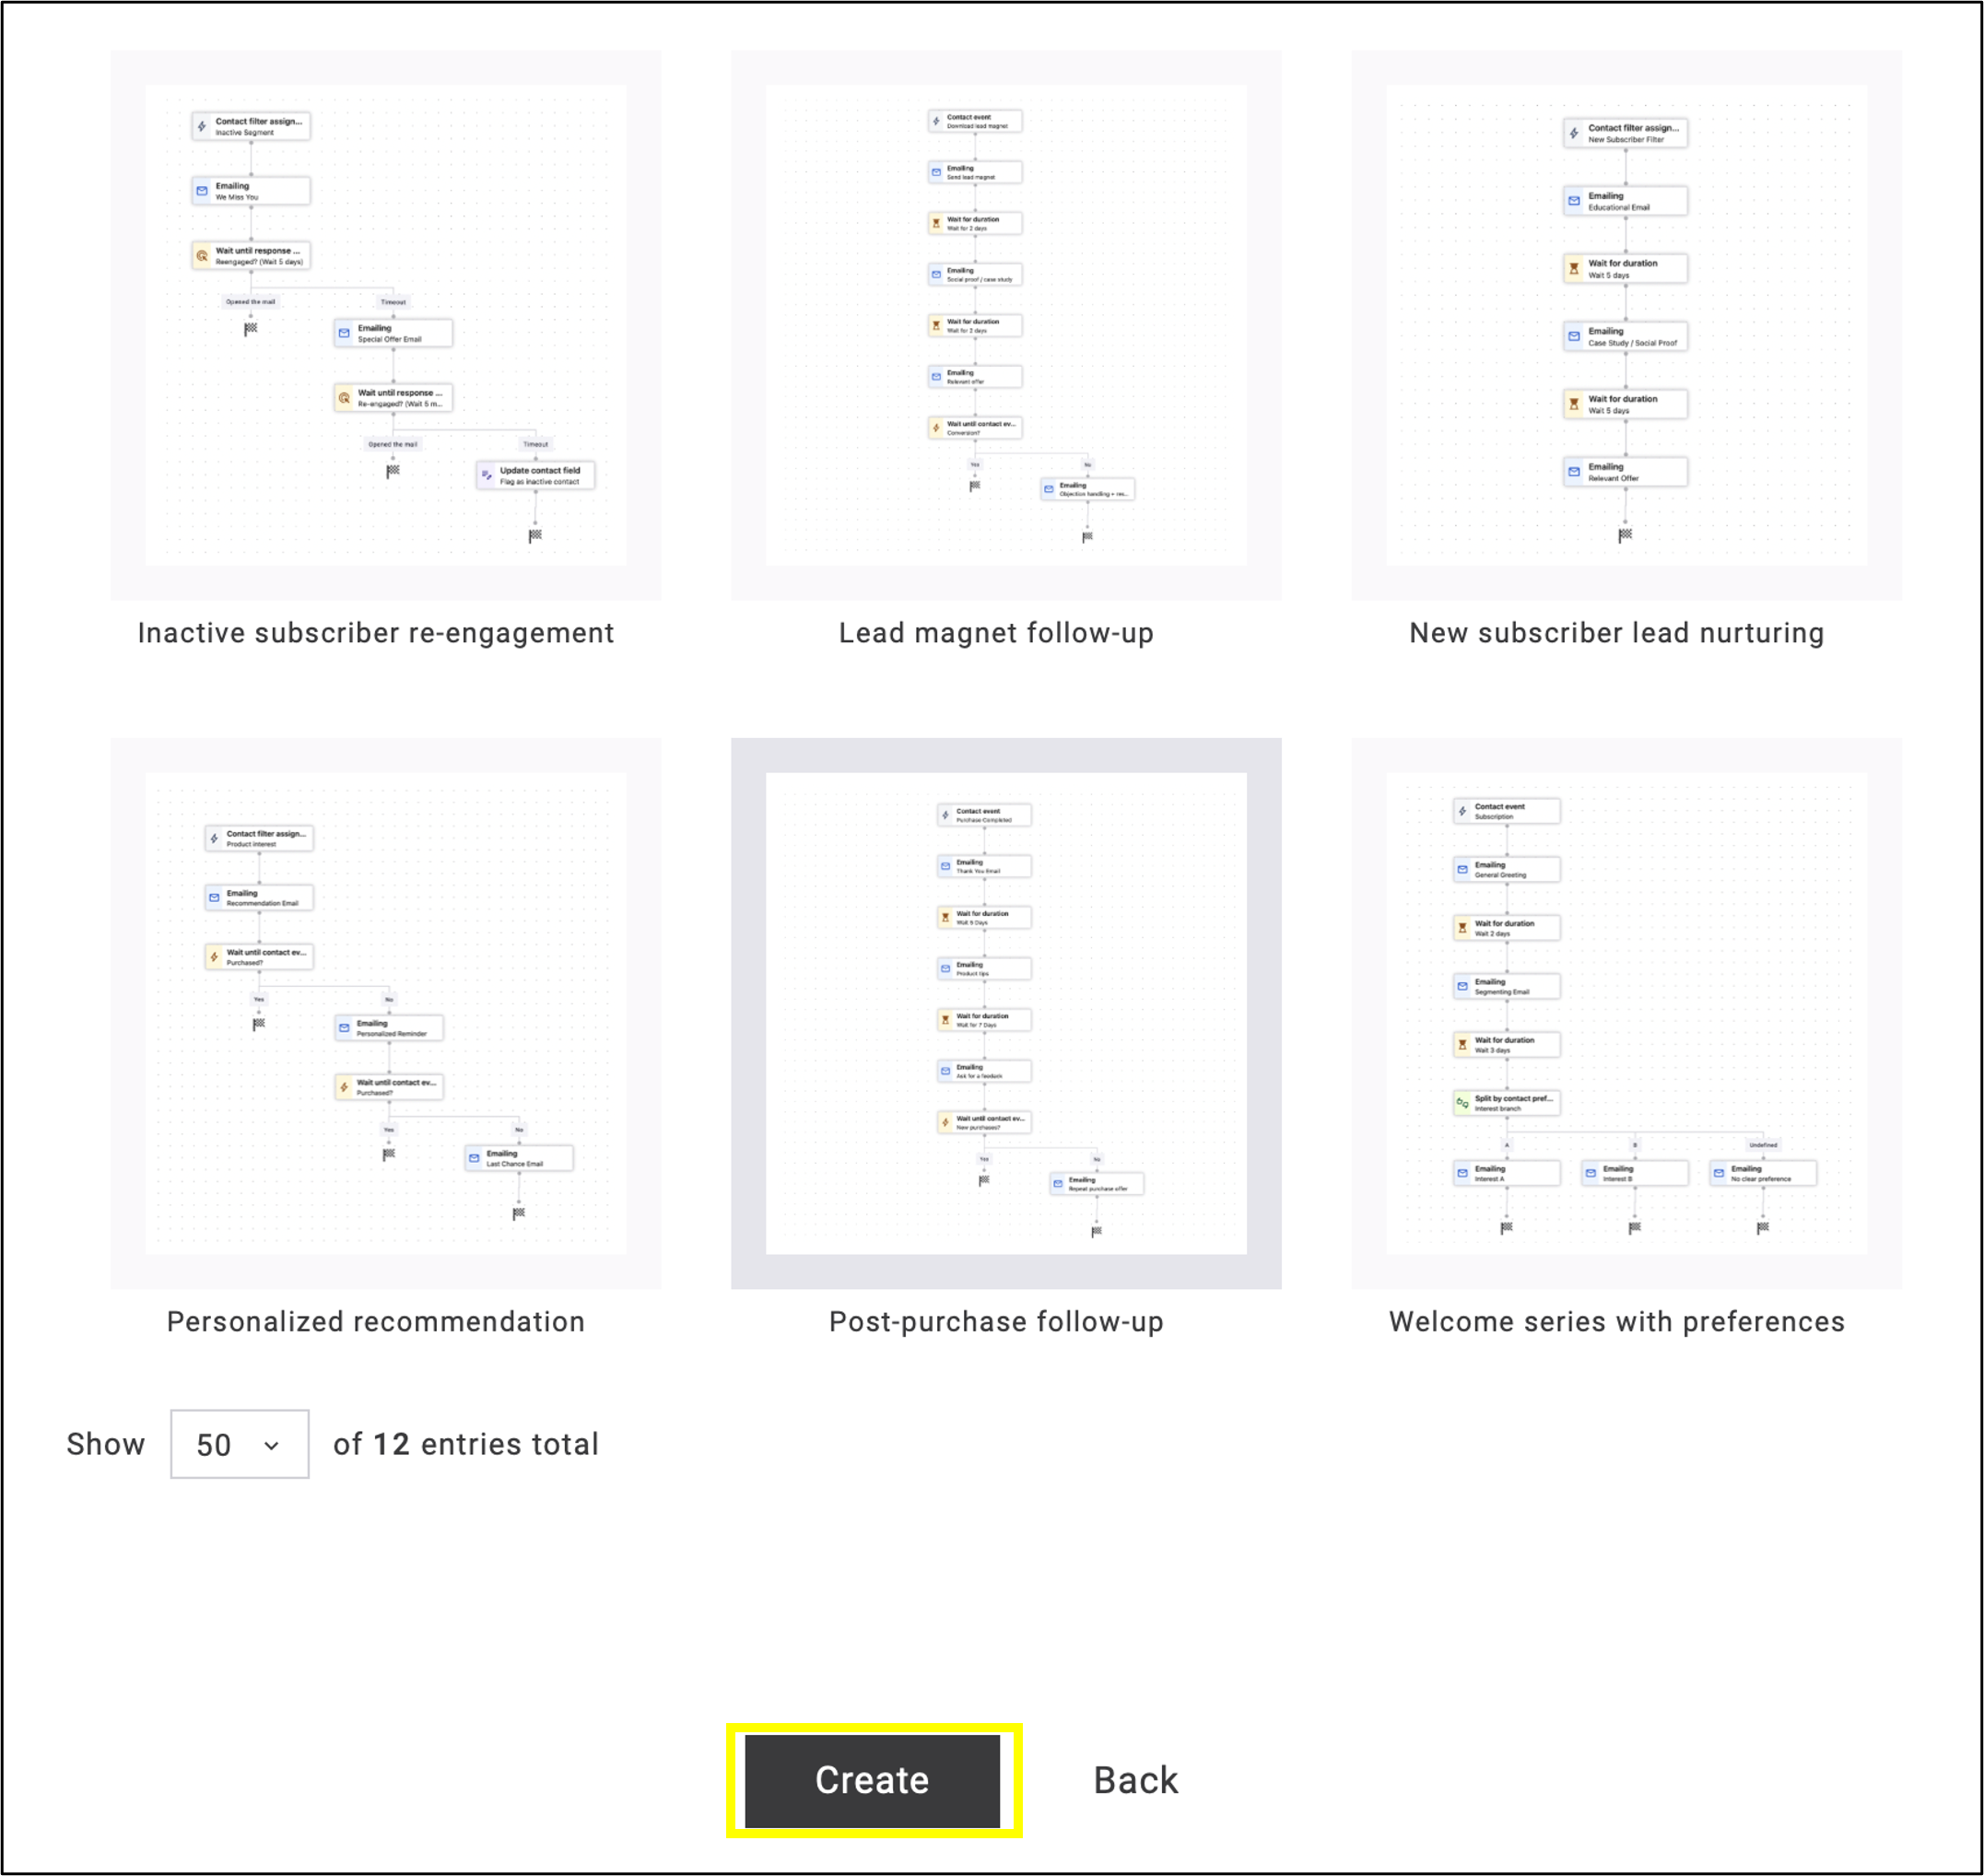
fig. 11: Click ’Create’ after selecting the template.
- From here, the template can be freely edited: nodes can be added or removed, conditions and timings can be modified, and email content can be replaced with content tailored to your own brand. The modified template can be saved again as a standalone automation under a new name, among your own templates.
4. Managing Templates: Editing, Upload and Download
This method provides additional management actions for saved templates:
- Editing: the content and logic of a saved template can be edited afterwards.
- Upload / download: template files can be uploaded and downloaded.
5. Frequently Asked Questions (FAQ)
- How many templates are currently available in the gallery? Currently, 12 different pre-built templates are available.
- Can I edit my own templates? Yes, every template you create can be freely edited further and adapted to your own needs.
- Does modifying an automation created from a template change the original template? Changes only affect the automation created from the template. The original template remains unchanged.
Version history / note
This feature was introduced to the Maileon platform in August 2026. This version of the documentation was created based on publicly available information and the introductory text provided by the product team.