
Im Maileon Help-Center finden Sie umfassende Dokumentationen zu unserem System.
Beliebte Suchanfragen: Importe | Rest-API | Integrationen | SMS
1.1 Contact Lists (EN)
General Information
Overview of the entire address pool, as described in the info box: In this section, you will find a list of all contacts in your account. Contacts can be added, edited, or deleted manually, via import, or through the system interface.
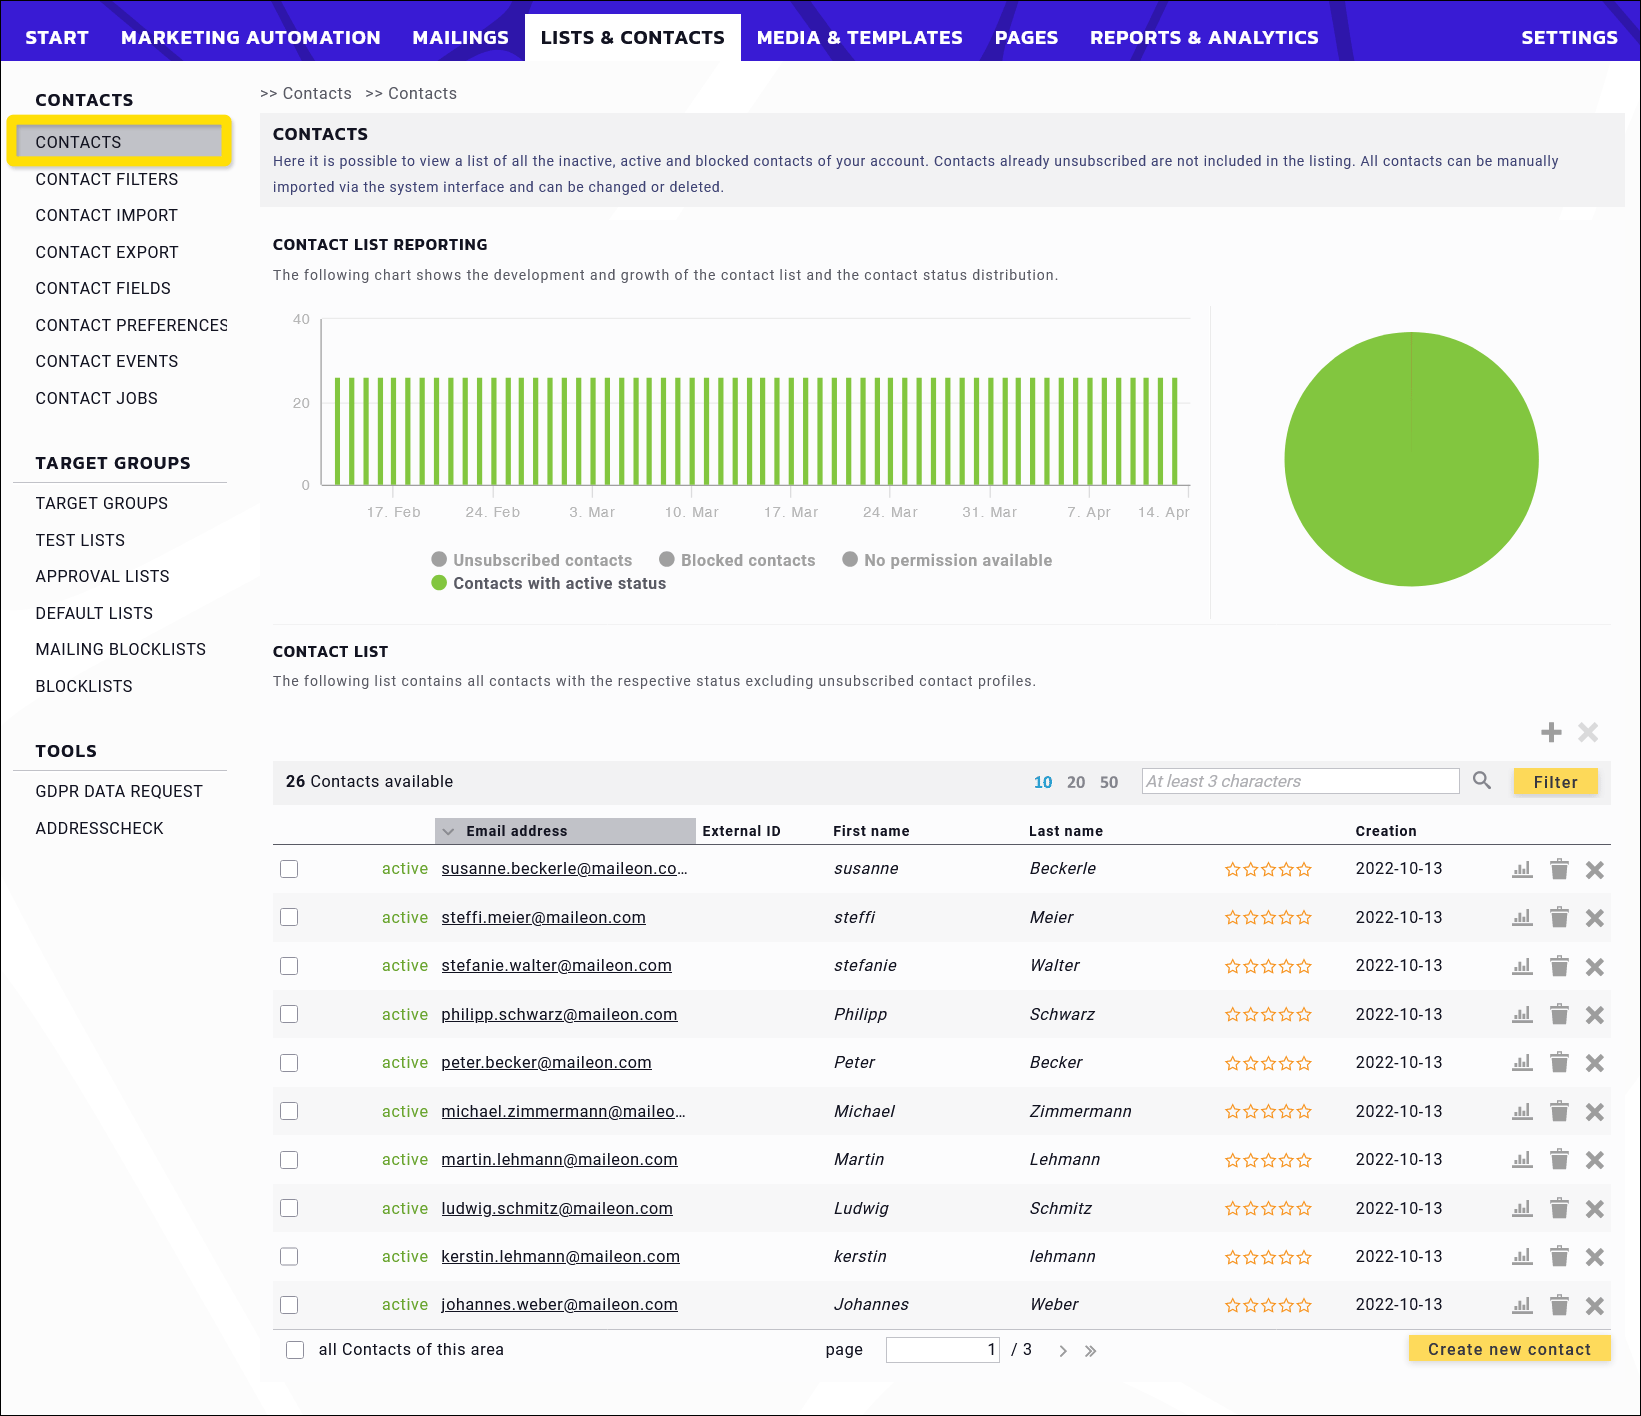
Fig. 1: Overview of contacts with a reporting chart over time.
Above the list of contacts, the chart shows the distribution of addresses over time, broken down and color-coded by: contacts with active status, contacts without permission, blocked contacts, and unsubscribed contacts.
The contact list below shows all recipient addresses individually, with the exception of unsubscribed contacts. Each row displays one contact along with details and options. The columns, from left to right, show:
- Checkbox to select individual contacts
- Status information: active, blocked, or blacklisted, without permission
- Email address
- First name
- Last name
- Star rating
- Creation date
- Icons for additional options:
- Individual contact report (diagram icon)
- Manually unsubscribe contact (trash can icon)
- Delete (X icon)
Single Contact Report
You can access the “Single Contact Report” by clicking the chart icon on the right.
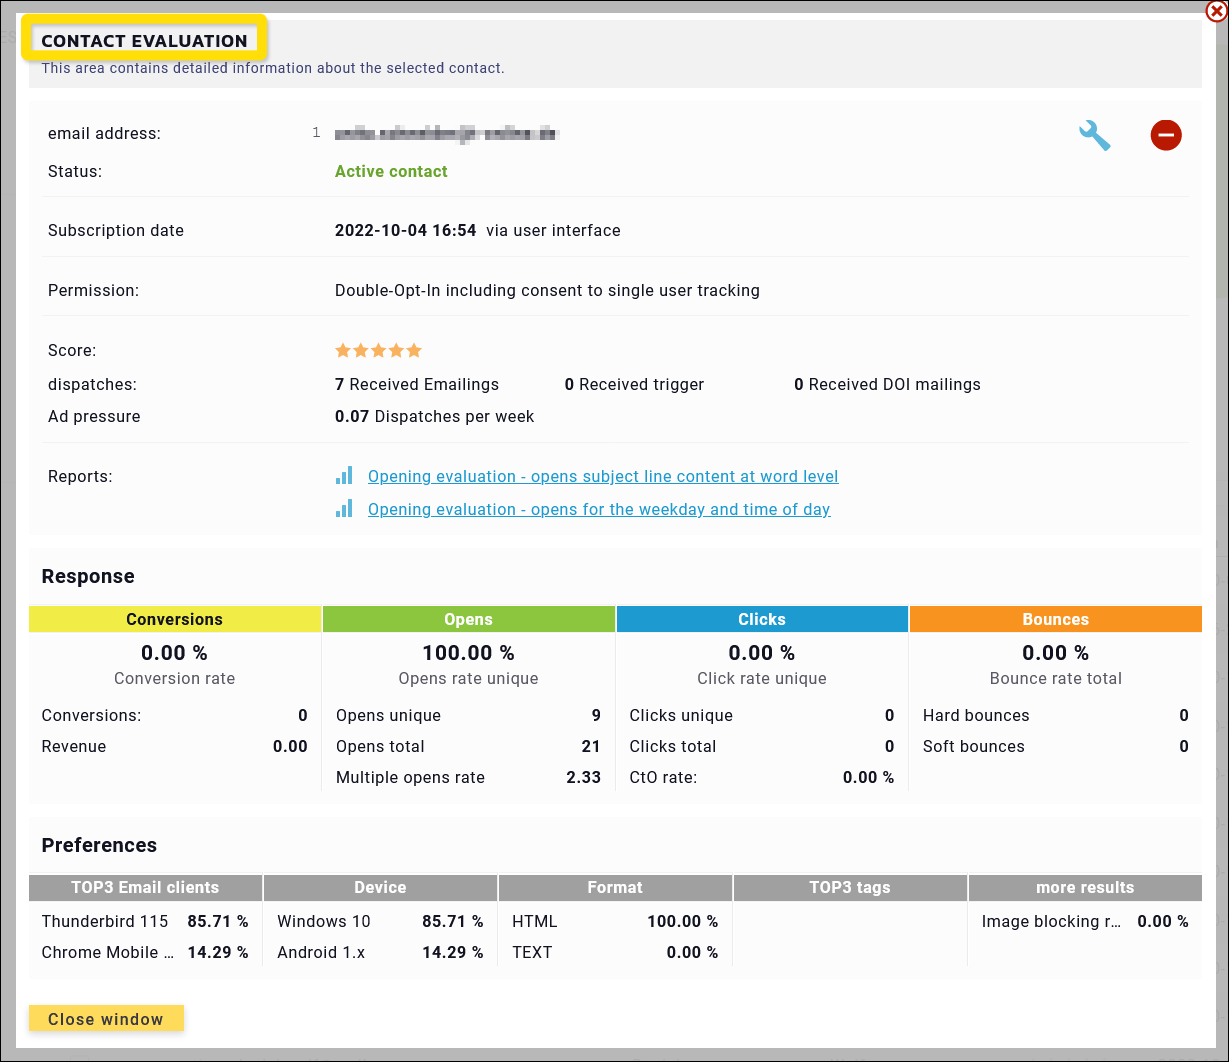
Fig. 2: Detailed analysis for a contact.
Information in the Individual Contact Report
a) Email address, features a wrench icon on the far right for “Edit Contact,” which takes you directly to the contact details page (see the section on the contact details page below). On the far right, you can manually unsubscribe the contact using the red circle icon.
b) Status: active, blocked or blacklisted, unsubscribed.
c) Registration date and time, as well as the source of the contact (manual, import, or via the user interface or API, for example, from your sign-up page).
d) Permission: This field indicates whether the contact has a valid permission. If so, the type of permission is specified (e.g., “Double opt-in including consent to individual user tracking”).
Note: Meaningful analyses and a targeted response to recipient behavior are only possible if contacts have given their consent to individual user tracking. Since only the double opt-in process ensures legal certainty, we strongly recommend sending messages exclusively to contacts who have provided consent using the “Double opt-in including consent to individual user tracking” permission method.
e) Score: A rating on a five-star scale. The score increases with the number of mailings sent to a contact.
f) Mailings: The next 3 lines provide information on the number of email campaigns received, triggers (see “Trigger Mailings” for more details), and DOI mailings received.
g) Advertising Frequency: This displays the maximum average number of email campaigns the selected contact should receive per week.
h) Analyses:
- Open Rates by Subject Line Content at the Word Level
Here you can view the open rate for the selected contact, displayed in different colors and sizes. The size represents the frequency with which a word appears in the subject line, while the color indicates the open rate achieved. - First Opens by Day of the Week and Time of Day
First, you can choose whether to display only the first open or all opens. The following 3 checkboxes allow you to filter by highest open probability by day of the week and time of day / day of the week / time of day. The results are displayed in a chart with the 7 days of the week and 24 columns showing the time as bars; blue represents opens on desktop devices, and orange represents opens on mobile devices.
i) Response: Here you can view the most important metrics for response behavior:
- Opens
The “Unique Open Rate” is displayed as a percentage. This refers to the number of recipients who opened the email at least once. Multiple opens per recipient are not included in this count. -
- Unique Opens: Displays the absolute number of these unique opens.
- Openings: Displays the absolute number of openings, including multiple openings per recipient.
- Multiple-opening rate: A factor calculated as the ratio of unique openings to total openings. Example: 10,000 recipients opened the email at least once, but a total of 17,500 openings were recorded. Therefore, the ratio here would be 1.75.
- Clicks
Similar to opens, the “unique click rate” (recipients who clicked at least once, excluding multiple clickers) is displayed first, followed by the total figures: unique clicks, clicks (total, including multiple clickers), and the CtO rate as a percentage. CtO (Click-to-Open) refers to the ratio of clicks to opens according to the formula:
CtO rate = total number of clicks (per recipient) divided by the total number of opens. - Bounces
Percentage display of the total bounce rate, i.e., the number of undeliverable recipients relative to the total distribution list. Specifies the total number of hard bounces (definitely undeliverable) and soft bounces (temporarily undeliverable).
j) Preferences: Displays the top 3 email clients used to open the email, followed by the devices used and the format (HTML or text).
Side Note: Contact Details Page
On the contact details page, you can view and edit various fields. You can access the contact details page directly by clicking the email address in the contact list or, in the individual contact report, by clicking the wrench icon.
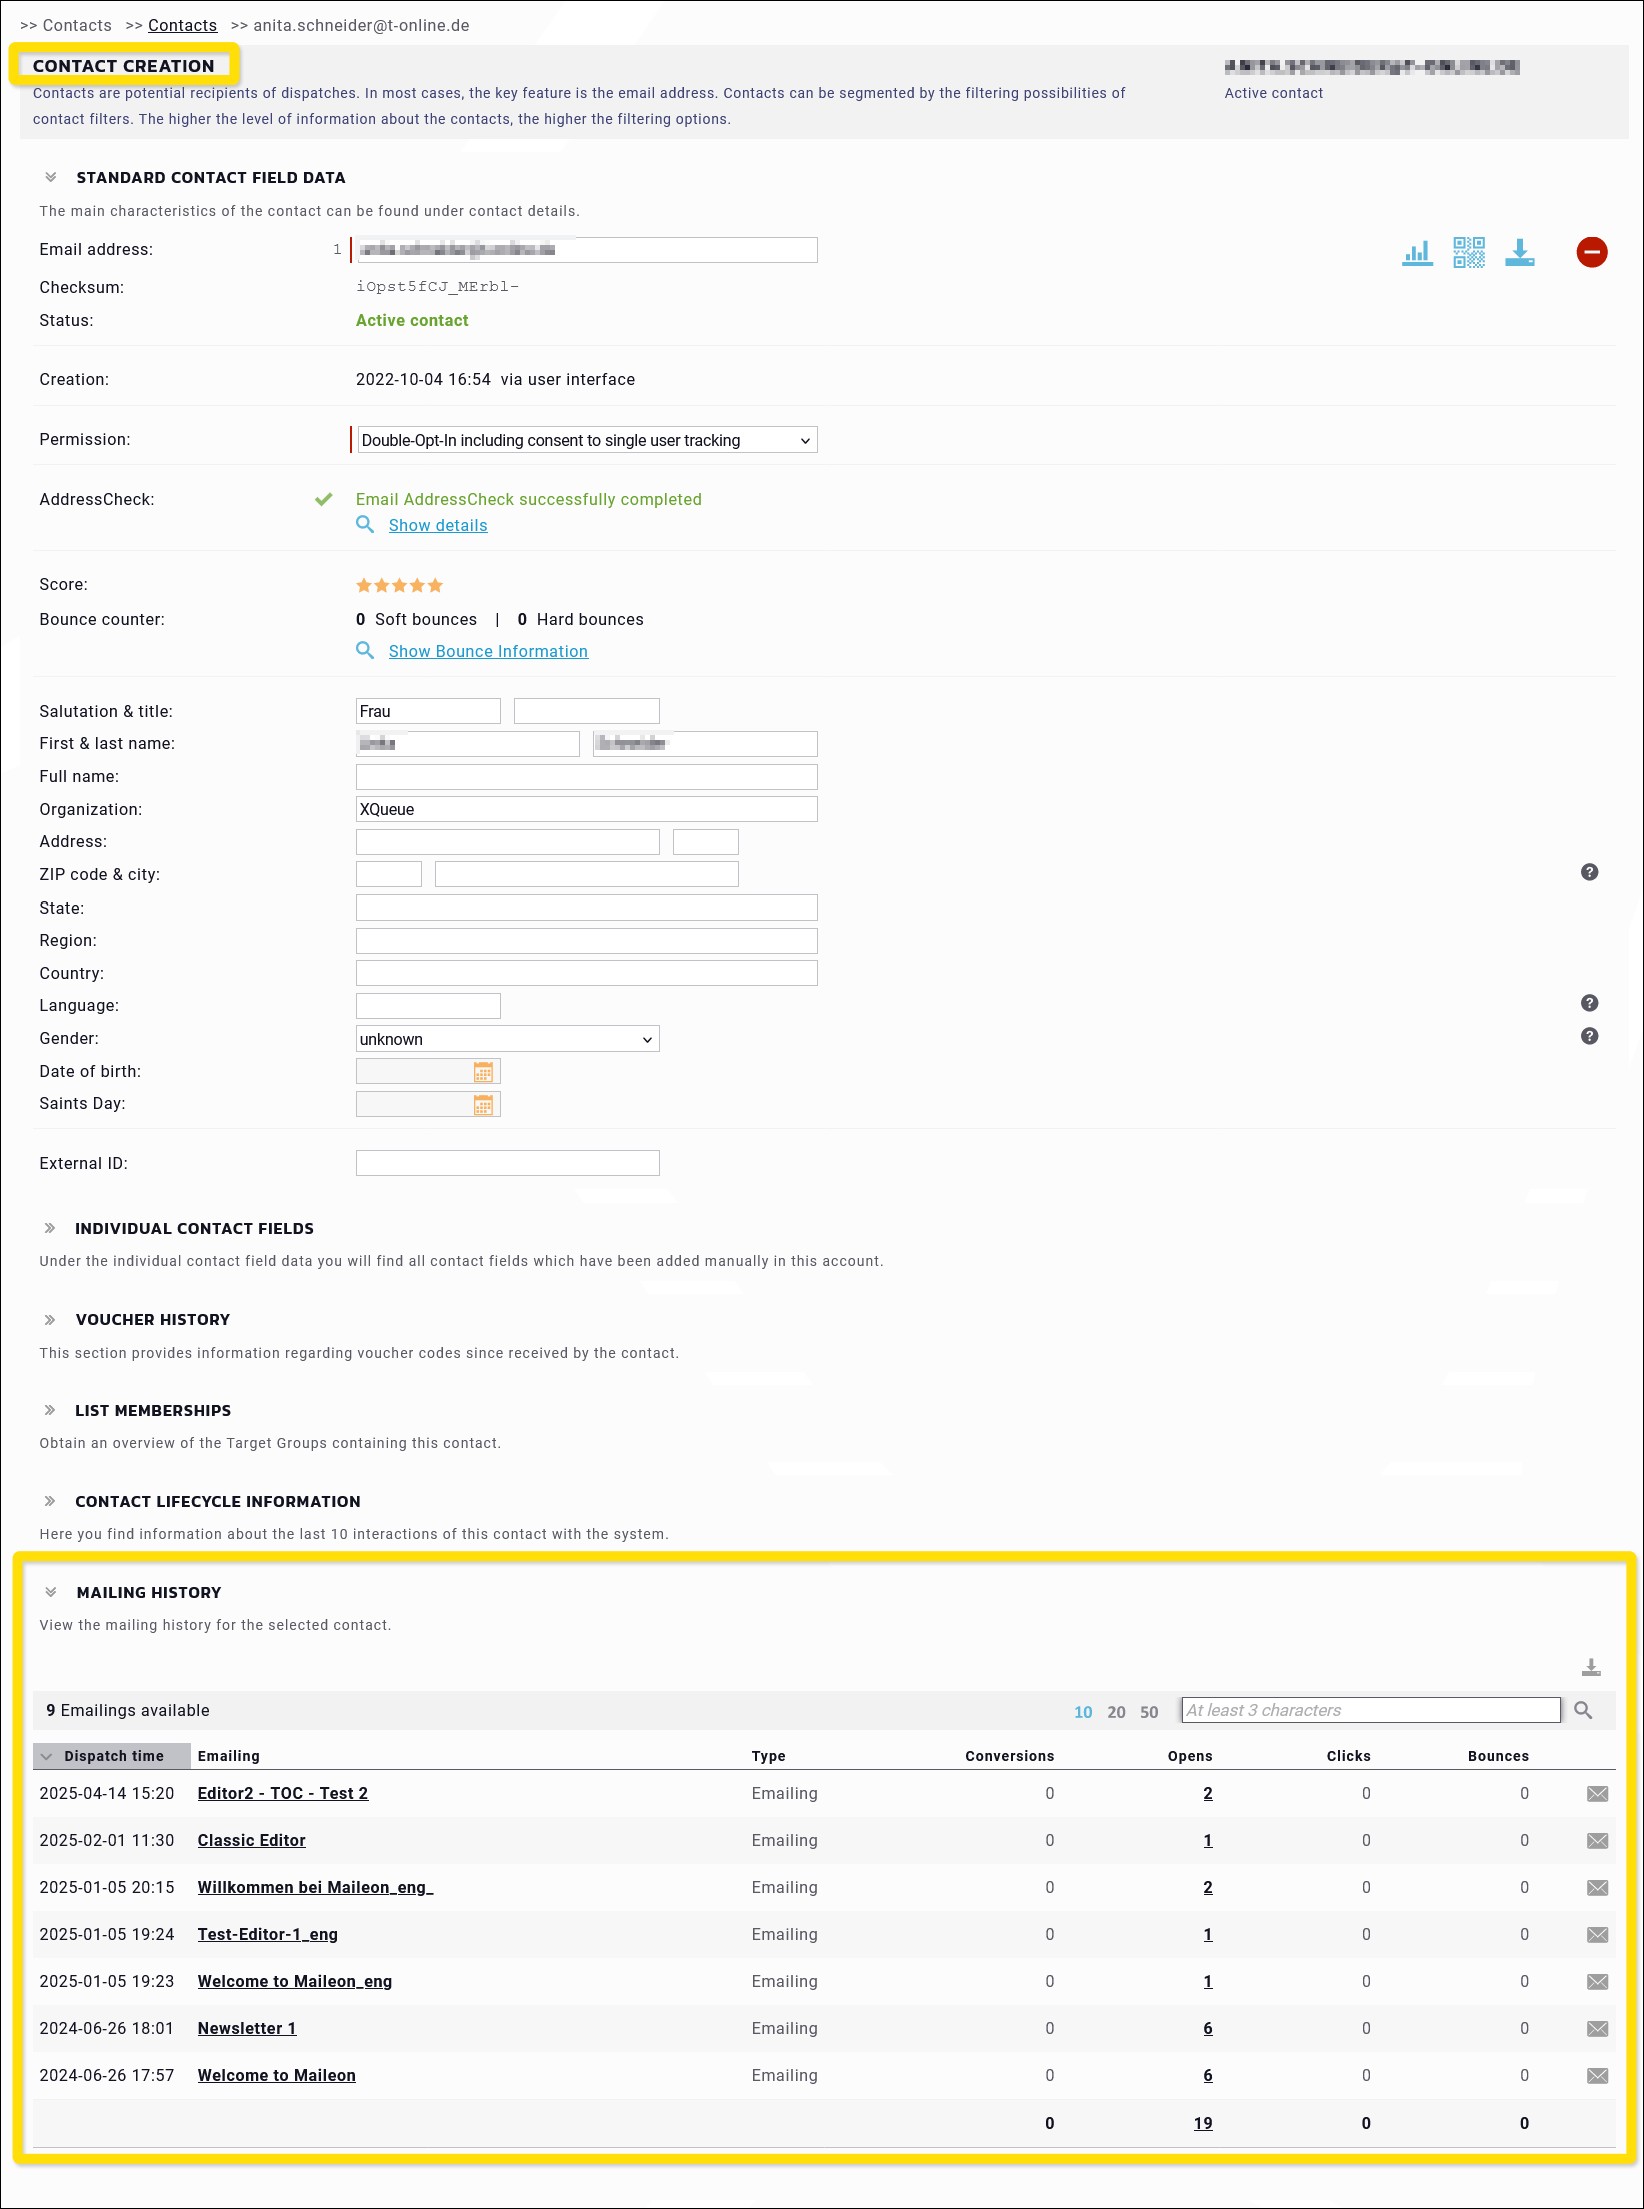
Fig. 3: Individual contact details page with mailing history.
Please note: The list in Fig. 3 shows all regular and trigger mailings that a contact has received. The number in the last row (total) also includes bounces from test mailings. Bounces from test mailings are recorded and can also lead to contacts being blocked. This discrepancy can occur exclusively with contacts used in tests.
Under “Send History” you can request a quick test of past mailings by clicking the envelope icon on the right; this means the selected mailing is sent as a test email to the currently logged-in Maileon user or to another email address that you can enter (Fig. 4). A quick test can be sent to one or more email addresses, which can be separated in the input field by spaces, commas, or semicolons.
The selection can be made in the pop-up window that opens after clicking the envelope icon: This option is also available for historical, contact-event-driven trigger mailings.
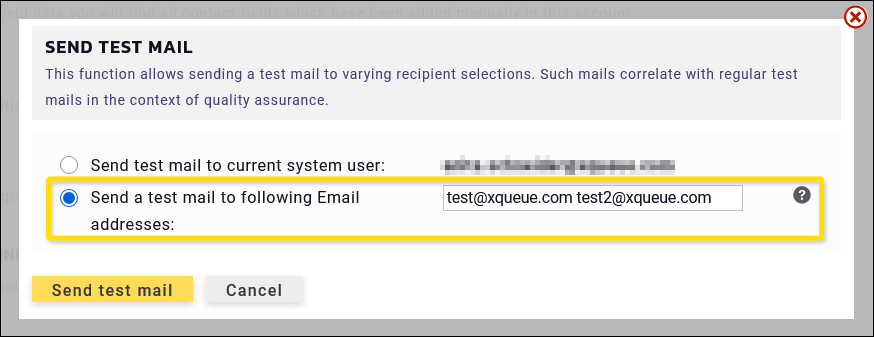
Fig. 4: A test email from the send history can be sent to multiple email addresses.