Im Maileon Help-Center finden Sie umfassende Dokumentationen zu unserem System.
Beliebte Suchanfragen: Importe | Rest-API | Integrationen | SMS
Countdown Timer
Countdown Timer
1. Introduction
The countdown timer feature in Maileon allows you to create and configure timers for individual emailings. Integrating countdown timers into your email campaigns creates a sense of urgency that encourages faster decision-making, improves engagement and drives higher click-through rates. Personalized deadlines and automated content updates after expiration ensure a dynamic, relevant, and engaging experience for your customers.
Once configured, the timer can be added directly to the emailing as a new widget.
Note: The countdown timer is only available in Maileon UI2. Only Maileon can activate or modify this feature.
Limit: Up to three countdown timers are included for free. Additional timers can be requested. For requests or questions, please contact us at support@xqueue.com or reach out to your dedicated account manager.
2. Create Countdown Timer
Find this feature in the Data → Data section. If the countdown timer feature is not activated in your account, it will appear grayed out in the menu (fig. 1).

Fig. 1: Inactive countdown timer features appear grayed out in the menu.
Clicking on the feature opens the following pop-up window (fig. 2).

Fig. 2: The product preview includes a brief description of the countdown timer.
If the countdown timer feature is activated in your account, click on it. To configure a new timer, click +Create countdown timer in the displayed interface in the top-right corner (fig. 3).

Fig. 3: Click ’+Create countdown timer‘ in the top-right corner to configure a new timer.
Enter the name of the countdown timer and optionally add a description to organize and identify it later for your email campaign. Click Save (fig. 4).
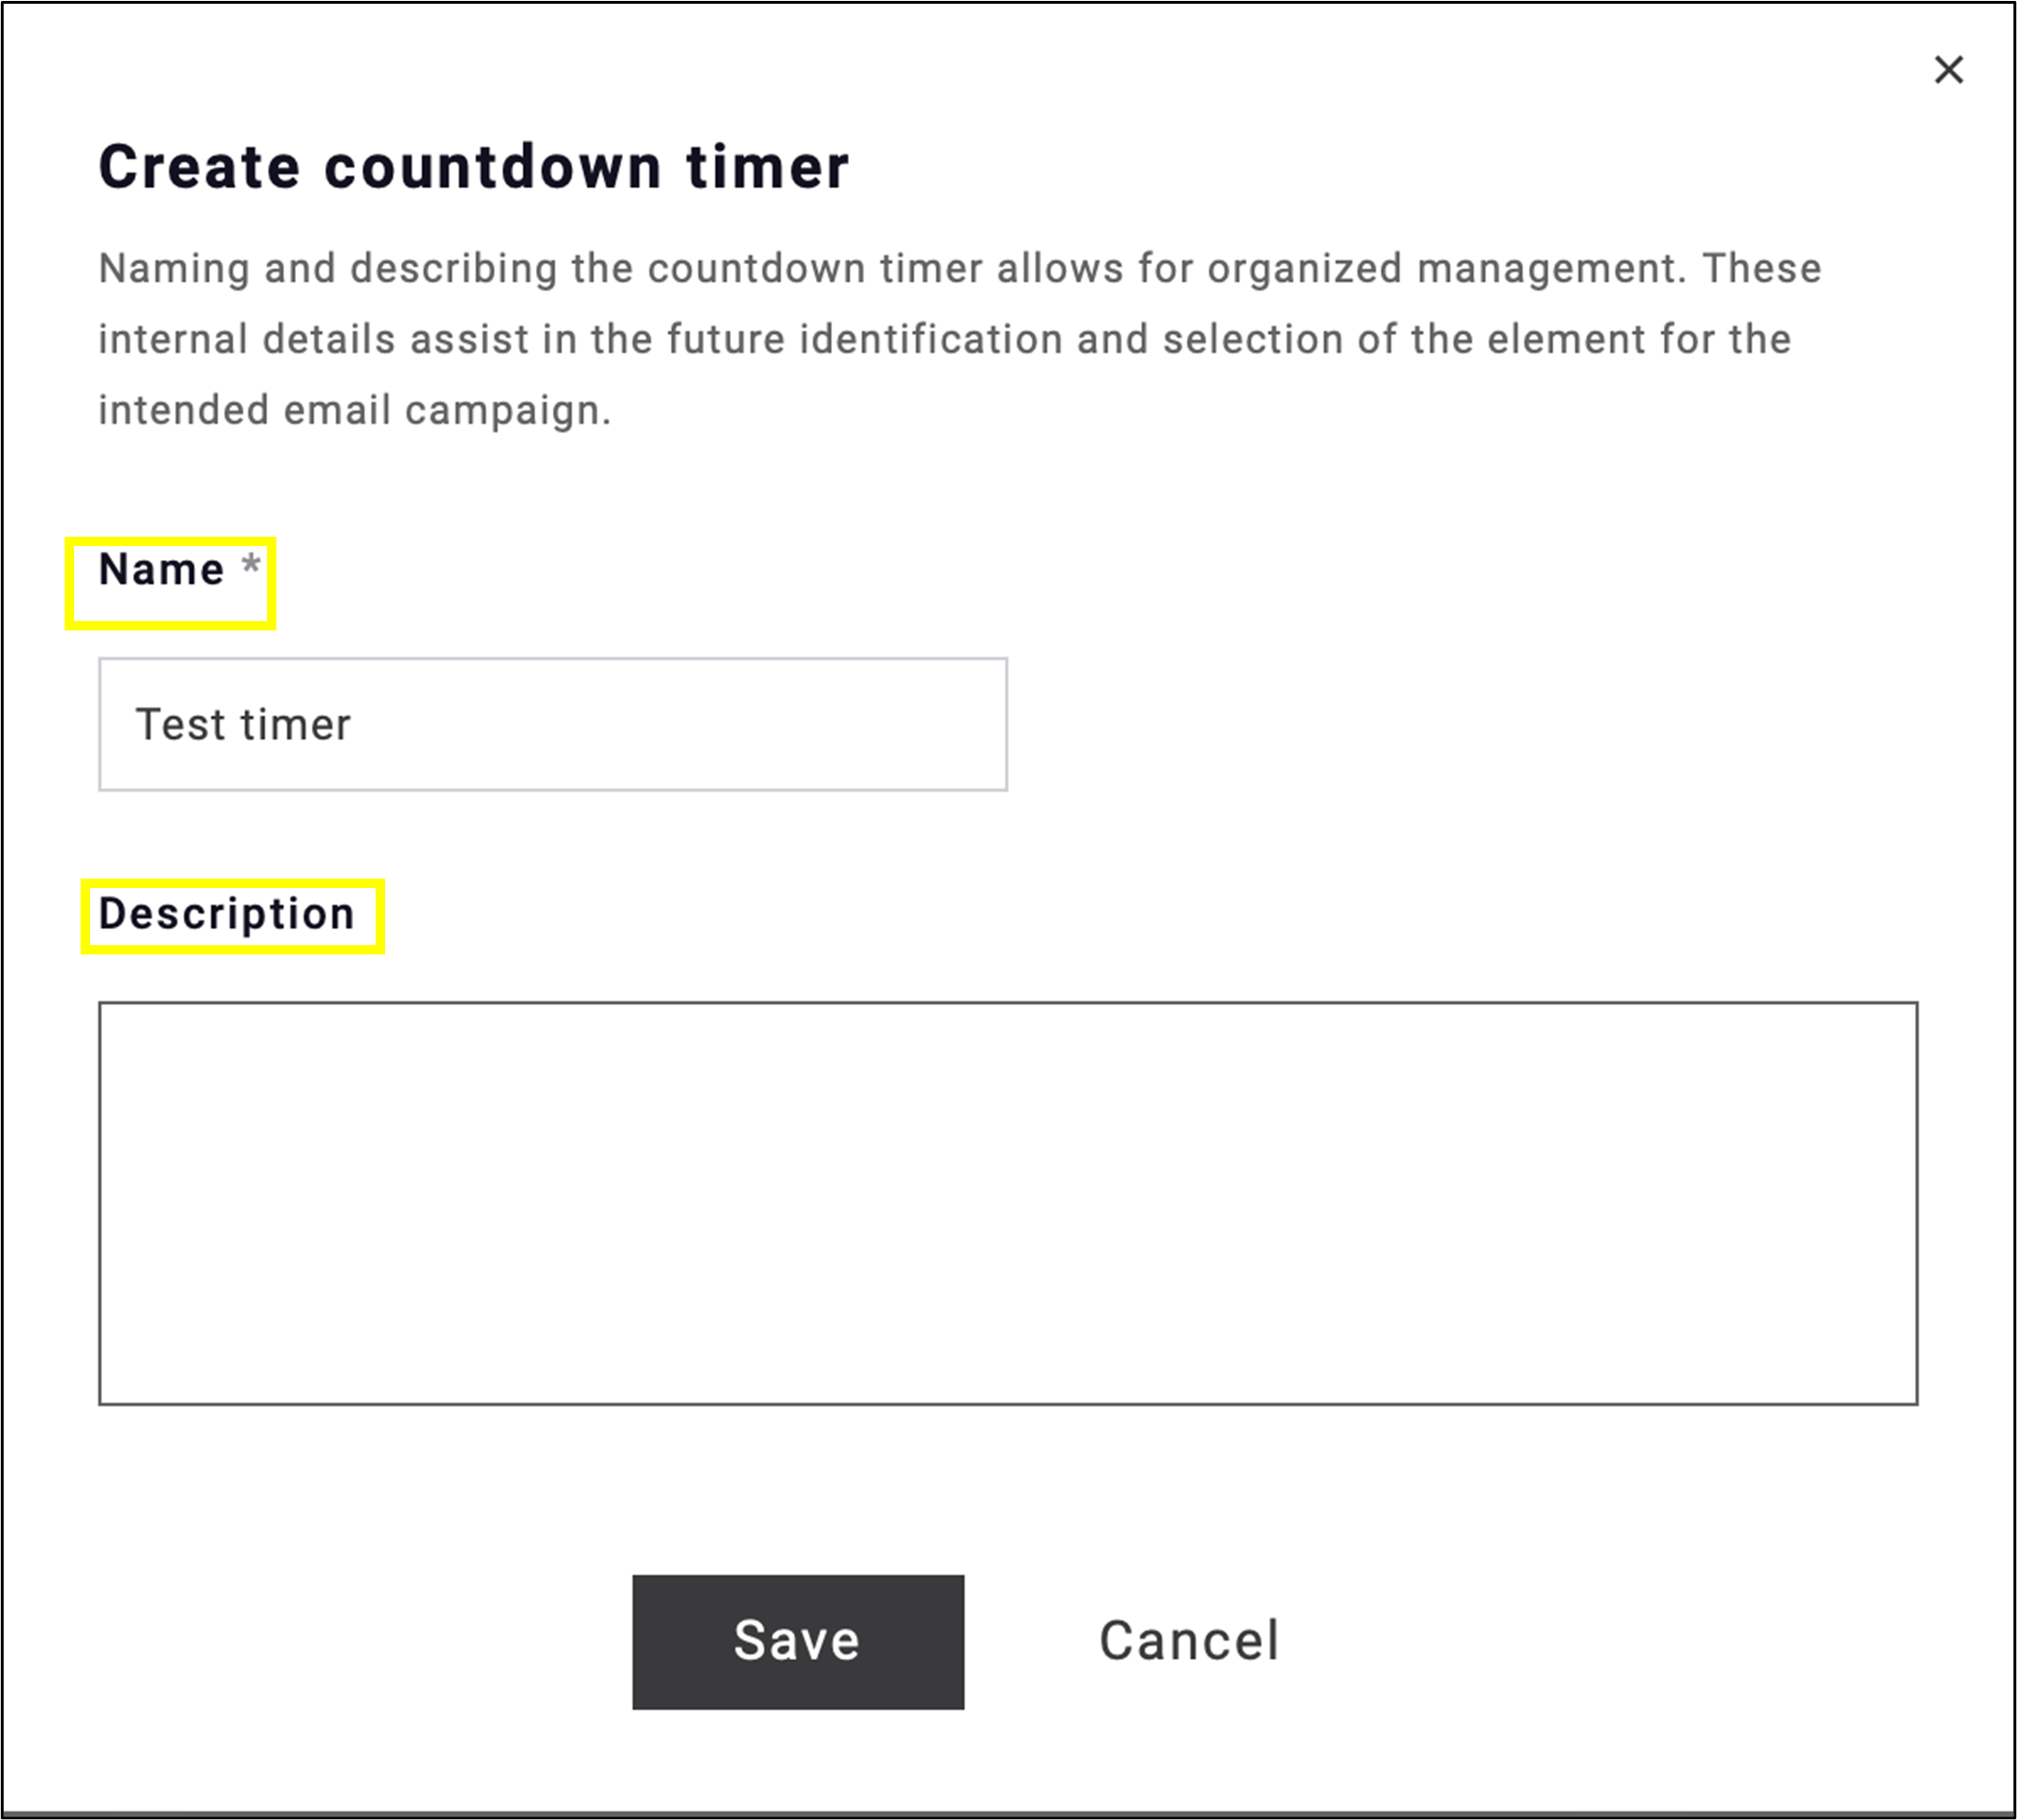
Fig. 4: Name your countdown timer, optionally add a description and click ‘Save’.
After saving, the settings can be configured on the left side menu, while the preview is displayed on the right (fig. 5). Configure the timing settings by clicking on the calendar icon.
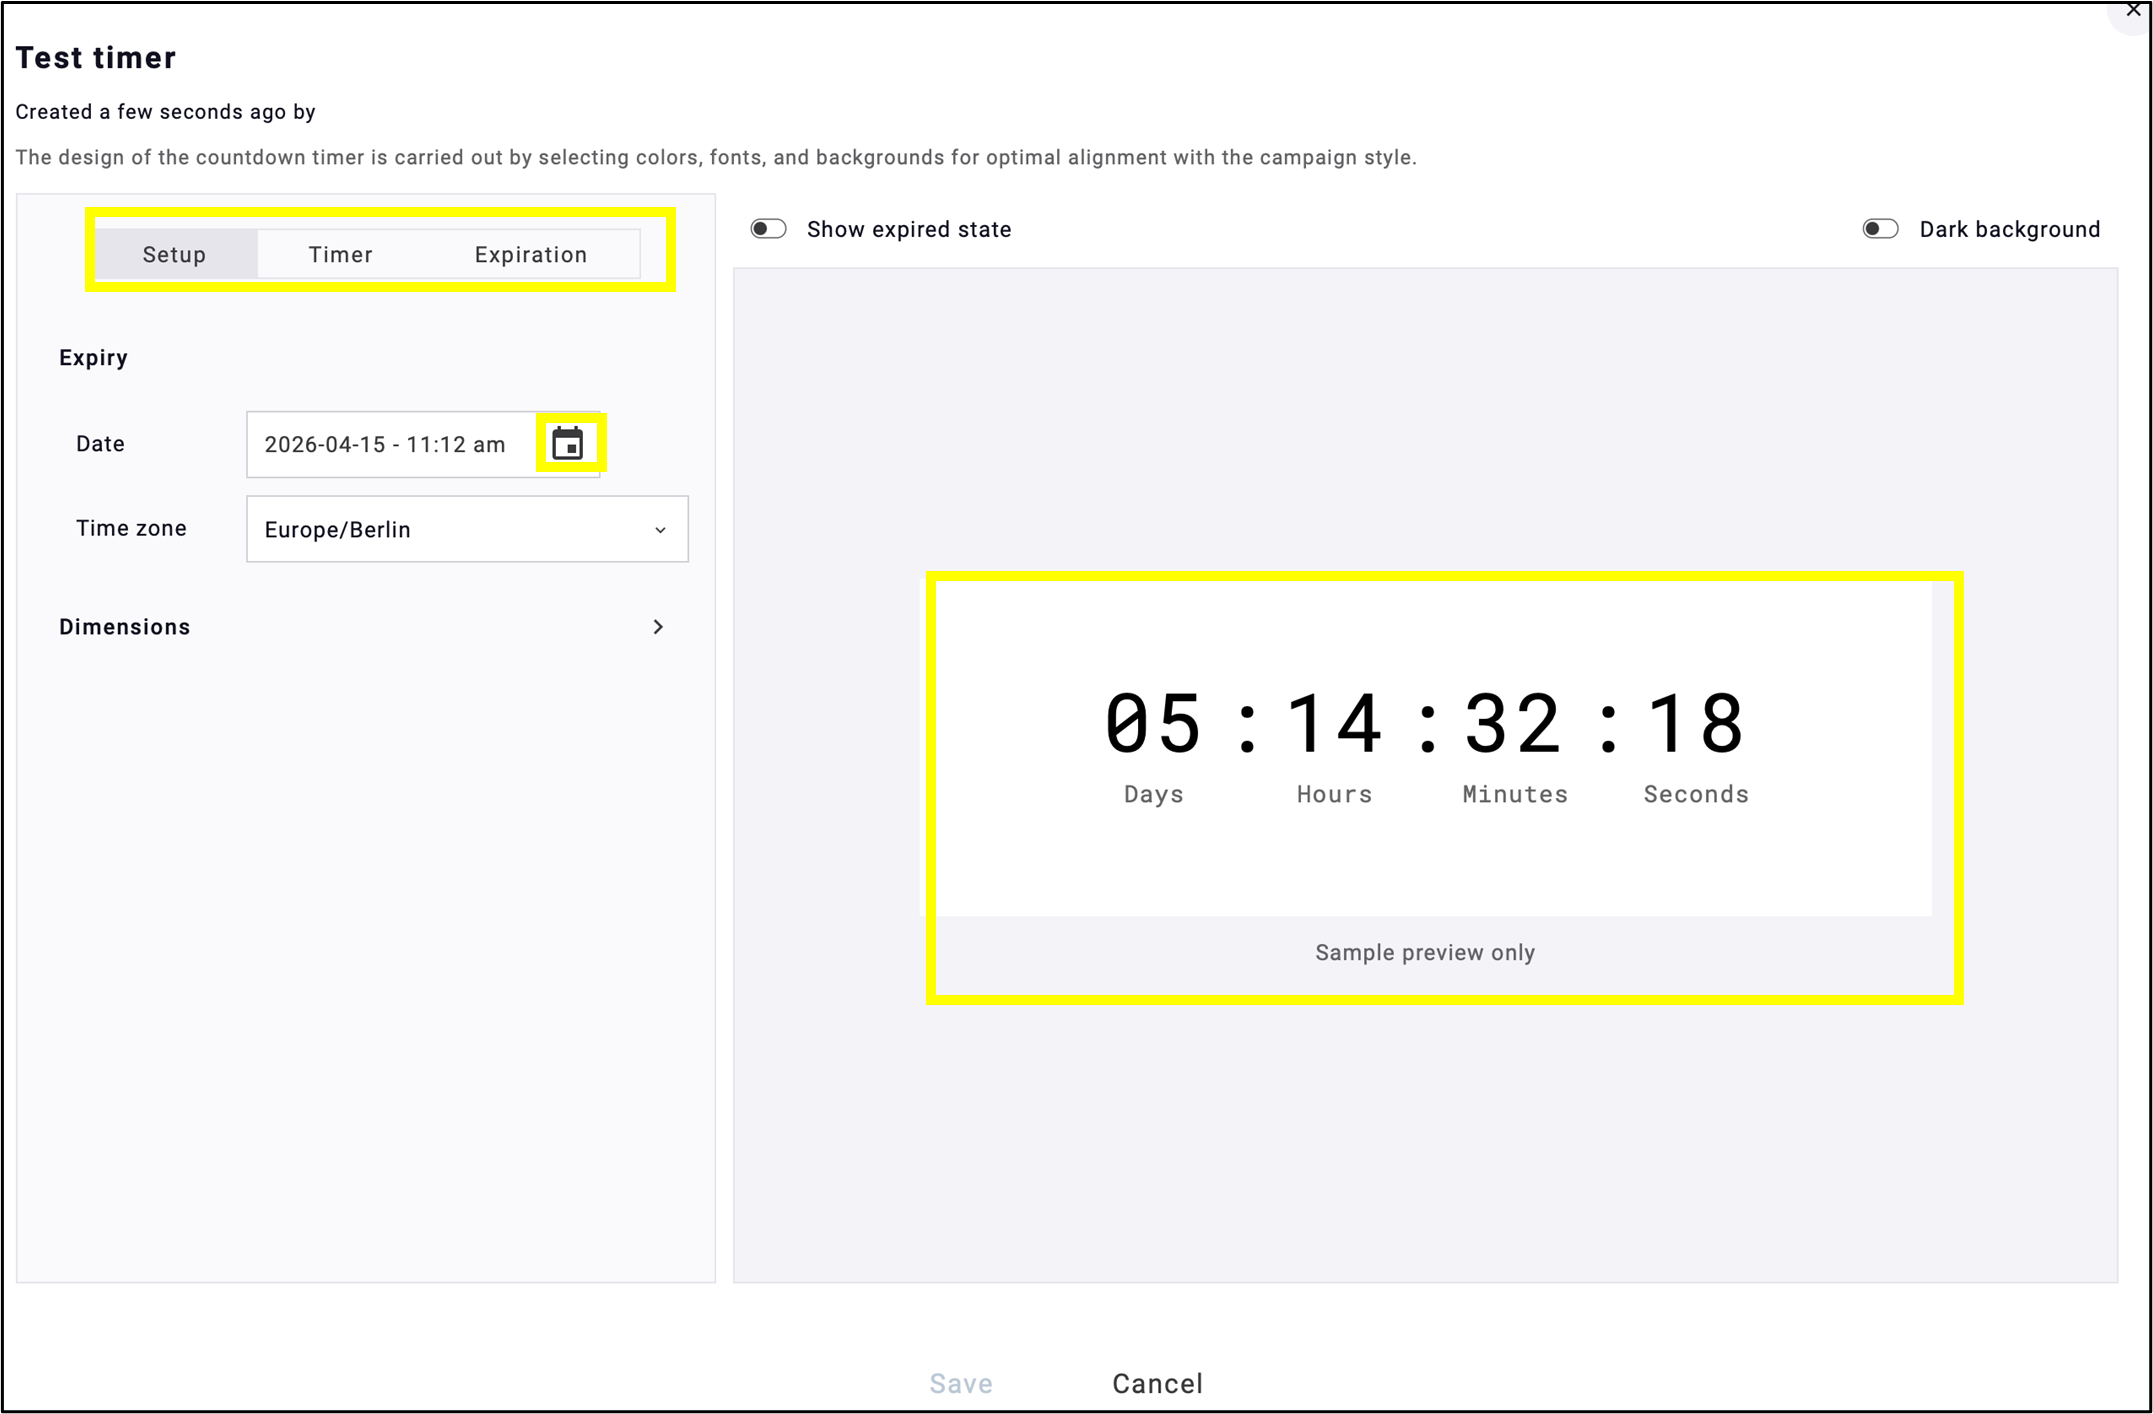
Fig. 5: Configure the countdown settings in the menu on the left; the changes will be displayed on the right.
Set the exact timing options in the pop-up calendar, then click Save (fig. 6).
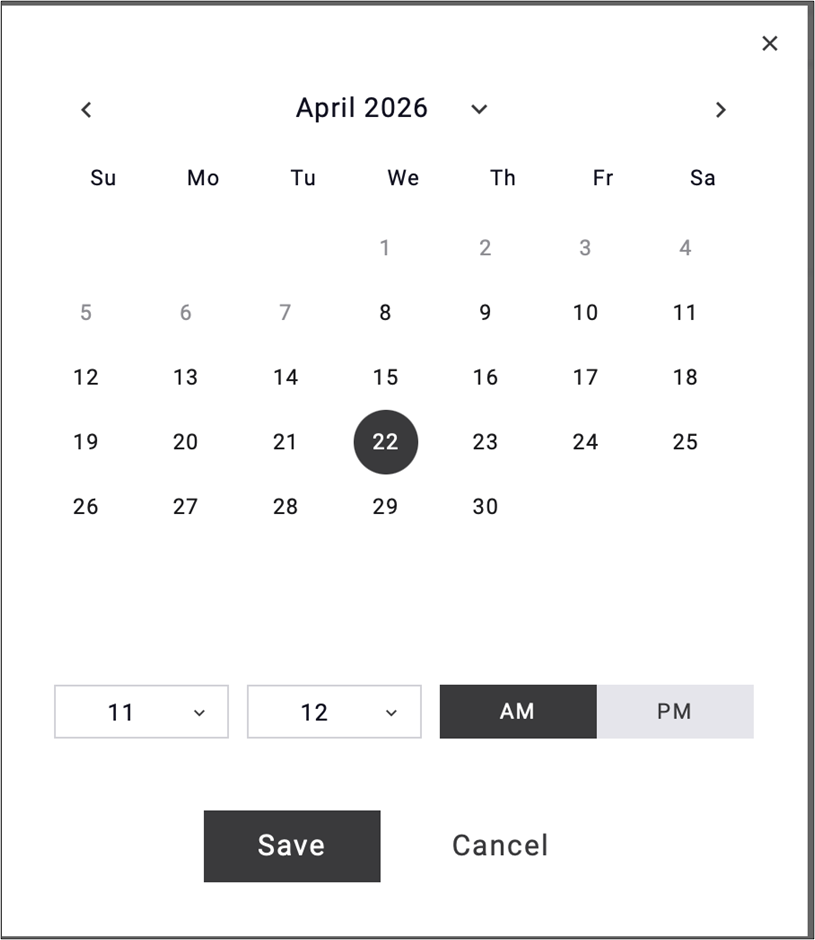
Fig. 6: Set the timing in the pop-up calendar, then click ‘Save’.
The top row of the menu bar includes three tabs for easily managing detailed settings and edits (fig. 7).

Fig. 7: Use the three top menu tabs to manage detailed settings and edits.
The Setup tab allows you to set the expiration deadline and size dimensions (fig. 8).
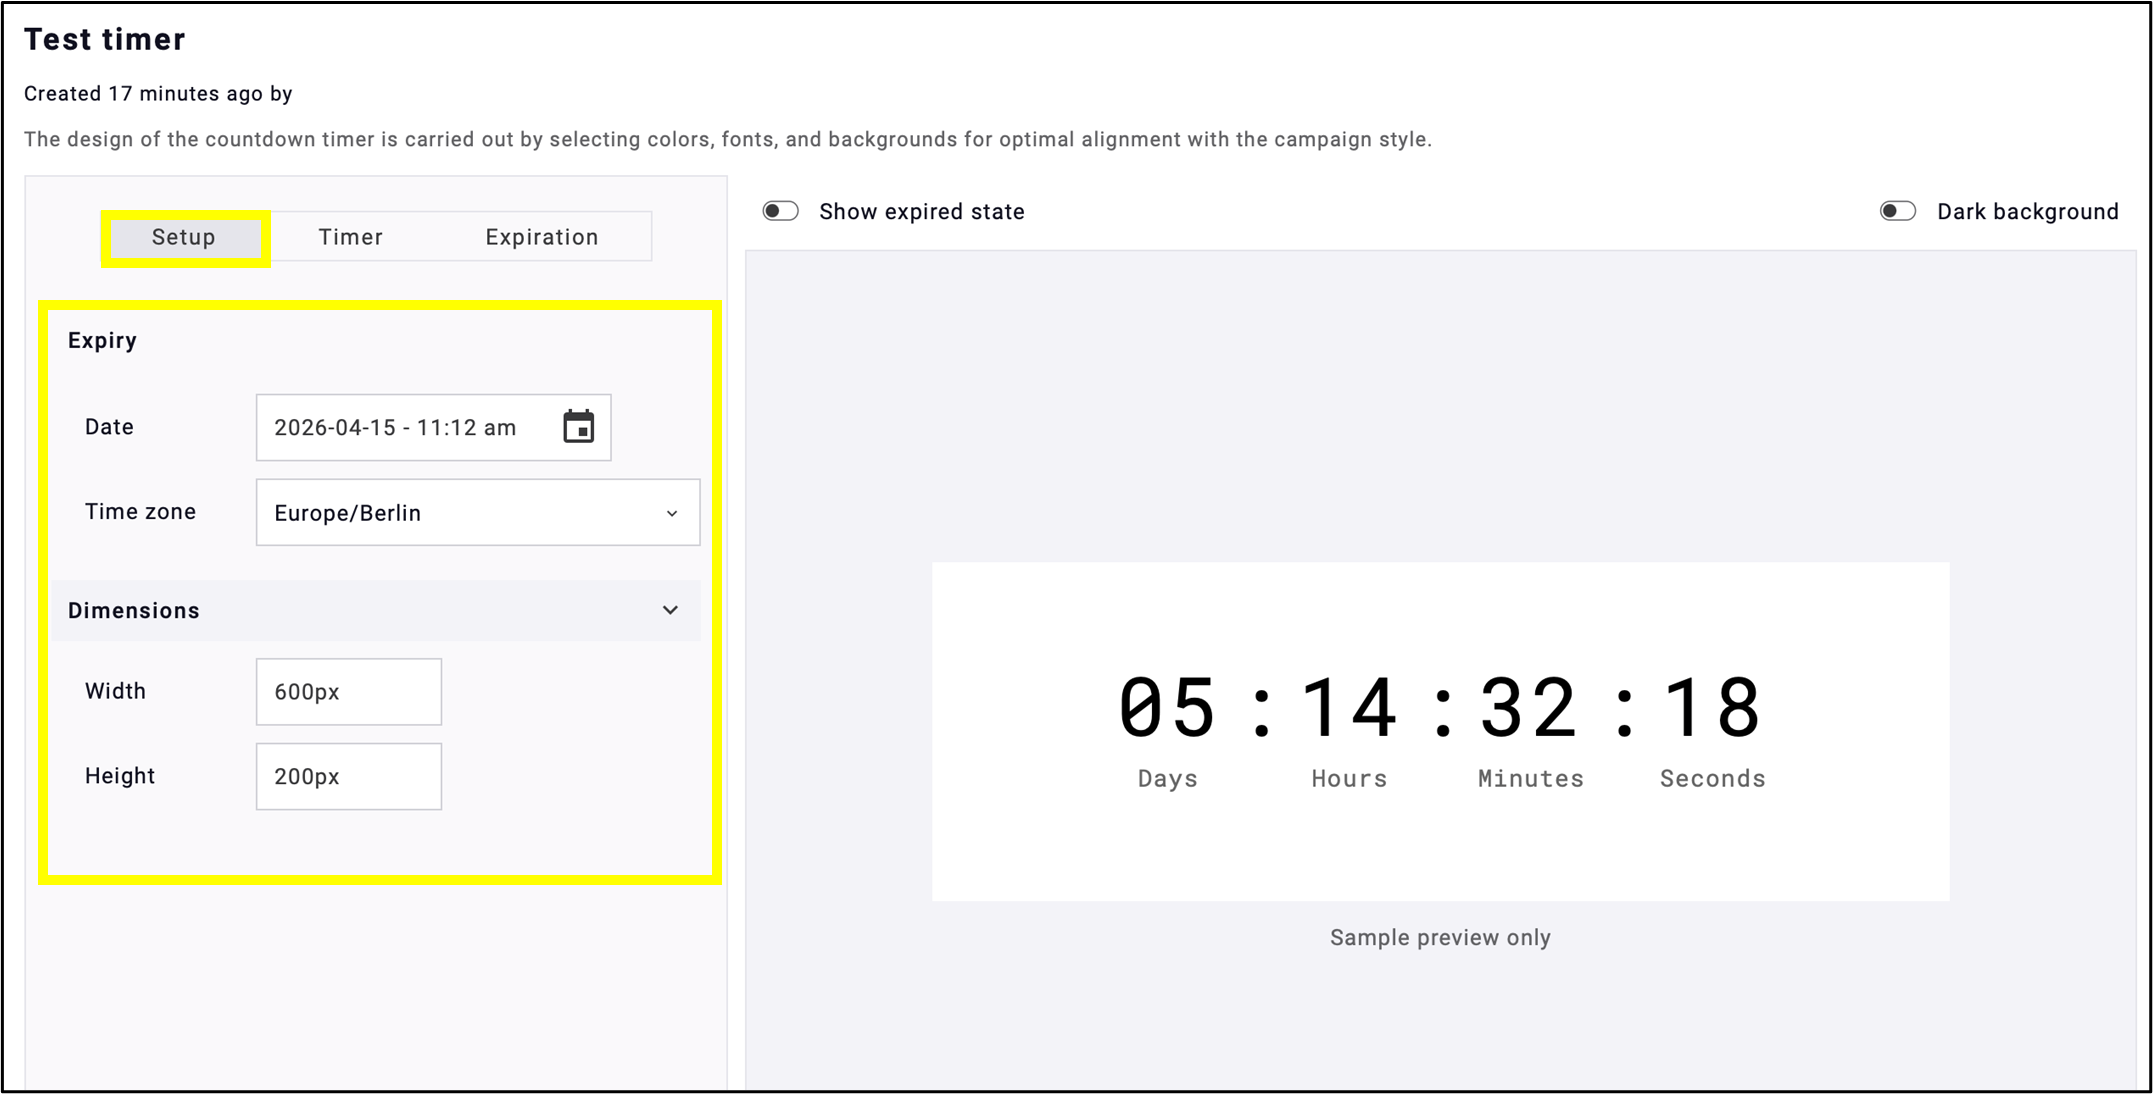
Fig. 8: Set the expiration date and dimensions on the ’Setup’ tab.
Configure the timer layout settings on Timer tab (fig. 9).
Here you can:
- set the text alignment (default: centered),
- customize the background color,
- upload an image from the image library,
- optionally specify time units (days, hours, minutes, and seconds),
- configure the appearance of digits, including color, size, font, spacing between digits, and spacing between time units,
- style the digit background optionally,
- configure the style of time unit labels (hours, minutes, seconds), which are displayed directly in the interface,
- optionally add a headline.
Note 1: Label and separator settings become available only after they are enabled.
Note 2: For all custom settings, the file size of any custom fonts used must not exceed 1 MB.
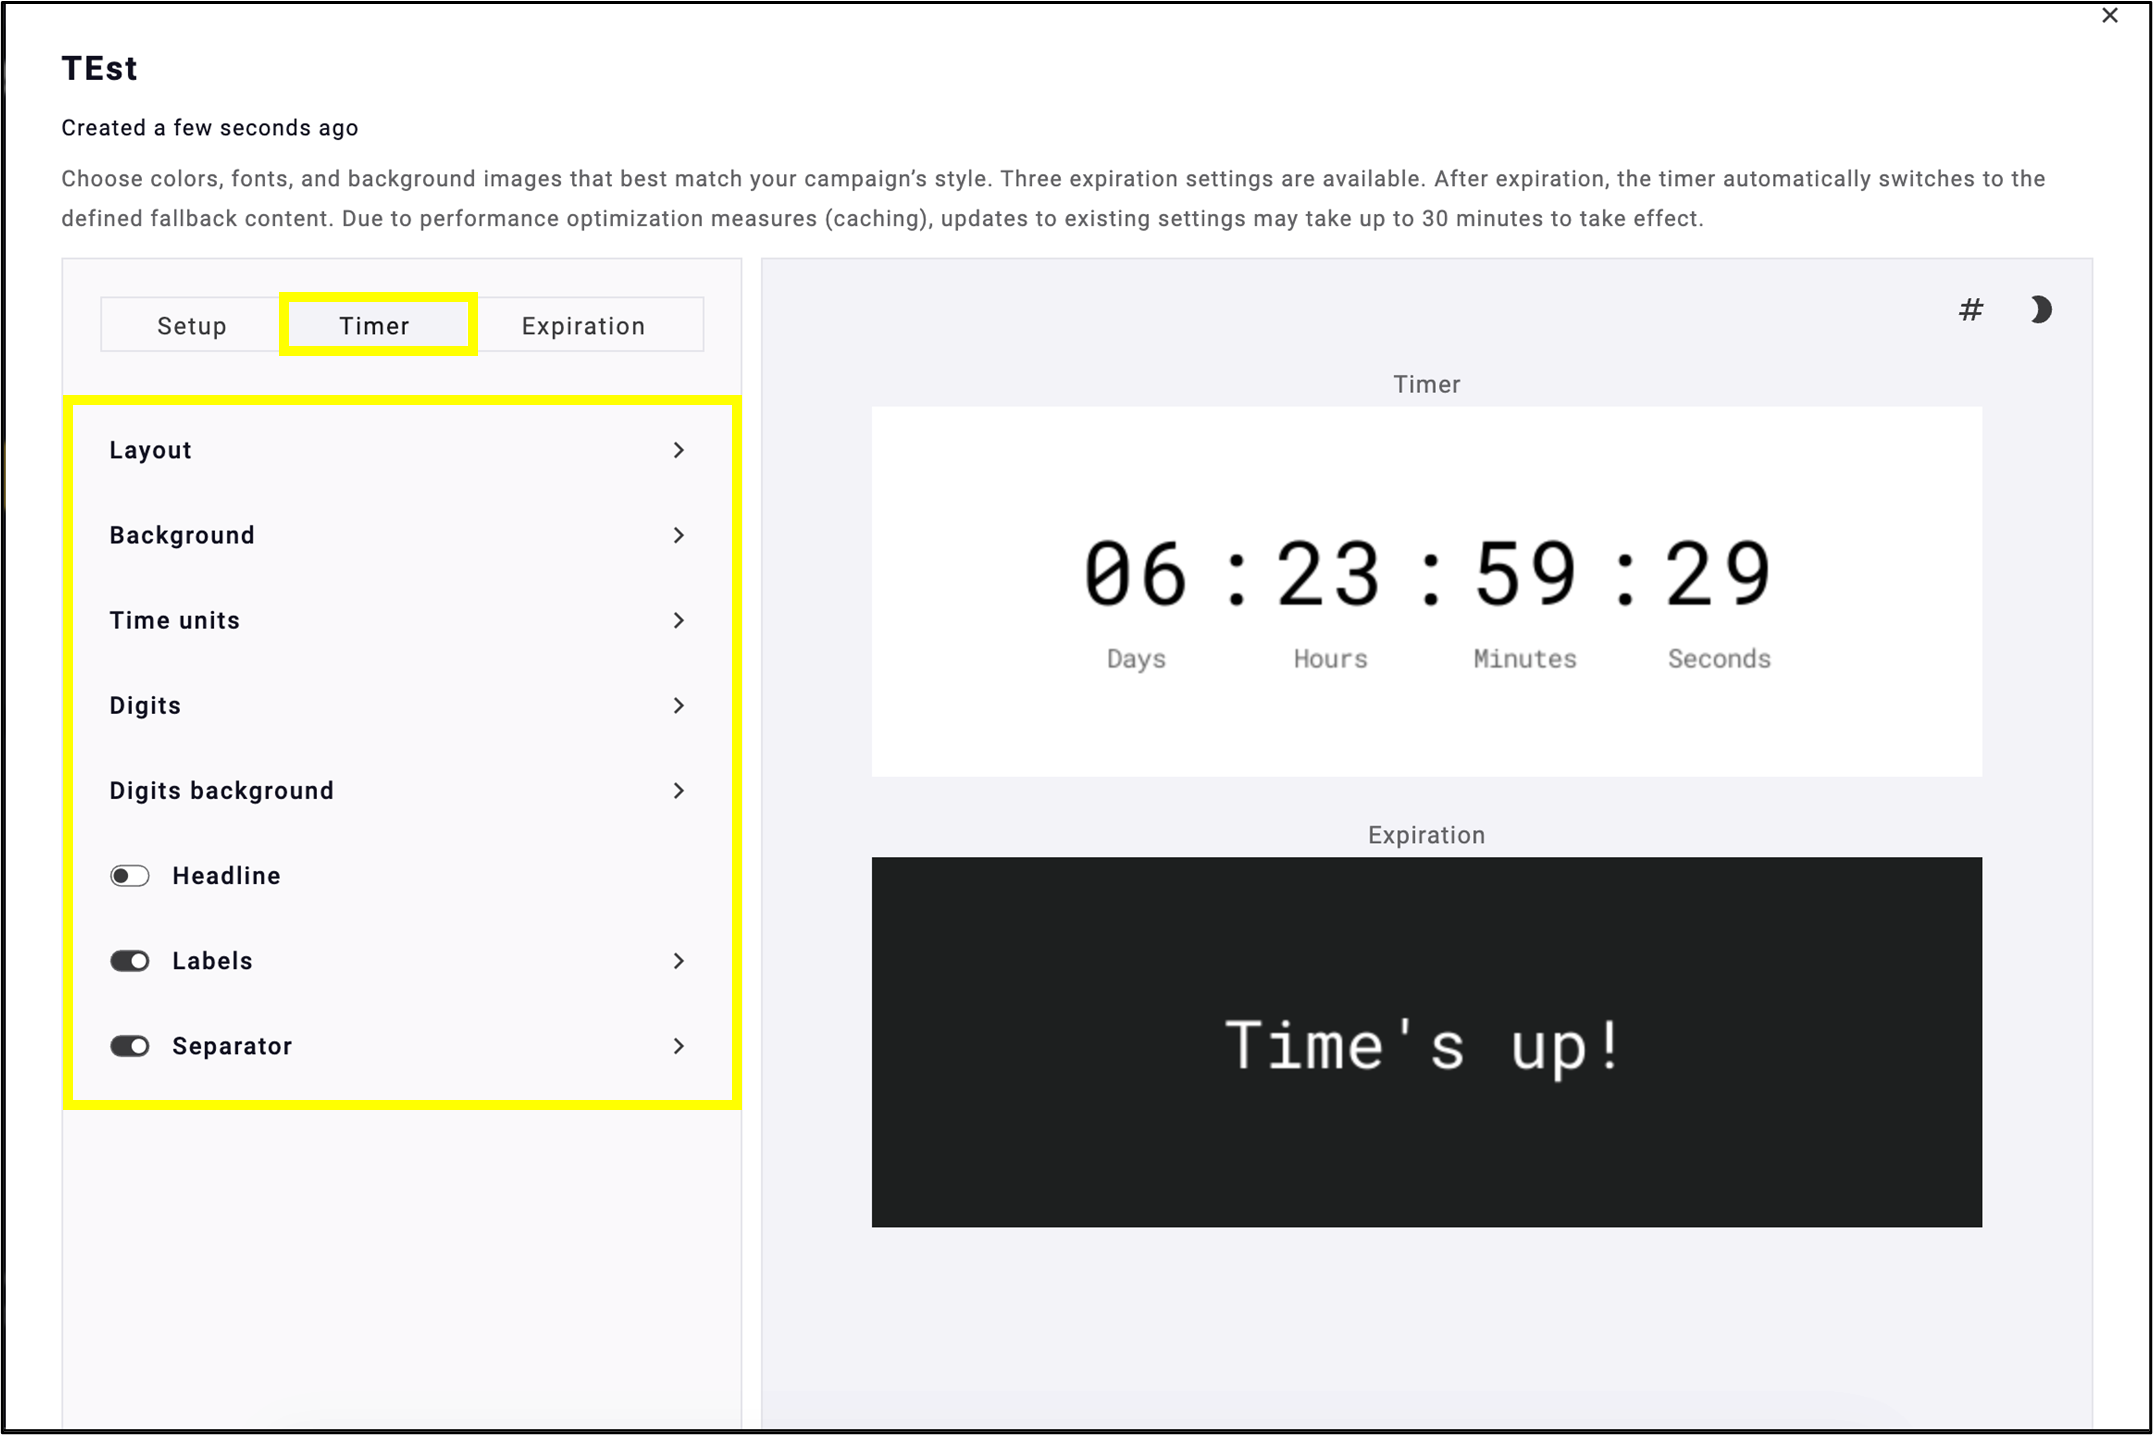
Fig. 9: Configure timer layout settings in the ’Timer’ tab.
Define the actions to be performed when the timer expires on the Expiration tab (fig. 10). After expiration, the timer will automatically switch to the defined fallback content.
Here, you can optionally:
- Edit the text displayed when the time runs out (default: ‘Time’s up!’).
- Instead of text, the counter can display zero, or the field can be left blank.
- Customize and format the text by adjusting alignment, color, size, font, and background color.
After making your selections, click Save.

Fig. 10: Define actions on timer expiration in the ’Expiration’ tab.
The countdown timer is now ready to be added to the emailing.
3. Inserting the Countdown Timer into the Emailing
Go to Campaigns → Newsletters and open the desired emailing or create a new one to include the countdown timer.
In the newsletter editor, find the Countdown widget in the widget list (fig. 11).

Fig. 11: Find the ’Countdown’ widget in the emailing editor to insert the countdown timer.
Drag and drop the Countdown widget into the content area, then select from the previously configured countdown timers on the Content tab (fig. 12).
Note: Only active countdown timers are displayed. Changes to settings may be delayed due to caching and can take up to 30 minutes to appear. If updates are not visible, try refreshing the editor or reopening the emailing.
The countdown timer can be edited, but changes may take up to hours to take effect. Once the email has been sent, it cannot be modified.
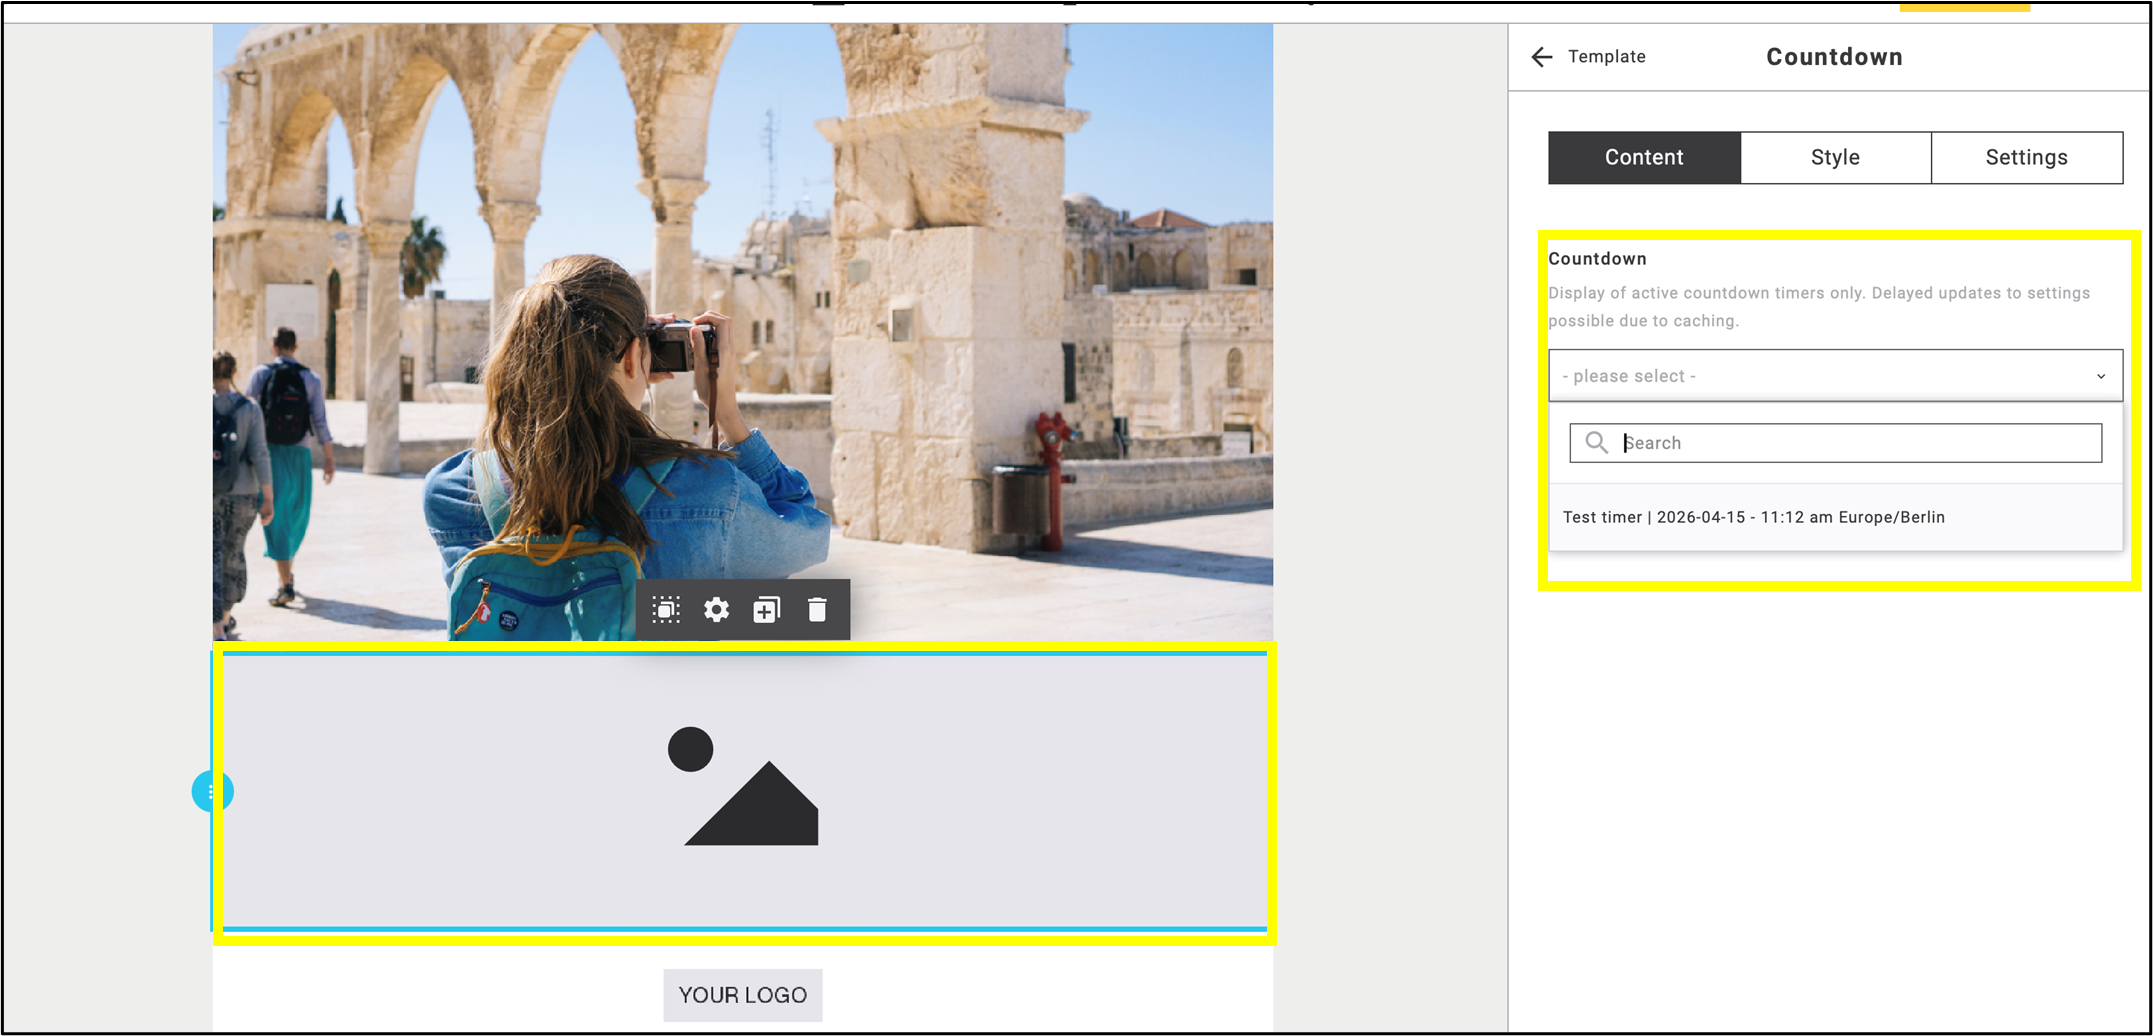
Fig. 12: Add the ‘Countdown’ widget to the emailing and select an active timer.
After setting up the countdown timer, you can add it directly to the emailing (fig. 13).
Note: The countdown timer is optimized for large-scale use, ensuring reliable performance for large mailing lists and standard campaign sizes.
The name, expiration date, and time zone are displayed after selecting the account and inserting the countdown timer.
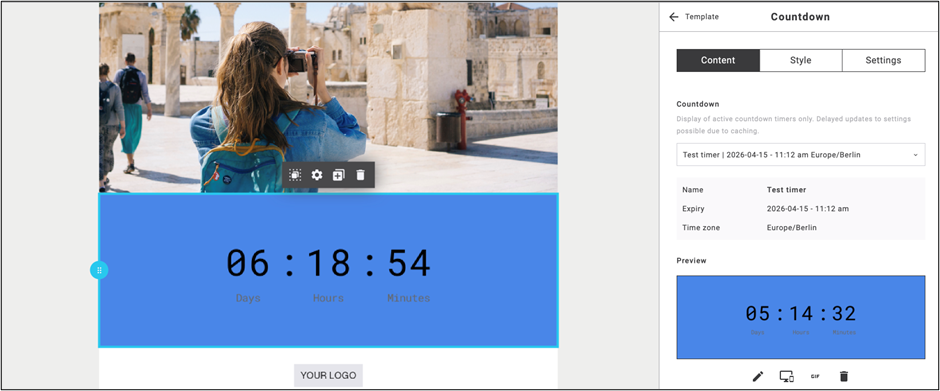
Fig. 13: Add the configured countdown timer directly to the emailing.
Configure optionally additional settings such as
- alt text and image title,
- GIF fallback,
- editing or deleting options of the image.
The AI text assistant and emojis are also available here, and a link can be added (fig. 14). It works like a standard image.

Fig. 14: Configure optional image settings, AI tools, and link options.
The AI-powered text generator creates text based on the provided brief and maximum word count. Click the stars ![]() icon to generate alt text using the Ai text assistant from a short description. Optionally, set the approximate word count (fig. 15). Click Generate.
icon to generate alt text using the Ai text assistant from a short description. Optionally, set the approximate word count (fig. 15). Click Generate.

Fig. 15: Use the AI assistant to generate appropriate alt text.
Click Apply to accept the suggested text (fig. 16).
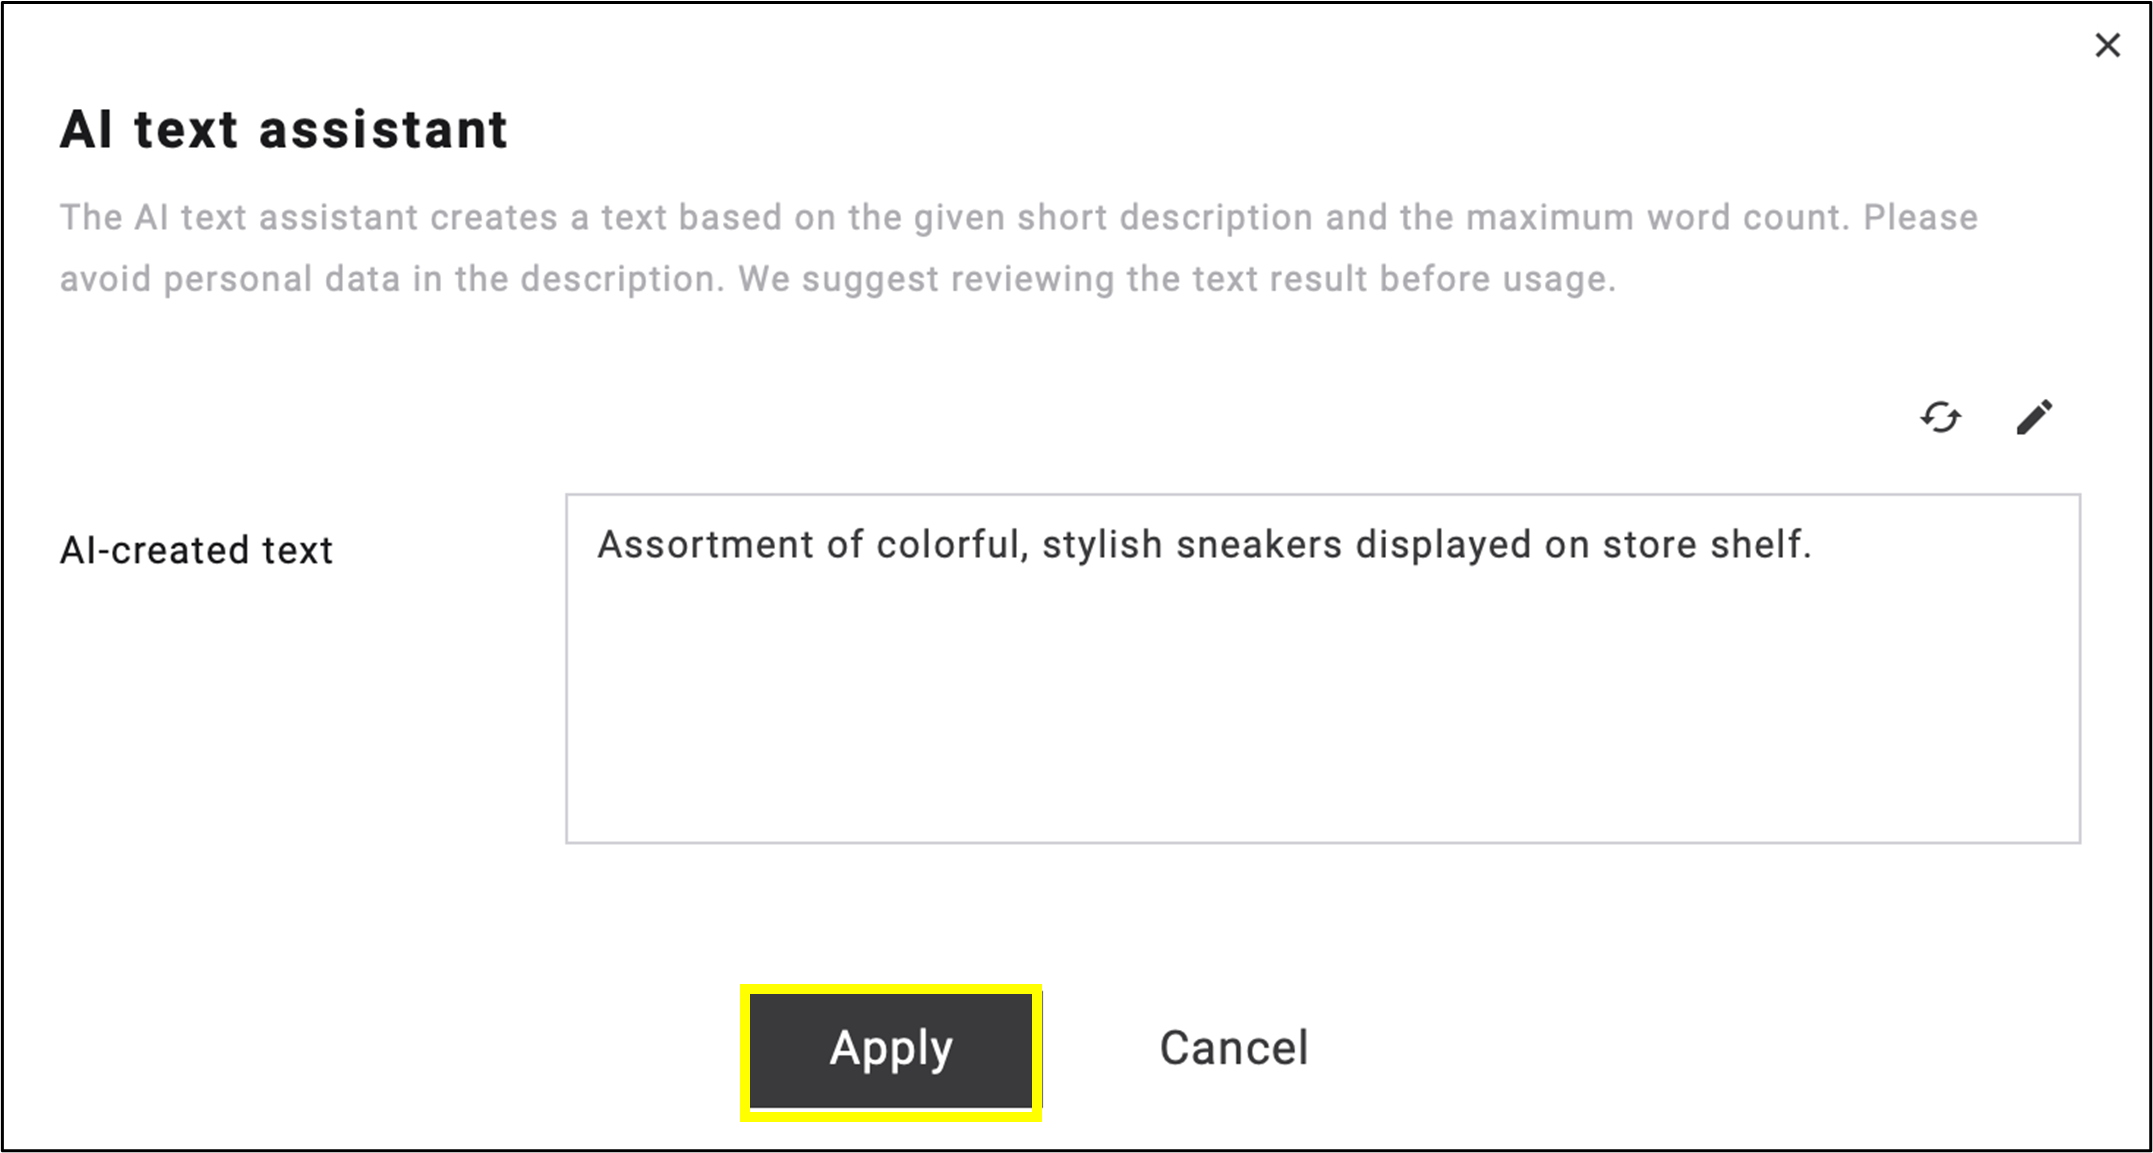
Fig. 16: Click ’Apply’ to accept the suggested text.
Note: The image title can be specified using the same method.
Click the emoji icon ![]() to optionally add emojis to the alt text and image title. Select a symbol or emoji from the list to insert it in the current text position (fig. 17). Click Add emoji.
to optionally add emojis to the alt text and image title. Select a symbol or emoji from the list to insert it in the current text position (fig. 17). Click Add emoji.
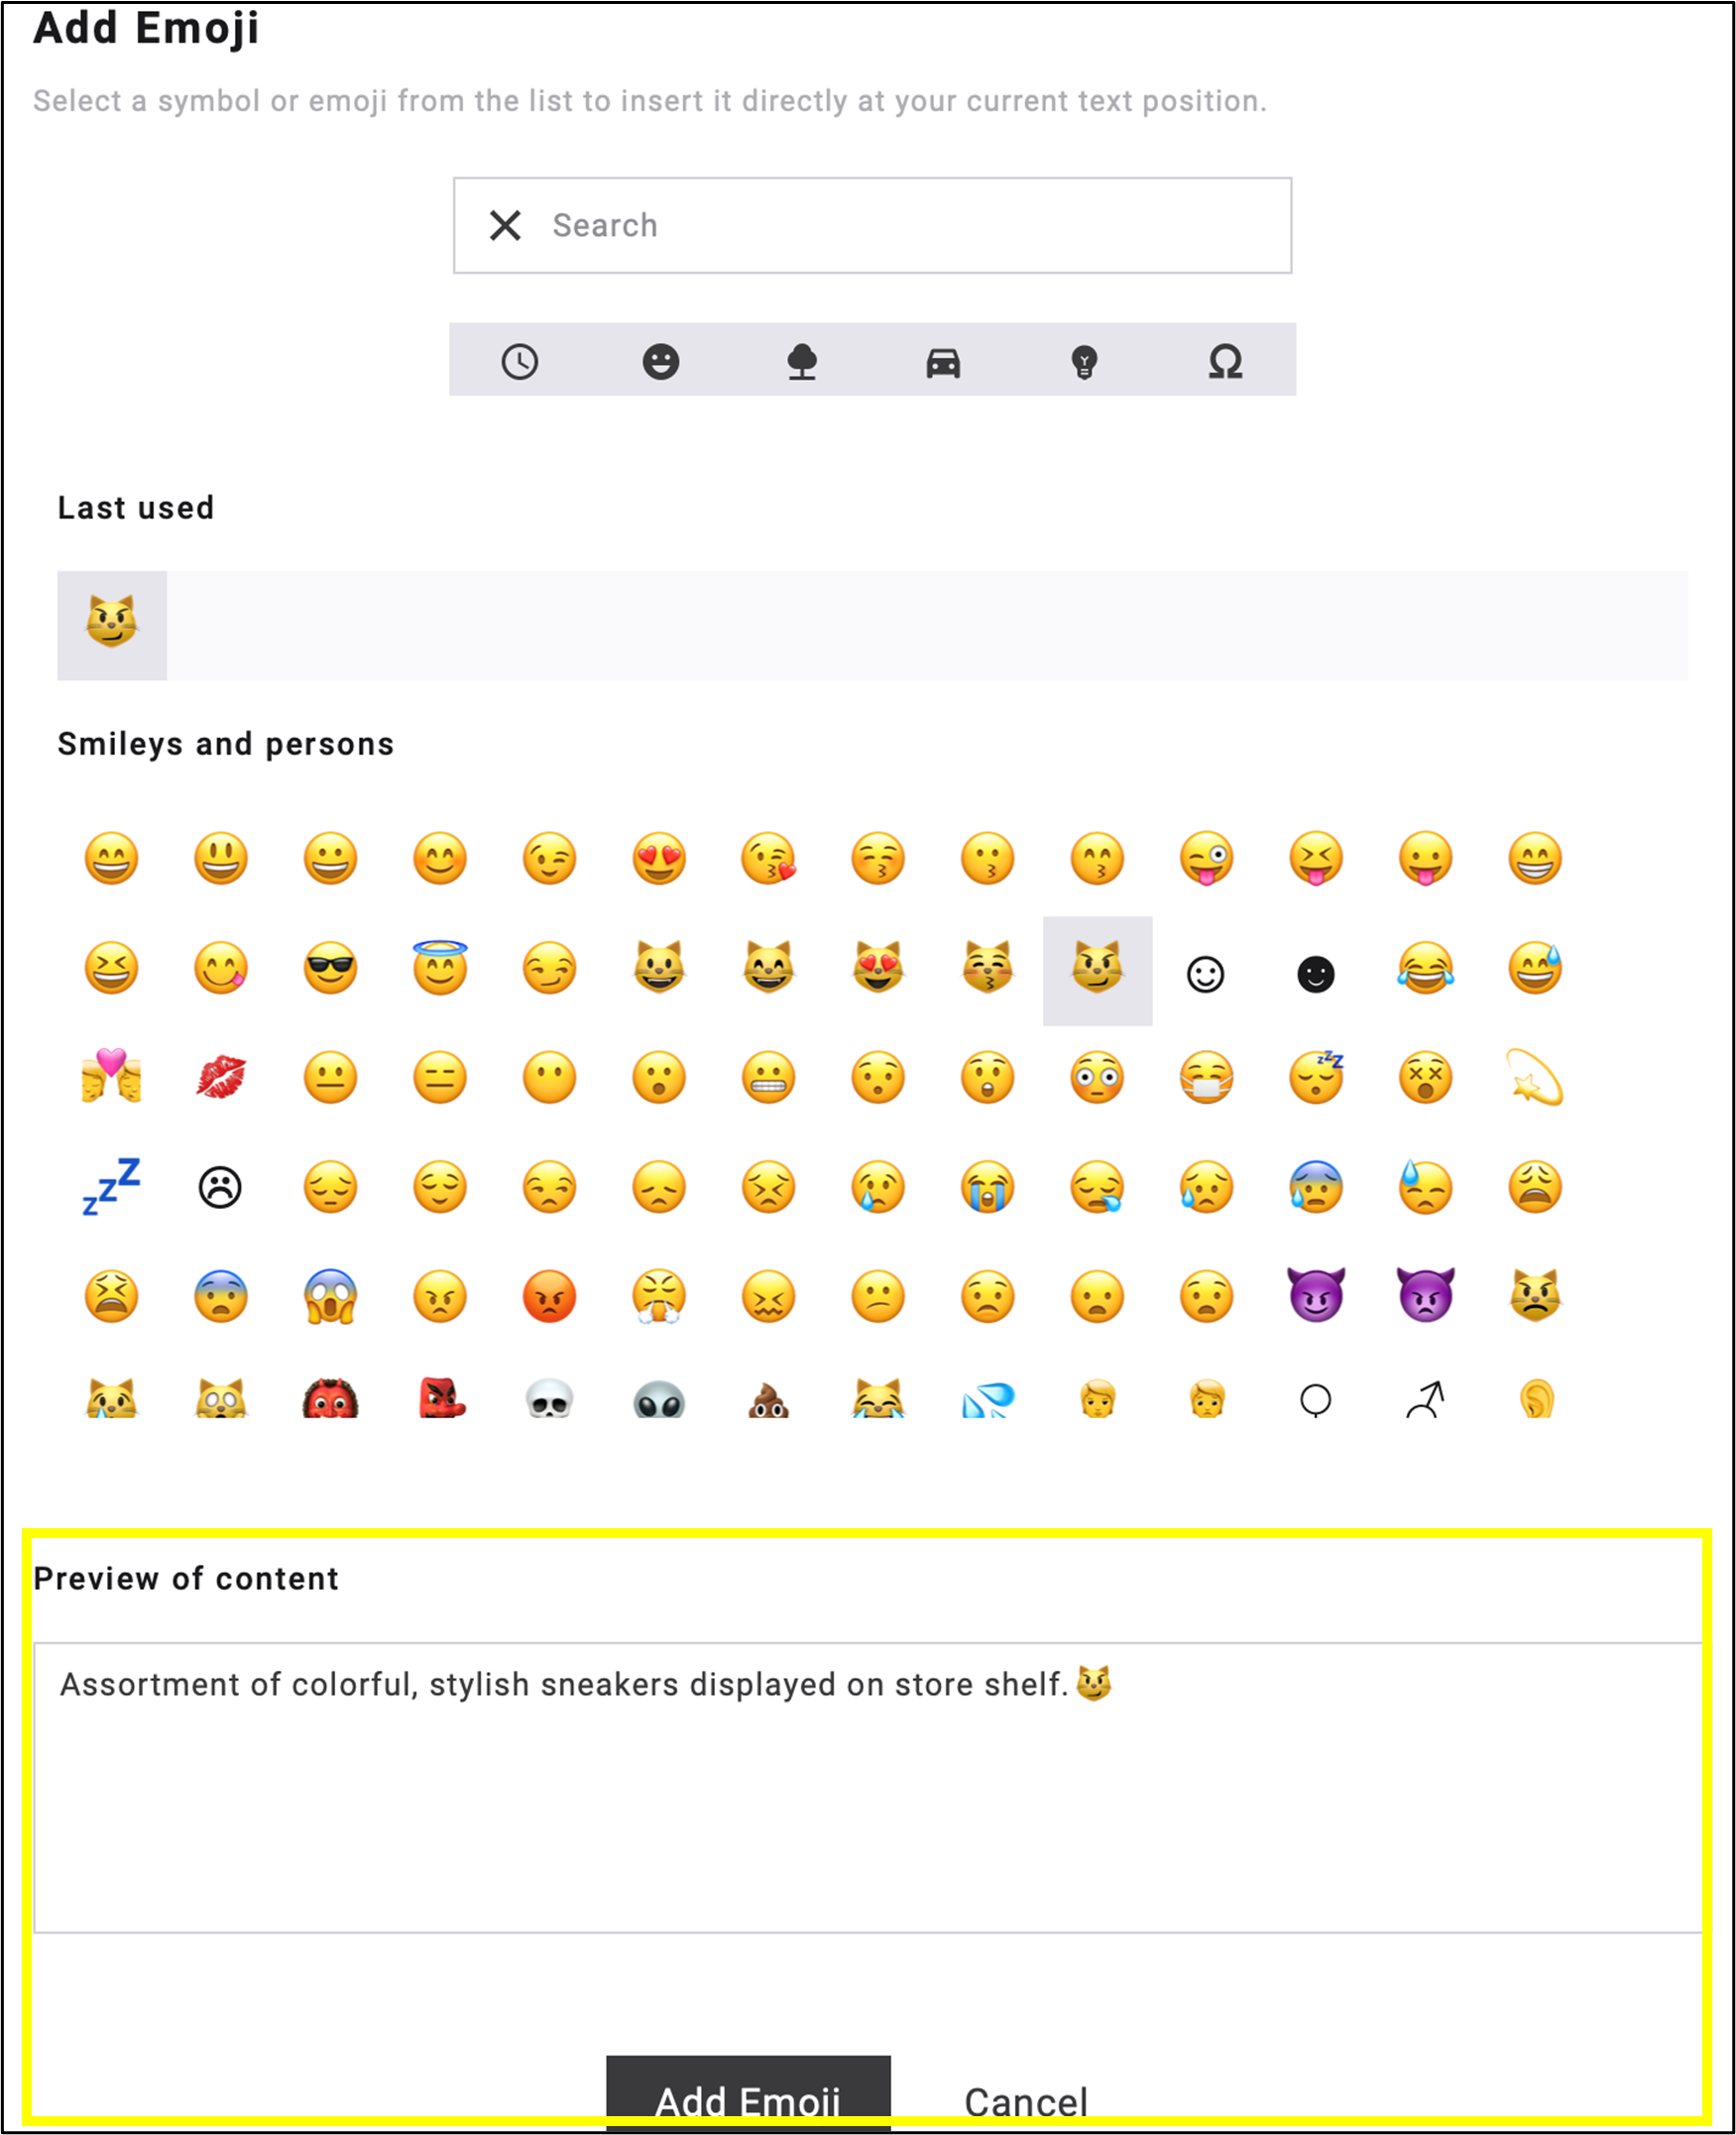
Fig. 17: Select a symbol or emoji to insert it in the current text position.
Style and Settings options can also be configured in the top menu bar next to Content. These options work the same way as in other widgets (fig. 18, fig. 19).
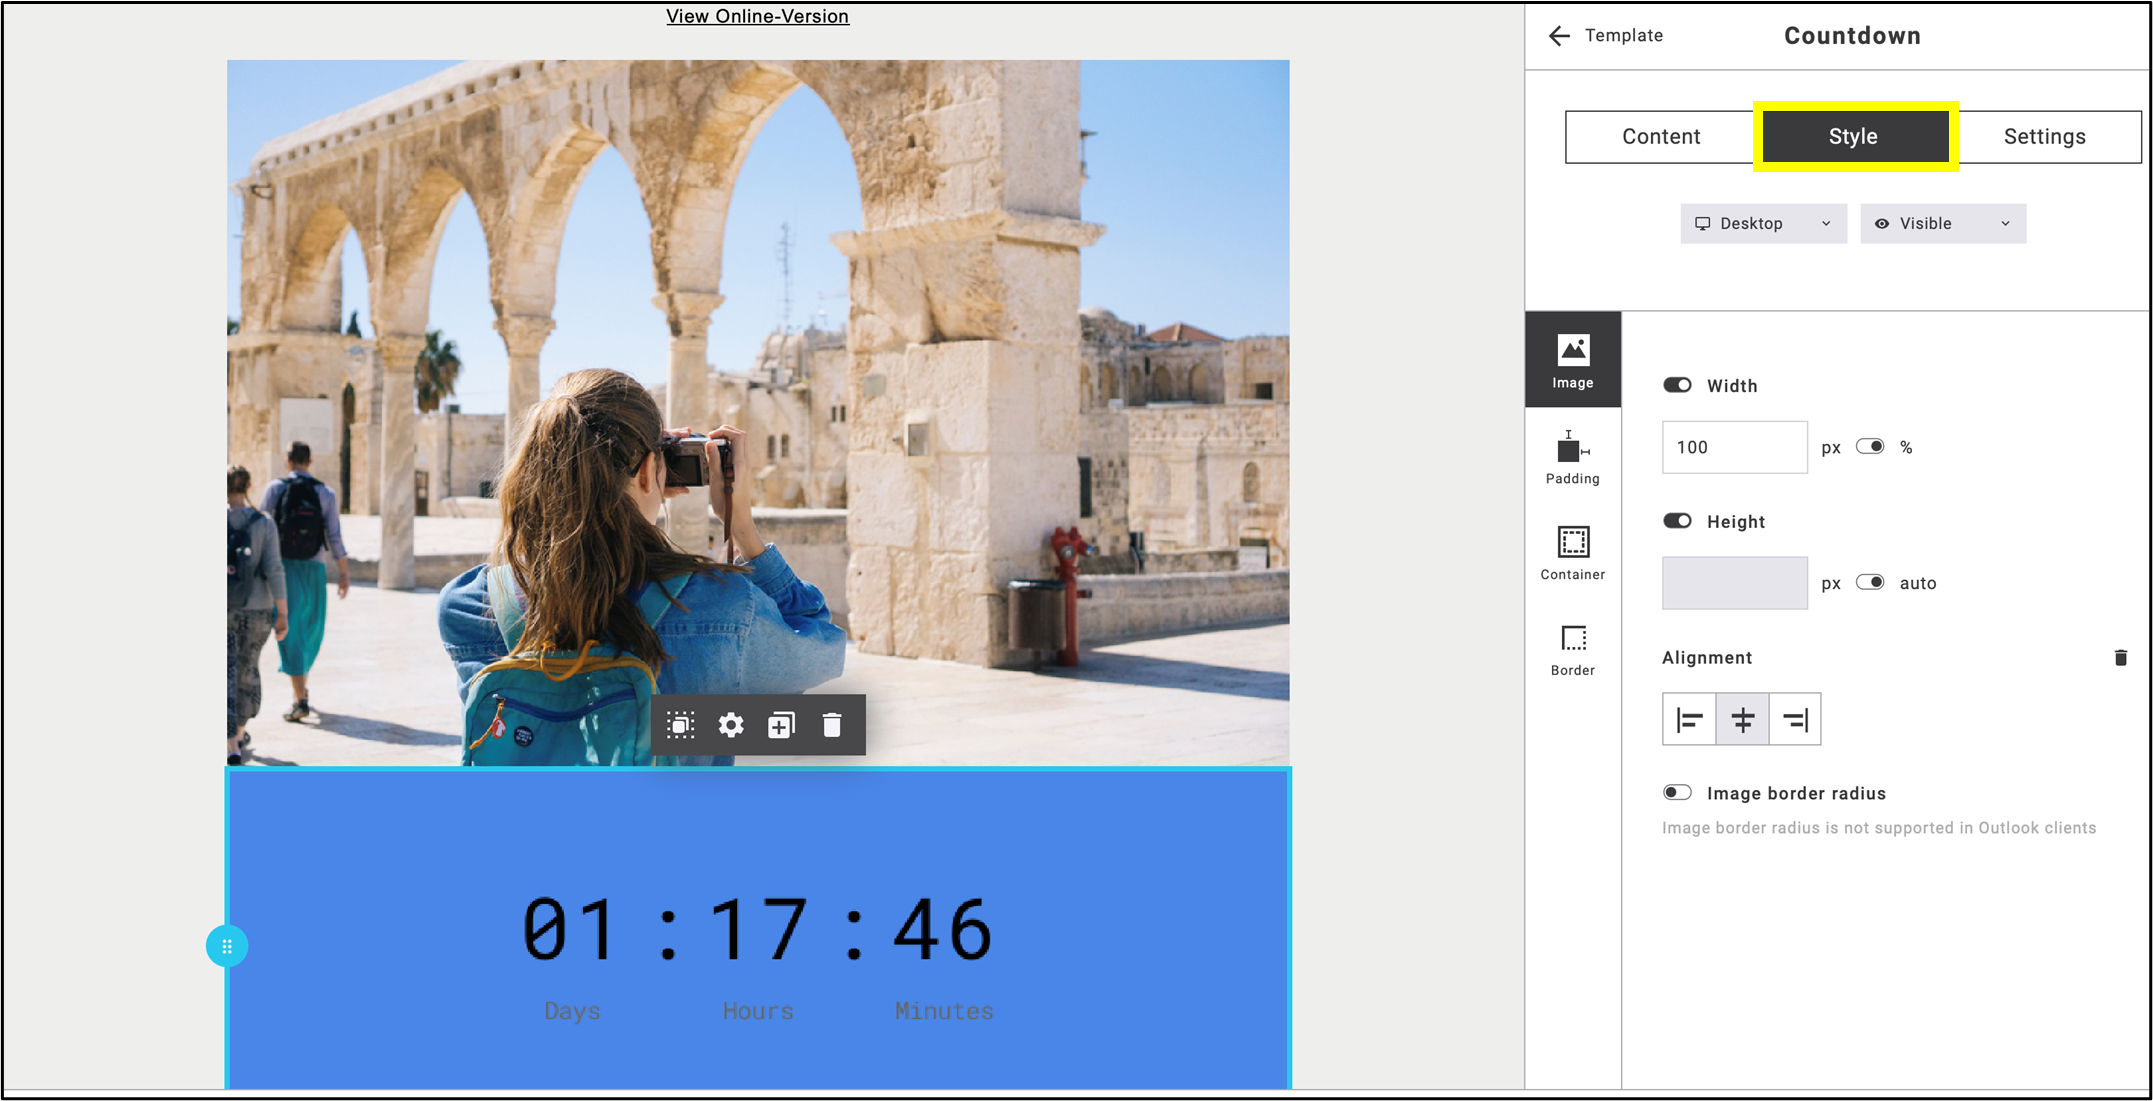
Fig. 18: Style settings work the same way as in other widgets.
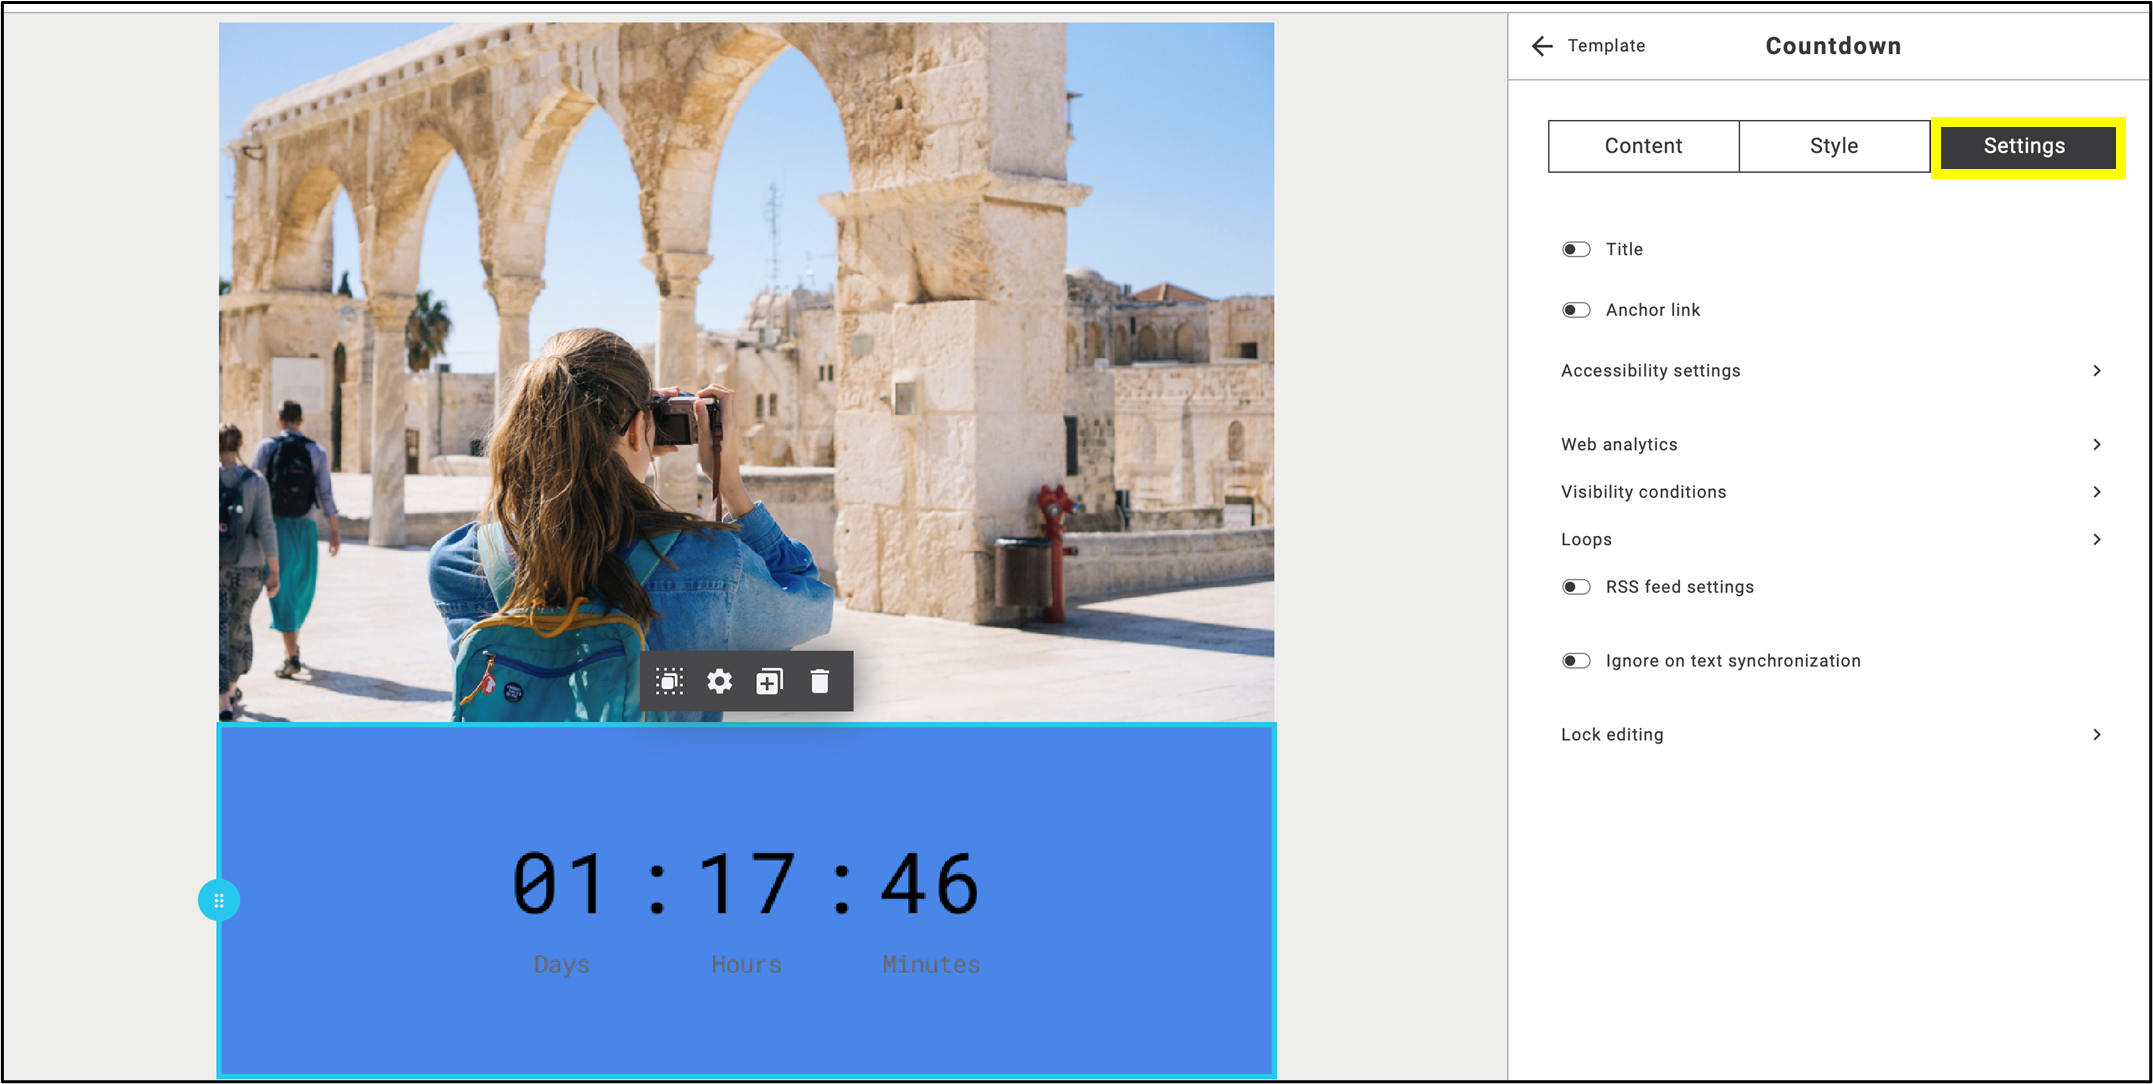
Fig. 19: Configure the countdown timer settings in the email with a few clicks.
You can use up to three countdown timers for free; additional timers may incur extra costs. The completed countdown timer is editable by clicking on its name (fig. 20).

Fig. 20: Click the countdown timer’s name to edit it. Limitations: 3 countdown timers.