Im Maileon Help-Center finden Sie umfassende Dokumentationen zu unserem System.
Beliebte Suchanfragen: Importe | Rest-API | Integrationen | SMS
-
Maileon Anleitungen
-
-
- Bald verfügbar
-
-
-
-
- 1. Basiseinstellungen
- 2. Template Editor2.0
- 3. Inhalt im Editor2.0 bearbeiten
- 3a - Editor 2.0 - App Panel Widgets
- 3b - Accessible Tables in the WYSIWYG Editor
- 3b - Barrierefreie Tabellen im WYSIWYG Editor (DE)
- 3d - SmartContent - Shopware 6 (DE)
- 3e - SmartContent - Shopware 6 (EN)
- 4. Verteilerliste auswählen
- 5. Qualitätssicherung
- 6. Newsletter-Versand
-
- Bald verfügbar
-
-
-
-
- Bald verfügbar
-
FAQs
-
Grundlagen
-
Für Entwickler
-
-
- Adding Unsubscription Reason to Already Unsubscribed Contact
- Contacts
- Count Active Contacts By Filter ID
- Count Contacts By Filter ID
- Create Contact
- Create Contact (JSON)
- Create Contact by External ID
- Create Contact by External ID (JSON)
- Create Contact Preference
- Create Contact Preference Category
- Create Custom Field
- Custom Contact Fields
- Delete All Contacts
- Delete Contact By Maileon ID
- Delete Contact Preference
- Delete Contact Preference Category
- Delete Contacts By Email
- Delete Contacts By External ID
- Delete Custom Field
- Delete Custom Field Values
- Delete Standard Field Values
- Delete Unsubscription-Marker
- Get Blocked Contacts
- Get Contact By Email
- Get Contact By Maileon ID
- Get Contact Preference
- Get Contact Preference Categories
- Get Contact Preference Category by Name
- Get Contacts
- Get Contacts By Email
- Get Contacts By External Id
- Get Contacts By Filter Id
- Get Count Contacts
- Get Custom Fields
- Get Preferences of Contact Preferences Category
- Get Unsubscription-Marker
- Rename Custom Field
- Set Unsubscription-Marker
- Standard Contact Fields
- Synchronize Contacts
- Synchronize Contacts Error Codes
- Unsubscribe Contact By Maileon Id
- Unsubscribe Contacts By Email
- Unsubscribe Contacts by External Id
- Update Contact By Email
- Update Contact By External ID
- Update Contact By Maileon ID
- Update Contact Preference
- Update Contact Preference Category
- Alle Artikel anzeigen ( 34 ) Artikel zusammenklappen
-
- Get Blocks
- Get Bounces
- Get Clicks
- Get Conversions
- Get Filtered Contacts
- Get Mailing Summaries
- Get Opens
- Get Recipients
- Get Replies
- Get Revenue
- Get Subscribers
- Get Unique Bounces
- Get Unique Clicks
- Get Unique Conversions
- Get Unique Opens
- Get Unsubscription Reasons
- Get Unsubscriptions
- Social Networks List
- Alle Artikel anzeigen ( 3 ) Artikel zusammenklappen
-
- Add Mailing Blacklist to Mailing
- Copy Mailing
- Create Dispatching
- Create Mailing
- Delete Mailing
- Delete Mailing Blacklist from Mailing
- Delete Trigger
- Get CMS2 Mailing As Zip
- Get Dispatching
- Get limit on number of contacts
- Get Mailing Archive URL
- Get Mailing Blacklists for Mailing
- Get Mailing ID By Name
- Get Mailing Report URL
- Get Mailing Thumbnail
- Get Mailing Thumbnail URL
- Get Mailings By Creator Name
- Get Mailings By Keywords
- Get Mailings By Schedule Time
- Get Mailings By States
- Get Mailings By Subject
- Get Mailings By Types
- Get Preview
- Get Preview Text
- Get Template
- Get Templates for CMS2
- Get The Reply-To Address
- Mailing – Add Attachment
- Mailing – Add Custom Mailing Properties
- Mailing – Copy Attachments
- Mailing – Create Schedule
- Mailing – Delete Attachment
- Mailing – Delete Attachments
- Mailing – Delete Schedule
- Mailing – Disable QoS Checks
- Mailing – Enable Target Group Update
- Mailing – Fill RSS SmartMailing Tags
- Mailing – Get “Ignore Permission” State
- Mailing – Get “Post Sendout Cleanup” State
- Mailing – Get Archival Duration
- Mailing – Get Attachment
- Mailing – Get Attachments
- Mailing – Get Count Attachments
- Mailing – Get DOI Mailing Key
- Mailing – Get HTML
- Mailing – Get List of Custom Mailing Properties
- Mailing – Get Locale
- Mailing – Get Mailing Domain
- Mailing – Get Max Attachment Size
- Mailing – Get Max Content Size
- Mailing – Get Name
- Mailing – Get Recipient Alias
- Mailing – Get result for Link Quality Check
- Mailing – Get result for Message Size Quality Check
- Mailing – Get result for Personalization Quality Check
- Mailing – Get result for Spam Quality Check
- Mailing – Get results for Approval Sendout Quality Check
- Mailing – Get results for Bounce Quality Check
- Mailing – Get results for Display Quality Check
- Mailing – Get results for Image Quality Check
- Mailing – Get results for Test Mail Sendout
- Mailing – Get Schedule
- Mailing – Get Sender Address
- Mailing – Get Sender Alias
- Mailing – Get Speed Level
- Mailing – Get State
- Mailing – Get Subject
- Mailing – Get Tags
- Mailing – Get Target Group Id
- Mailing – Get Target Group Update status
- Mailing – Get Text
- Mailing – Get Tracking Duration
- Mailing – Get Tracking Strategy
- Mailing – Get Type
- Mailing – Is Sealed
- Mailing – Remove Custom Mailing Property
- Mailing – Send Approval Mail to Targetgroup
- Mailing – Send Now
- Mailing – Send Testmail to Single Emailaddress
- Mailing – Send Testmail to Targetgroup
- Mailing – Set “Ignore Permission” State
- Mailing – Set “Post Sendout Cleanup” State
- Mailing – Set DOI Mailing Key
- Mailing – Set Html
- Mailing – Set Locale
- Mailing – Set Name
- Mailing – Set Recipient Alias
- Mailing – Set Sender Address
- Mailing – Set Sender Alias
- Mailing – Set Speed Level
- Mailing – Set Subject
- Mailing – Set Tags
- Mailing – Set Target Group Id
- Mailing – Set Text
- Mailing – Set Tracking Strategy
- Mailing – Start Bounce Quality Check
- Mailing – Start Image Quality Check
- Mailing – Start Link Quality Check
- Mailing – Start Message Size Quality Check
- Mailing – Start Personalization Quality Check
- Mailing – Start Quality Check
- Mailing – Update Custom Mailing Property
- Mailing – Update Schedule
- Reset Contents to Template
- Save CMS2 Mailing to Media Library
- Set limit on number of contacts before sending mailing
- Set Preview Text
- Set Template
- Set Template for CMS2 Mailing
- Set The Reply-To Address
- Upload CMS2 Mailing Contents
- Alle Artikel anzeigen ( 96 ) Artikel zusammenklappen
Einleitung: Aktive & geplante E-Mailings
Allgemeine Informationen
Unter dem Punkt Aktive & geplante E-Mailings finden Sie alle E-Mailings, die bereits für den Versand eingeplant wurden oder aktuell versendet werden.

Abb. 1: E-Mailing, das für den Versand terminiert wurde.
Aktive E-Mailings
Wird ein terminiertes E-Mailing aktuell versendet, so wird Ihnen dies hier angezeigt.
Versandzeitoptimierte E-Mailings
Haben Sie den Versand Ihres E-Mailings nicht mit einem festen Termin eingeplant, sondern Strecken den Versand beispielsweise über mehrere Stunden oder Tage, so wird Ihnen das E-Mailing nach Versandstart hier angezeigt.
Geplante E-Mailings
Sobald Sie einen Newsletter final bearbeitet haben und eine Versandart und -zeit festgelegt haben, so wird dieser hier aufgelistet und wartet auf seinen Versand.
Optionen für geplante E-Mailings
Am rechten Rand der Zeile eines geplantes E-Mailing stehen Ihnen vier Symbole zur Verfügung, mit denen Sie Änderungen und Versendungsoptionen vornehmen können (Abb. 2)

Abb. 2: Das Icon-Set für die Versendungsoptionen.
1. E-Mail-Generierungsdrosselung anpassen (Icon: Schraubenschlüssel)
Optimieren Sie Ihren Versand zeitlich. Über das Schraubenschlüssel-Symbol rufen Sie die Option zur Drosselung Ihres Versands auf. Geben Sie im Popup-Fenster in das Eingabefeld die Anzahl der gewünschten Versendungen pro Stunde ein und schließen Sie dann Ihre Eingabe mit einem Klick auf den Button „Änderungen übernehmen ab (Abb. 3).
 Abb. 3: Geben Sie zur Versendungsdrosselung die gewünschte Zahl der Versendungen pro Stunde ein.
2. Versendung anpassen (Icon: Stift)
Sie möchten Ihr E-Mailing vor dem Versand doch noch einmal bearbeiten? Nach Klick auf das Icon: Schraubenschlüssel wird dieses wieder in den Bereich E-MAILINGS > ENTWÜRFE zurückgesetzt. Vorher festgelegte Versandeinstellungen werden hierbei entfernt. Nun können Sie Ihren Entwurf ohne Eile korrigieren oder optimieren und anschließend erneut einplanen.
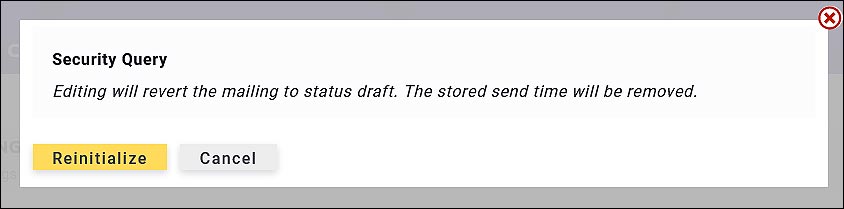
Abb. 4: Abfrage vor dem Zurücksetzen der Versendung in den Bereich „Entwürfe“.
3. Auskopplung einer Retargeting-Versendung (Icon: Zielscheibe)
Erstellen Sie bereits vor Versand Ihres E-Mailings eine Nachversendung. Basierend auf der gewählten Grundlage (Retargeting-Gruppe) wird dabei ein Kontaktfilter und eine Verteilerliste erstellt. Diese wird einer neuen Kopie der gewählten Versendung automatisch zugewiesen. Selbstverständlich können Sie die Kopie Ihres E-Mailings unter ENTWÜRFE individuell anpassen. Bitte beachten Sie, dass die Verteilerliste 0 Kontakte enthält, da die erstellte Verteilerliste erst kurz vor Versand aktualisiert wird.

Abb. 5: Auswahl der Gruppe für das Retargeting-Mailing.
3. Versendung kopieren (Icon: Blätter)
Nicht nur Entwürfe und bereits versendete, sondern auch geplante E-Mailings lassen sich kopieren. So können Sie bereits an weiteren Versendungen arbeiten.