
Im Maileon Help-Center finden Sie umfassende Dokumentationen zu unserem System.
Beliebte Suchanfragen: Importe | Rest-API | Integrationen | SMS
Data Extensions
1. Introduction
This documentation provides an overview of the Maileon Data Extensions functionality. If you have any further questions after reading this documentation, or if you’re interested in this feature, contact us at support@xqueue.com or reach out to your dedicated account manager.
Data Extensions are lists or databases containing a wide variety of information, with an optional reference to contacts within the account. The detailed data records stored in these extensions can be used in campaigns, automation workflows, and segmentation scenarios.
In other words, the Data Extension feature in Maileon allows you to store and use additional information beyond standard contact data. It functions as an extended data table that can be referenced dynamically throughout the platform.
For example, a news publisher could use a data extension to store article information, such as titles, descriptions, authors, and categories. This content could then be inserted into newsletters based on the recipient’s preferences. Following the same principle, a product catalogue can also be built and maintained using data extensions.
2. Default Settings of Data Extensions
Navigate to the Data section in Maileon and select Data Extensions (fig. 1).
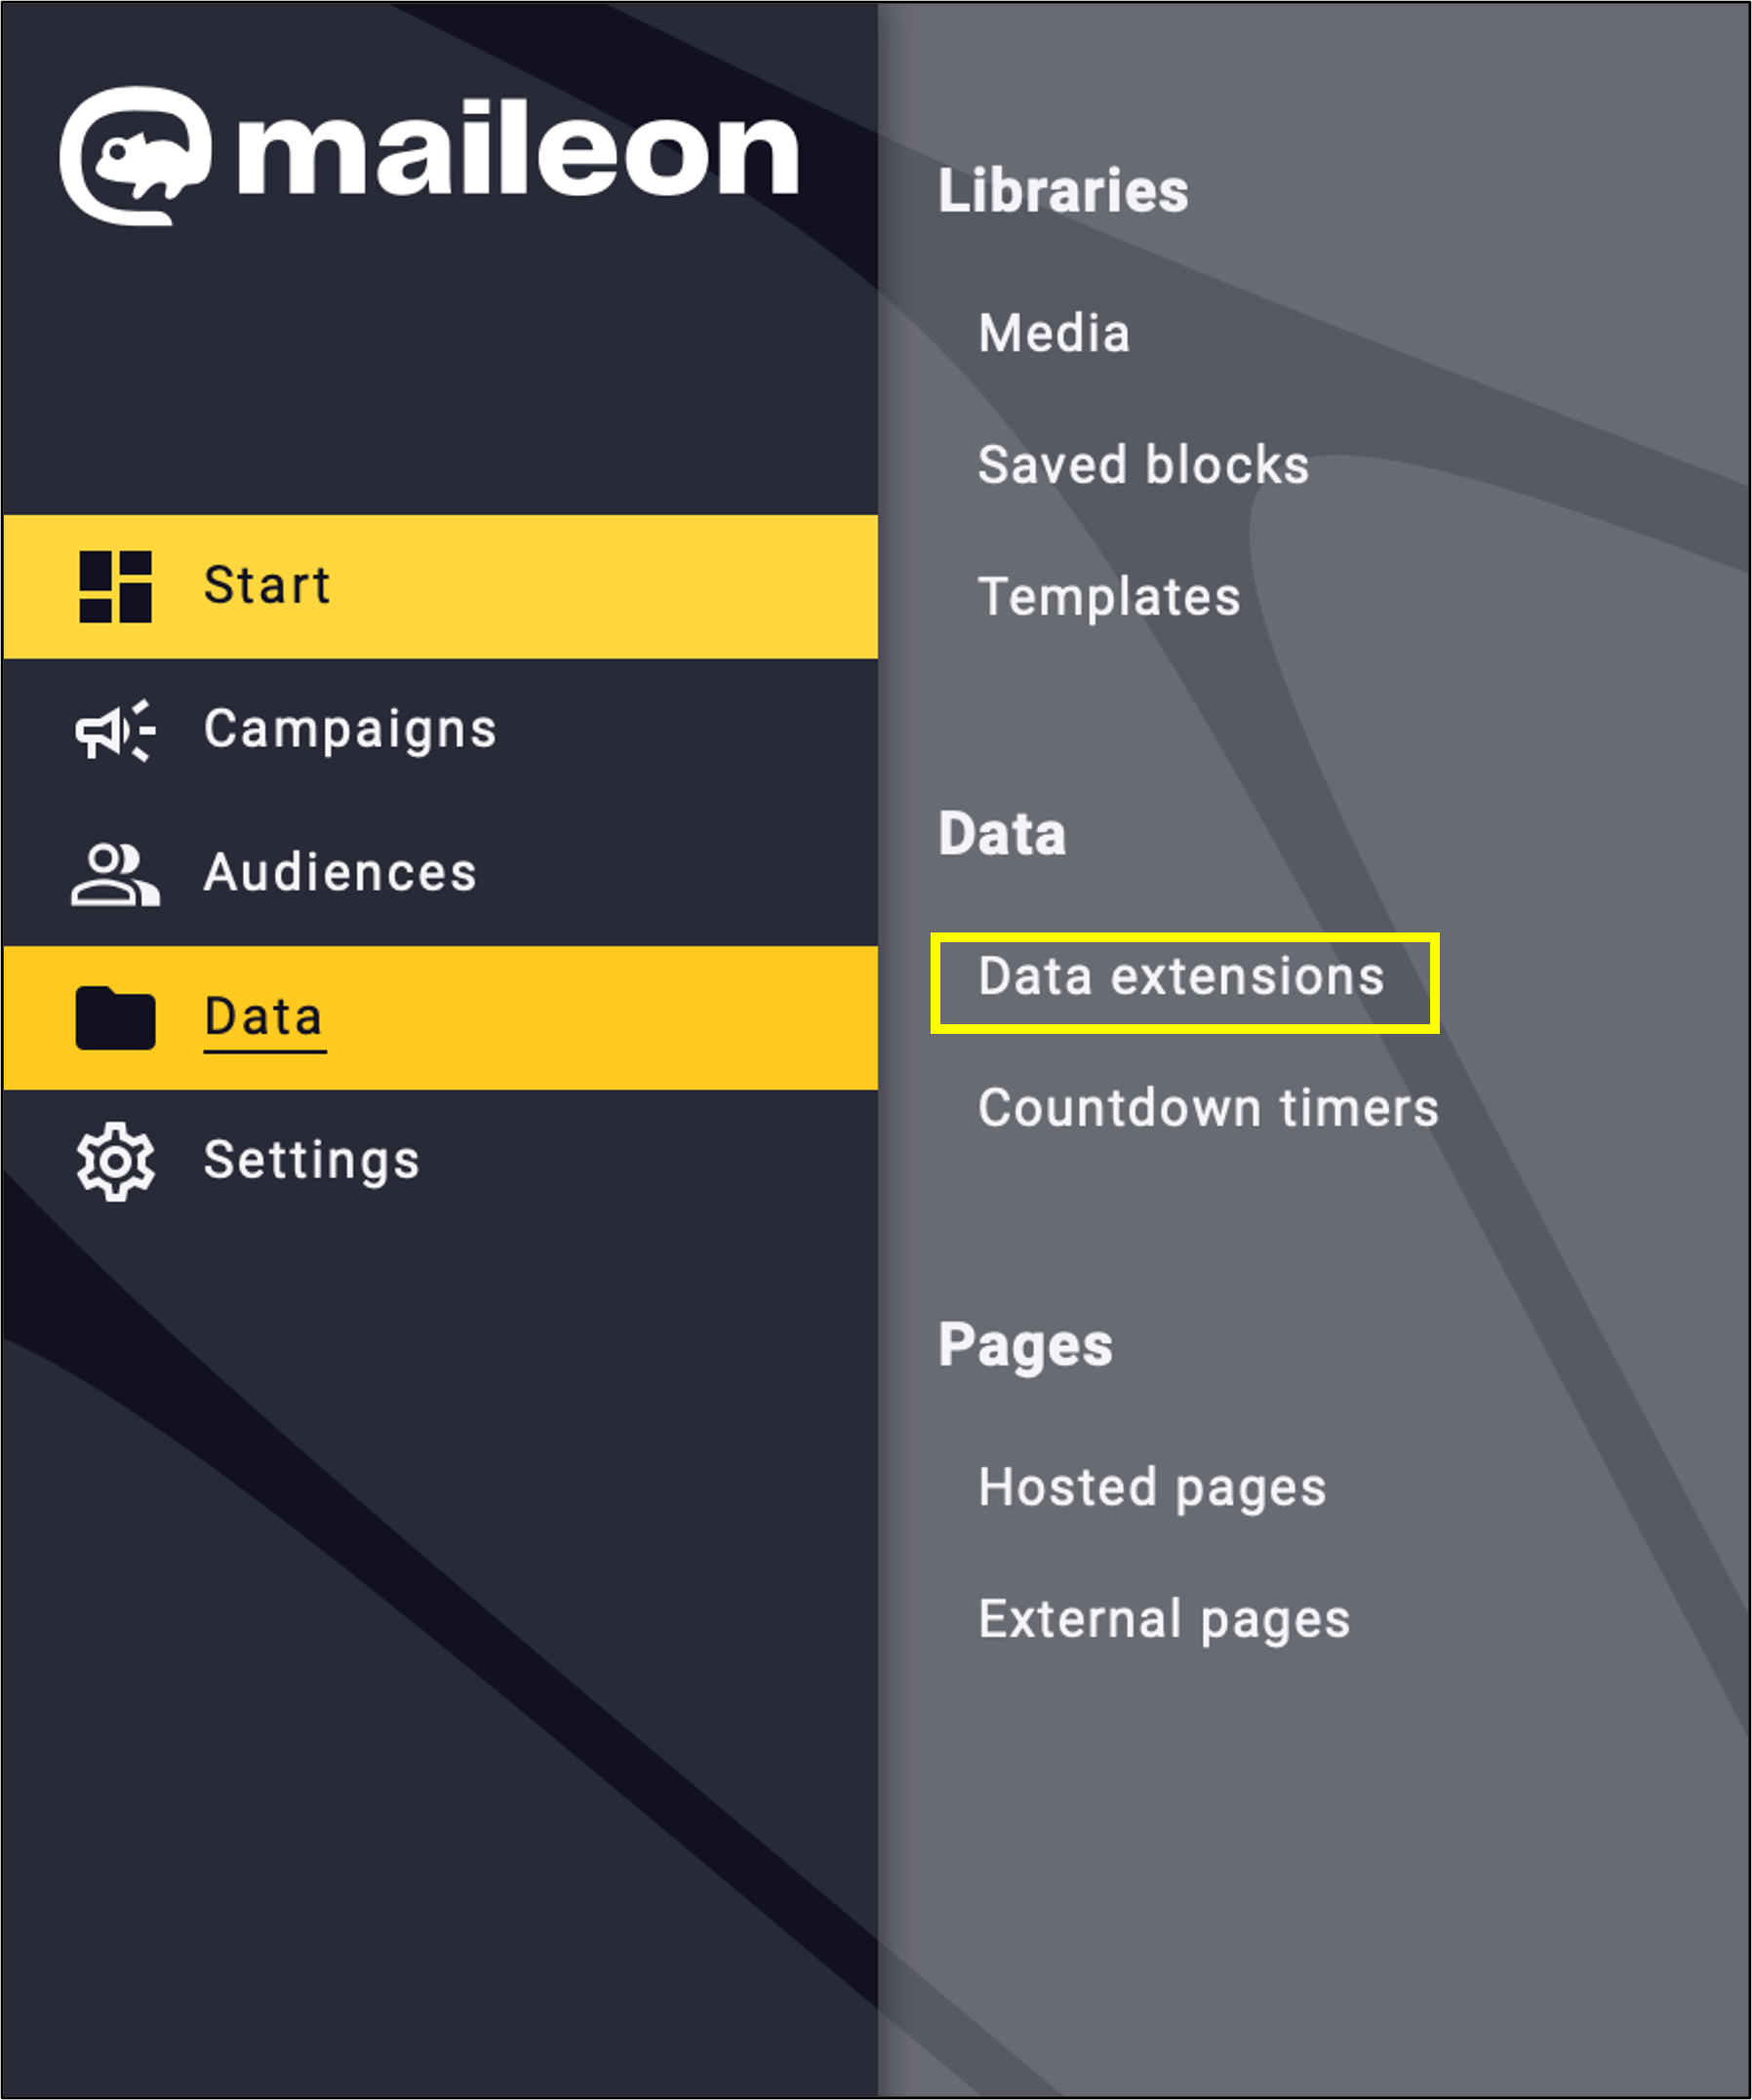
fig. 1: Find ‘Data extensions’ in ‘Data’ section of the dashboard.
To create a new data extension, click + Add Data Extension (fig. 2).
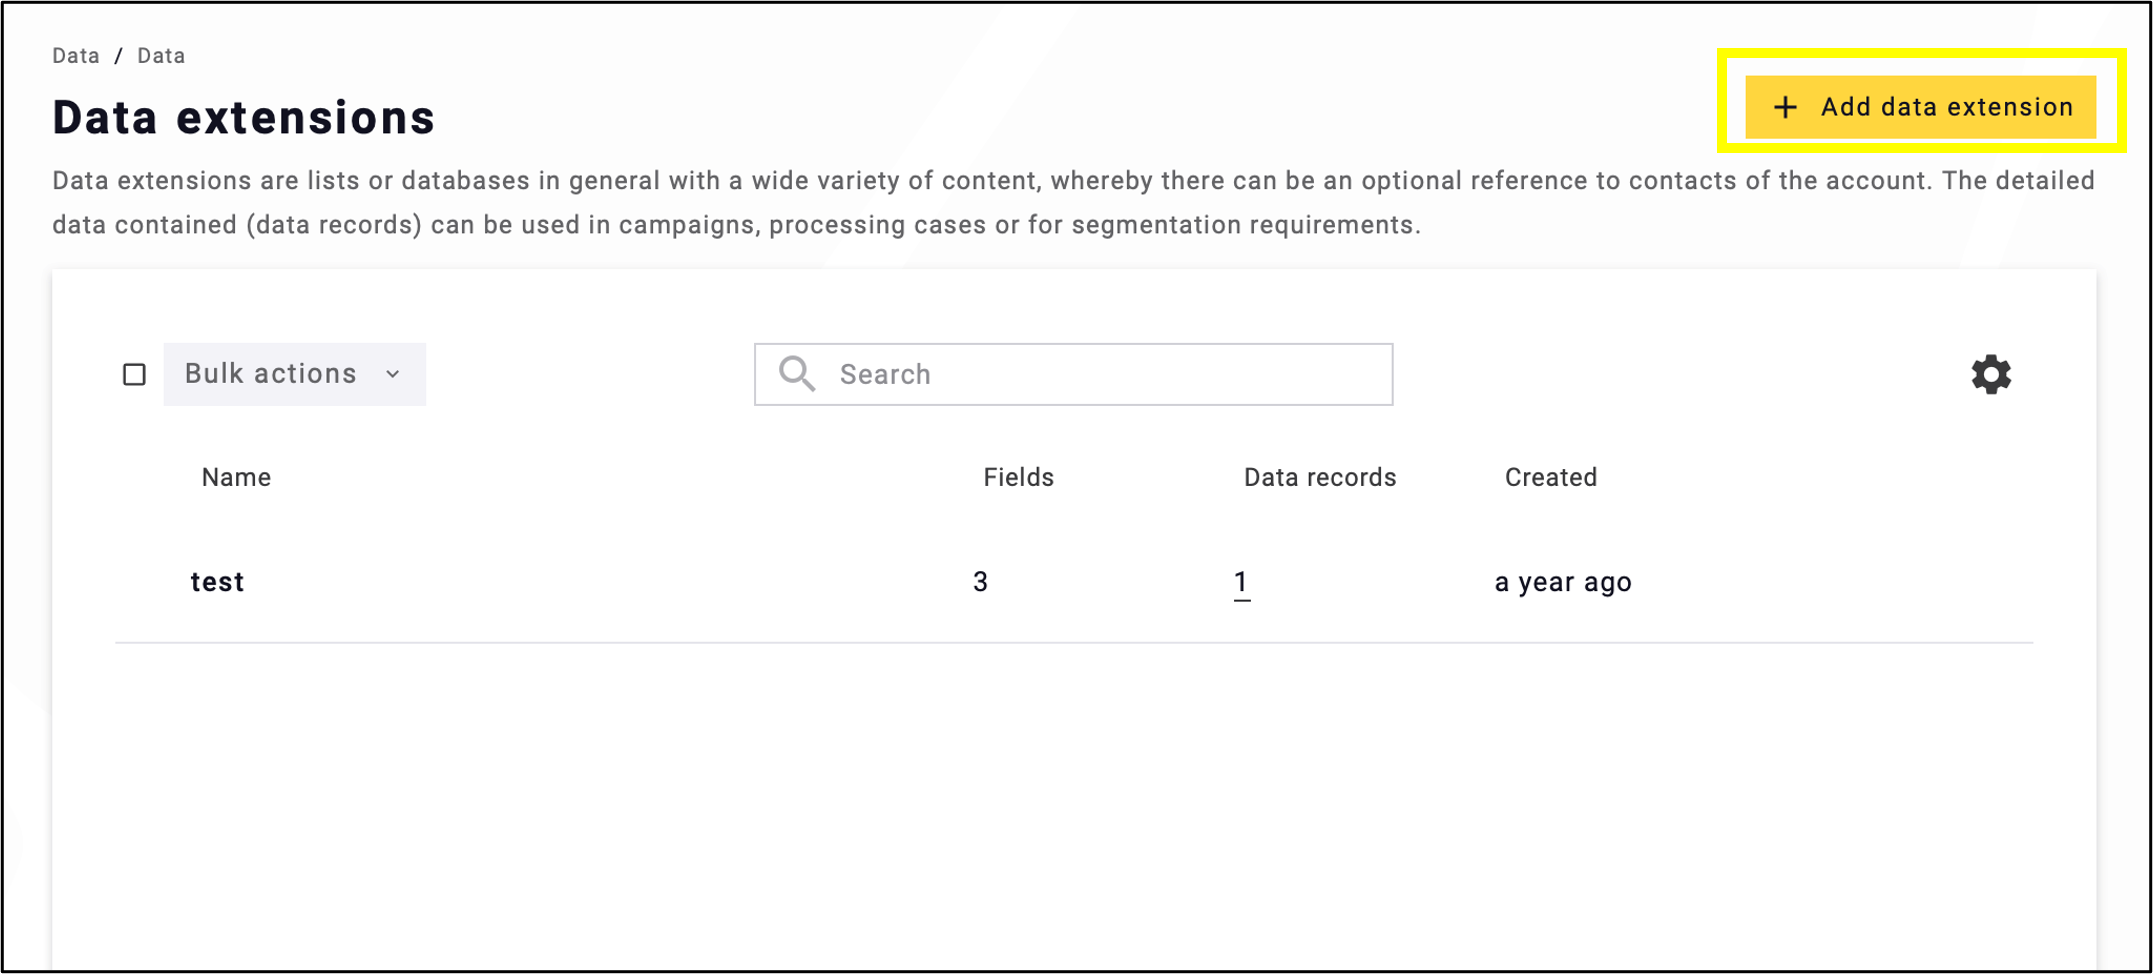
fig. 2: Click ’+Add data extension’ to start the process.
Provide a name for the data extension and add a description optionally. Choose the retention period, which defines when the stored data will be automatically deleted. Finally, add the required fields by clicking + Add Field (fig. 3).
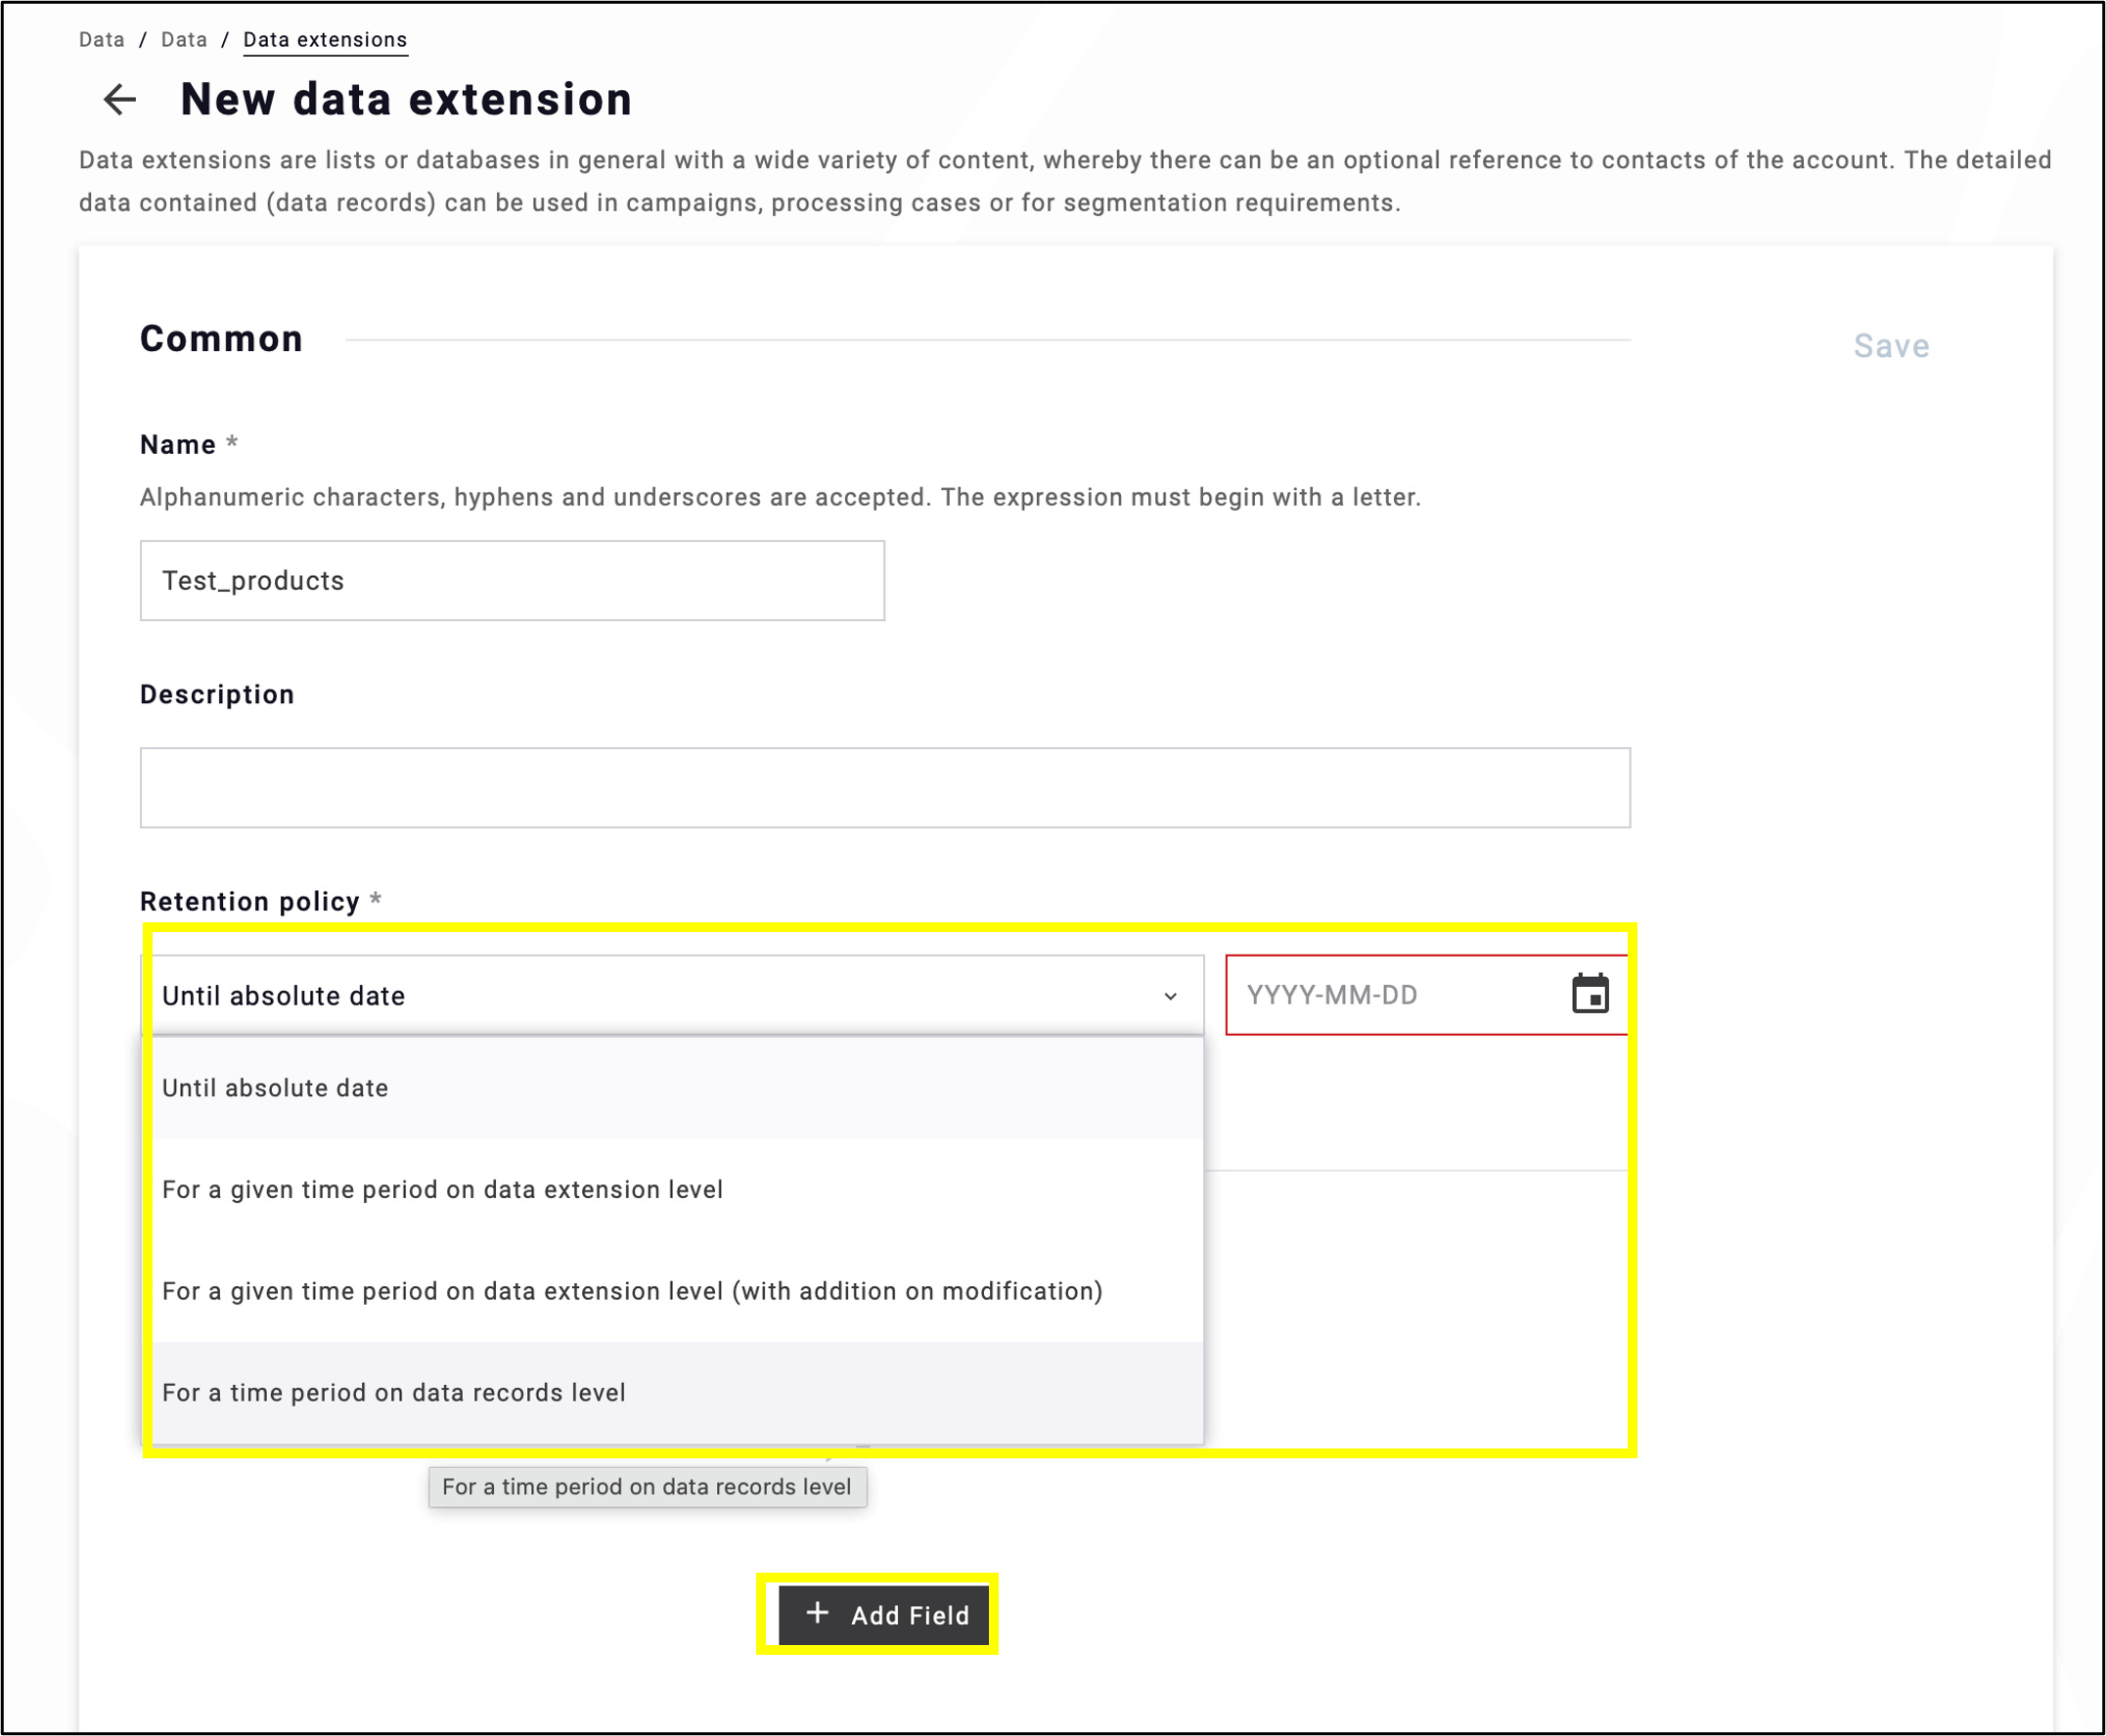
fig. 3: Selecting a retention policy is mandatory, as it determines how long the data will be stored before it is automatically deleted.
A variety of field types can be added to a data extension, ranging from Email Address to Timestamp fields (fig. 4).
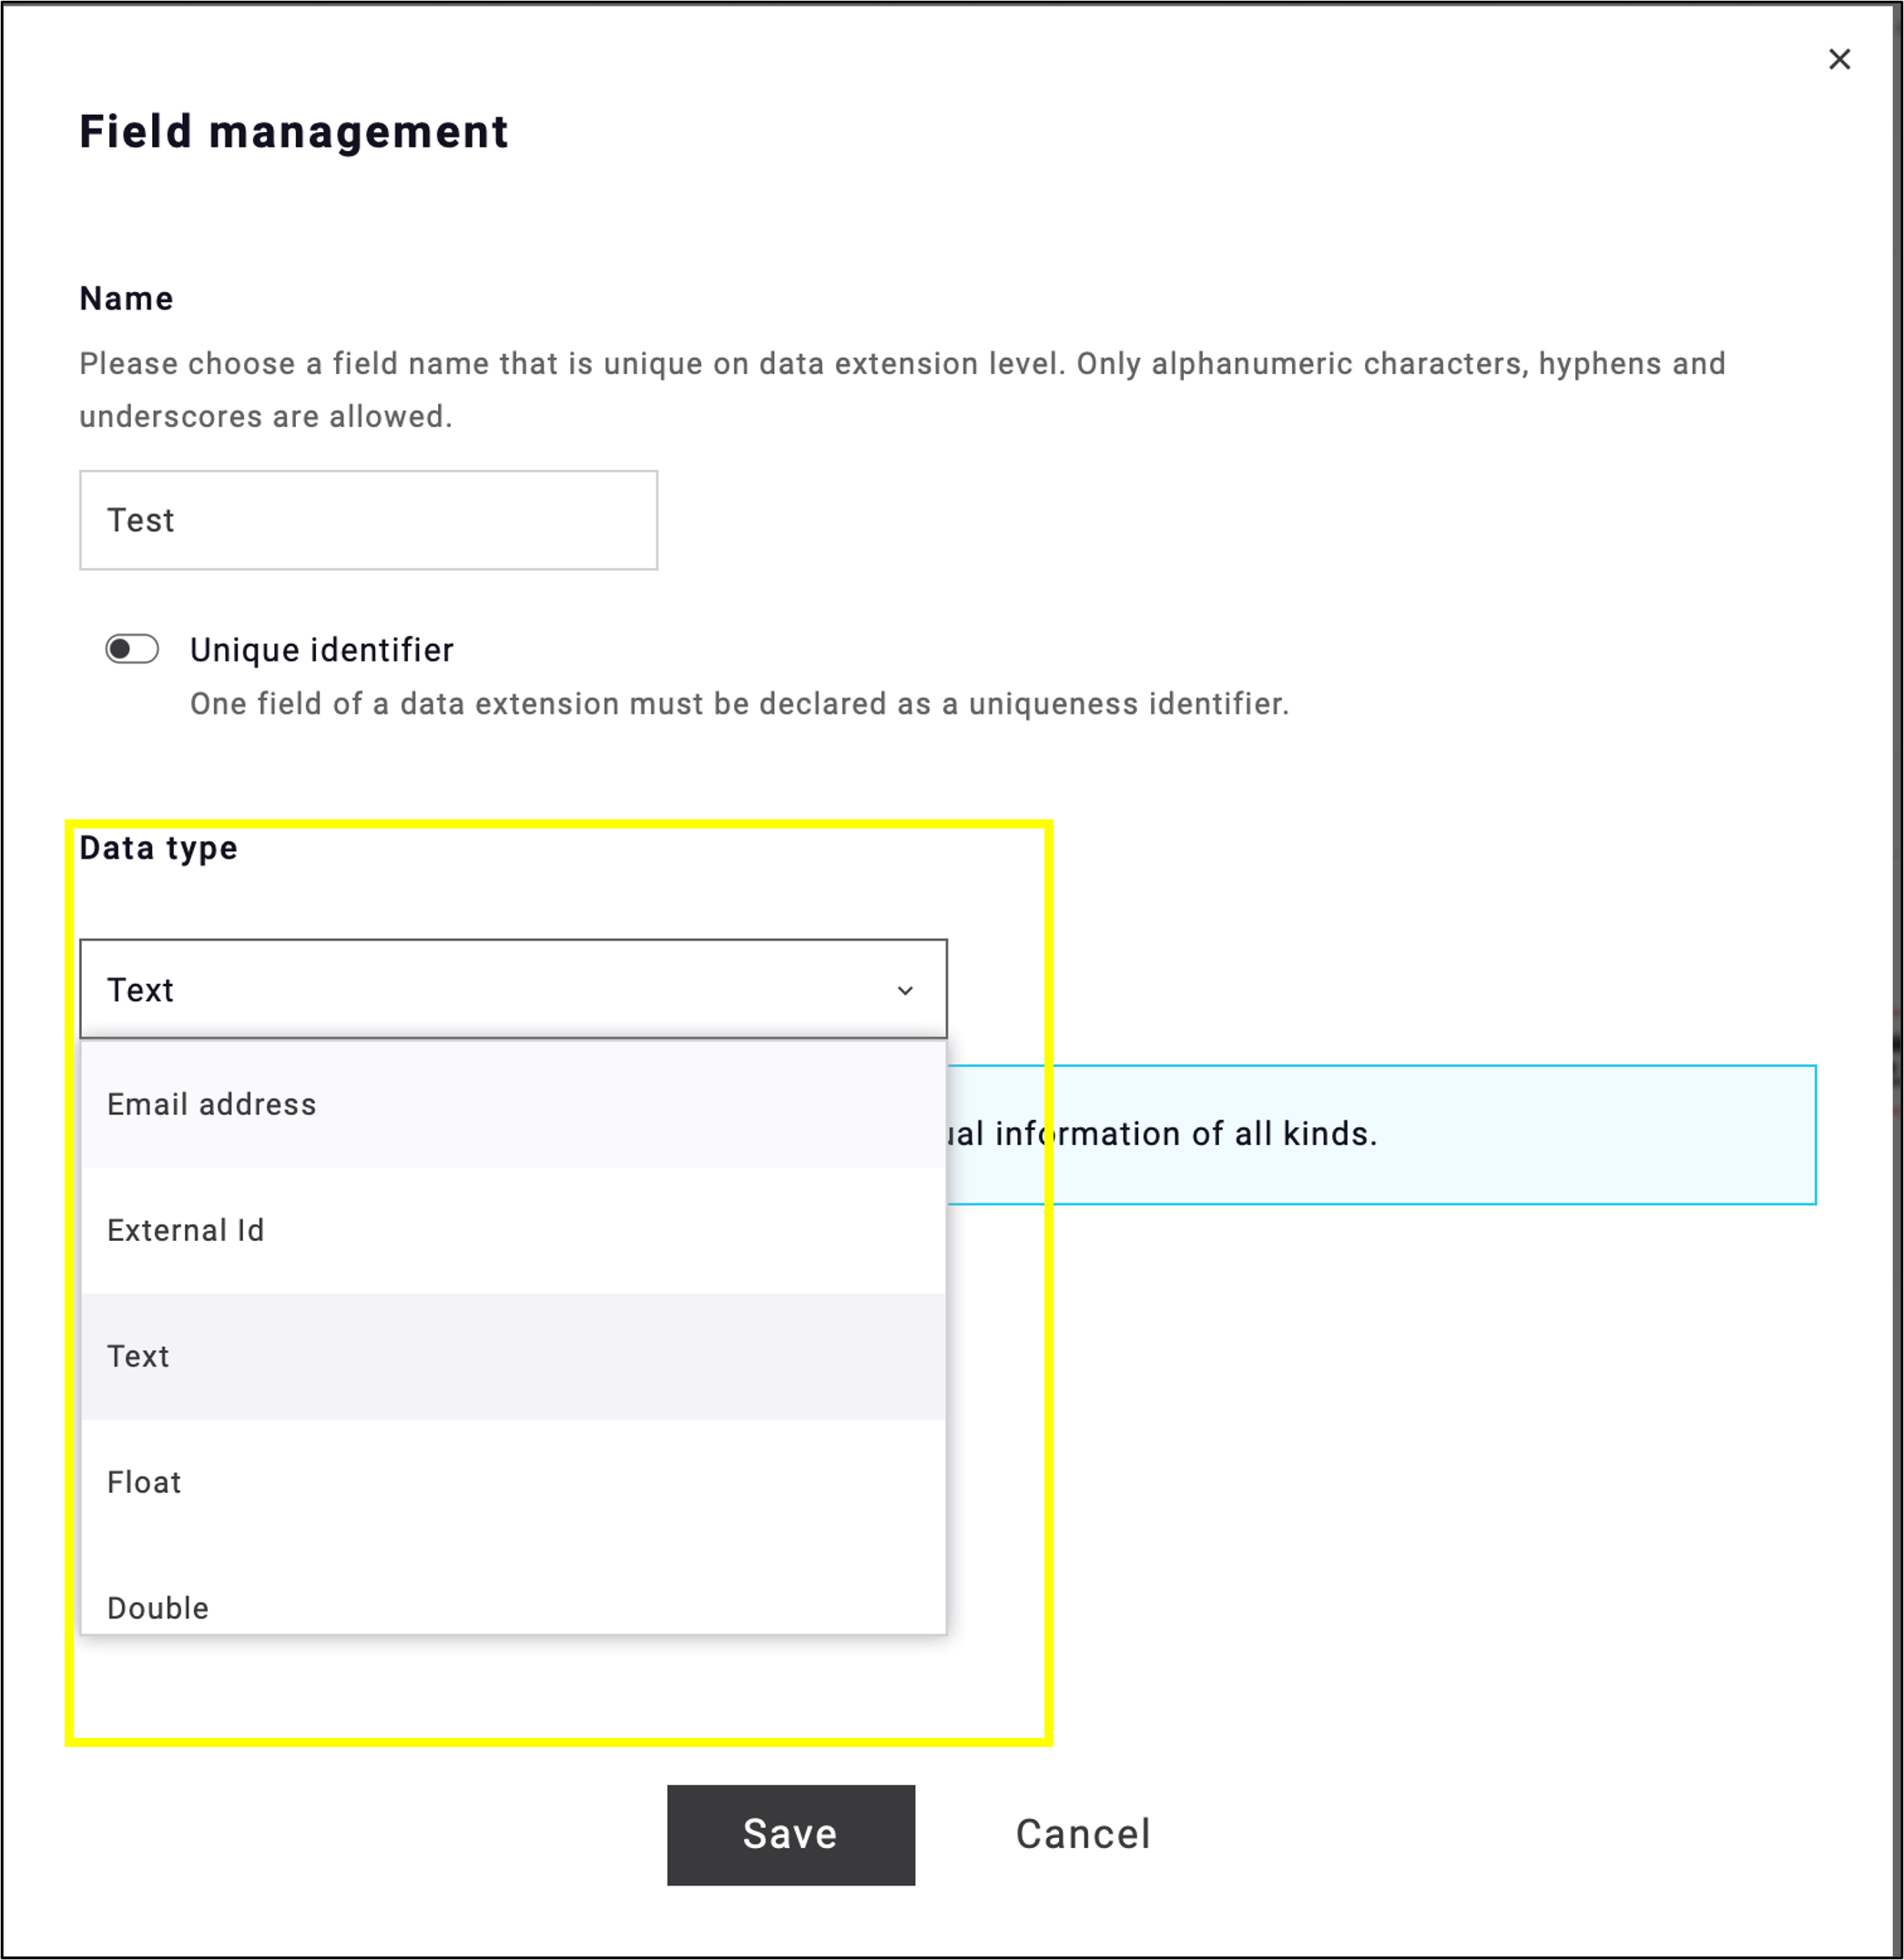
fig. 4: Define the required field types for your Data Extension.
Data Extension requires a unique identifier (ID). Without a unique ID, the system cannot distinguish between individual records. You can designate this identifier in this step and specify whether the field can be set as Nullable (fig. 5), which means the fields can be empty. Once you have completed the configuration, click Save.
Note: If an email address or external ID has not been explicitly defined as the unique identifier, the data extension will use the available value to establish the connection between records and contacts.
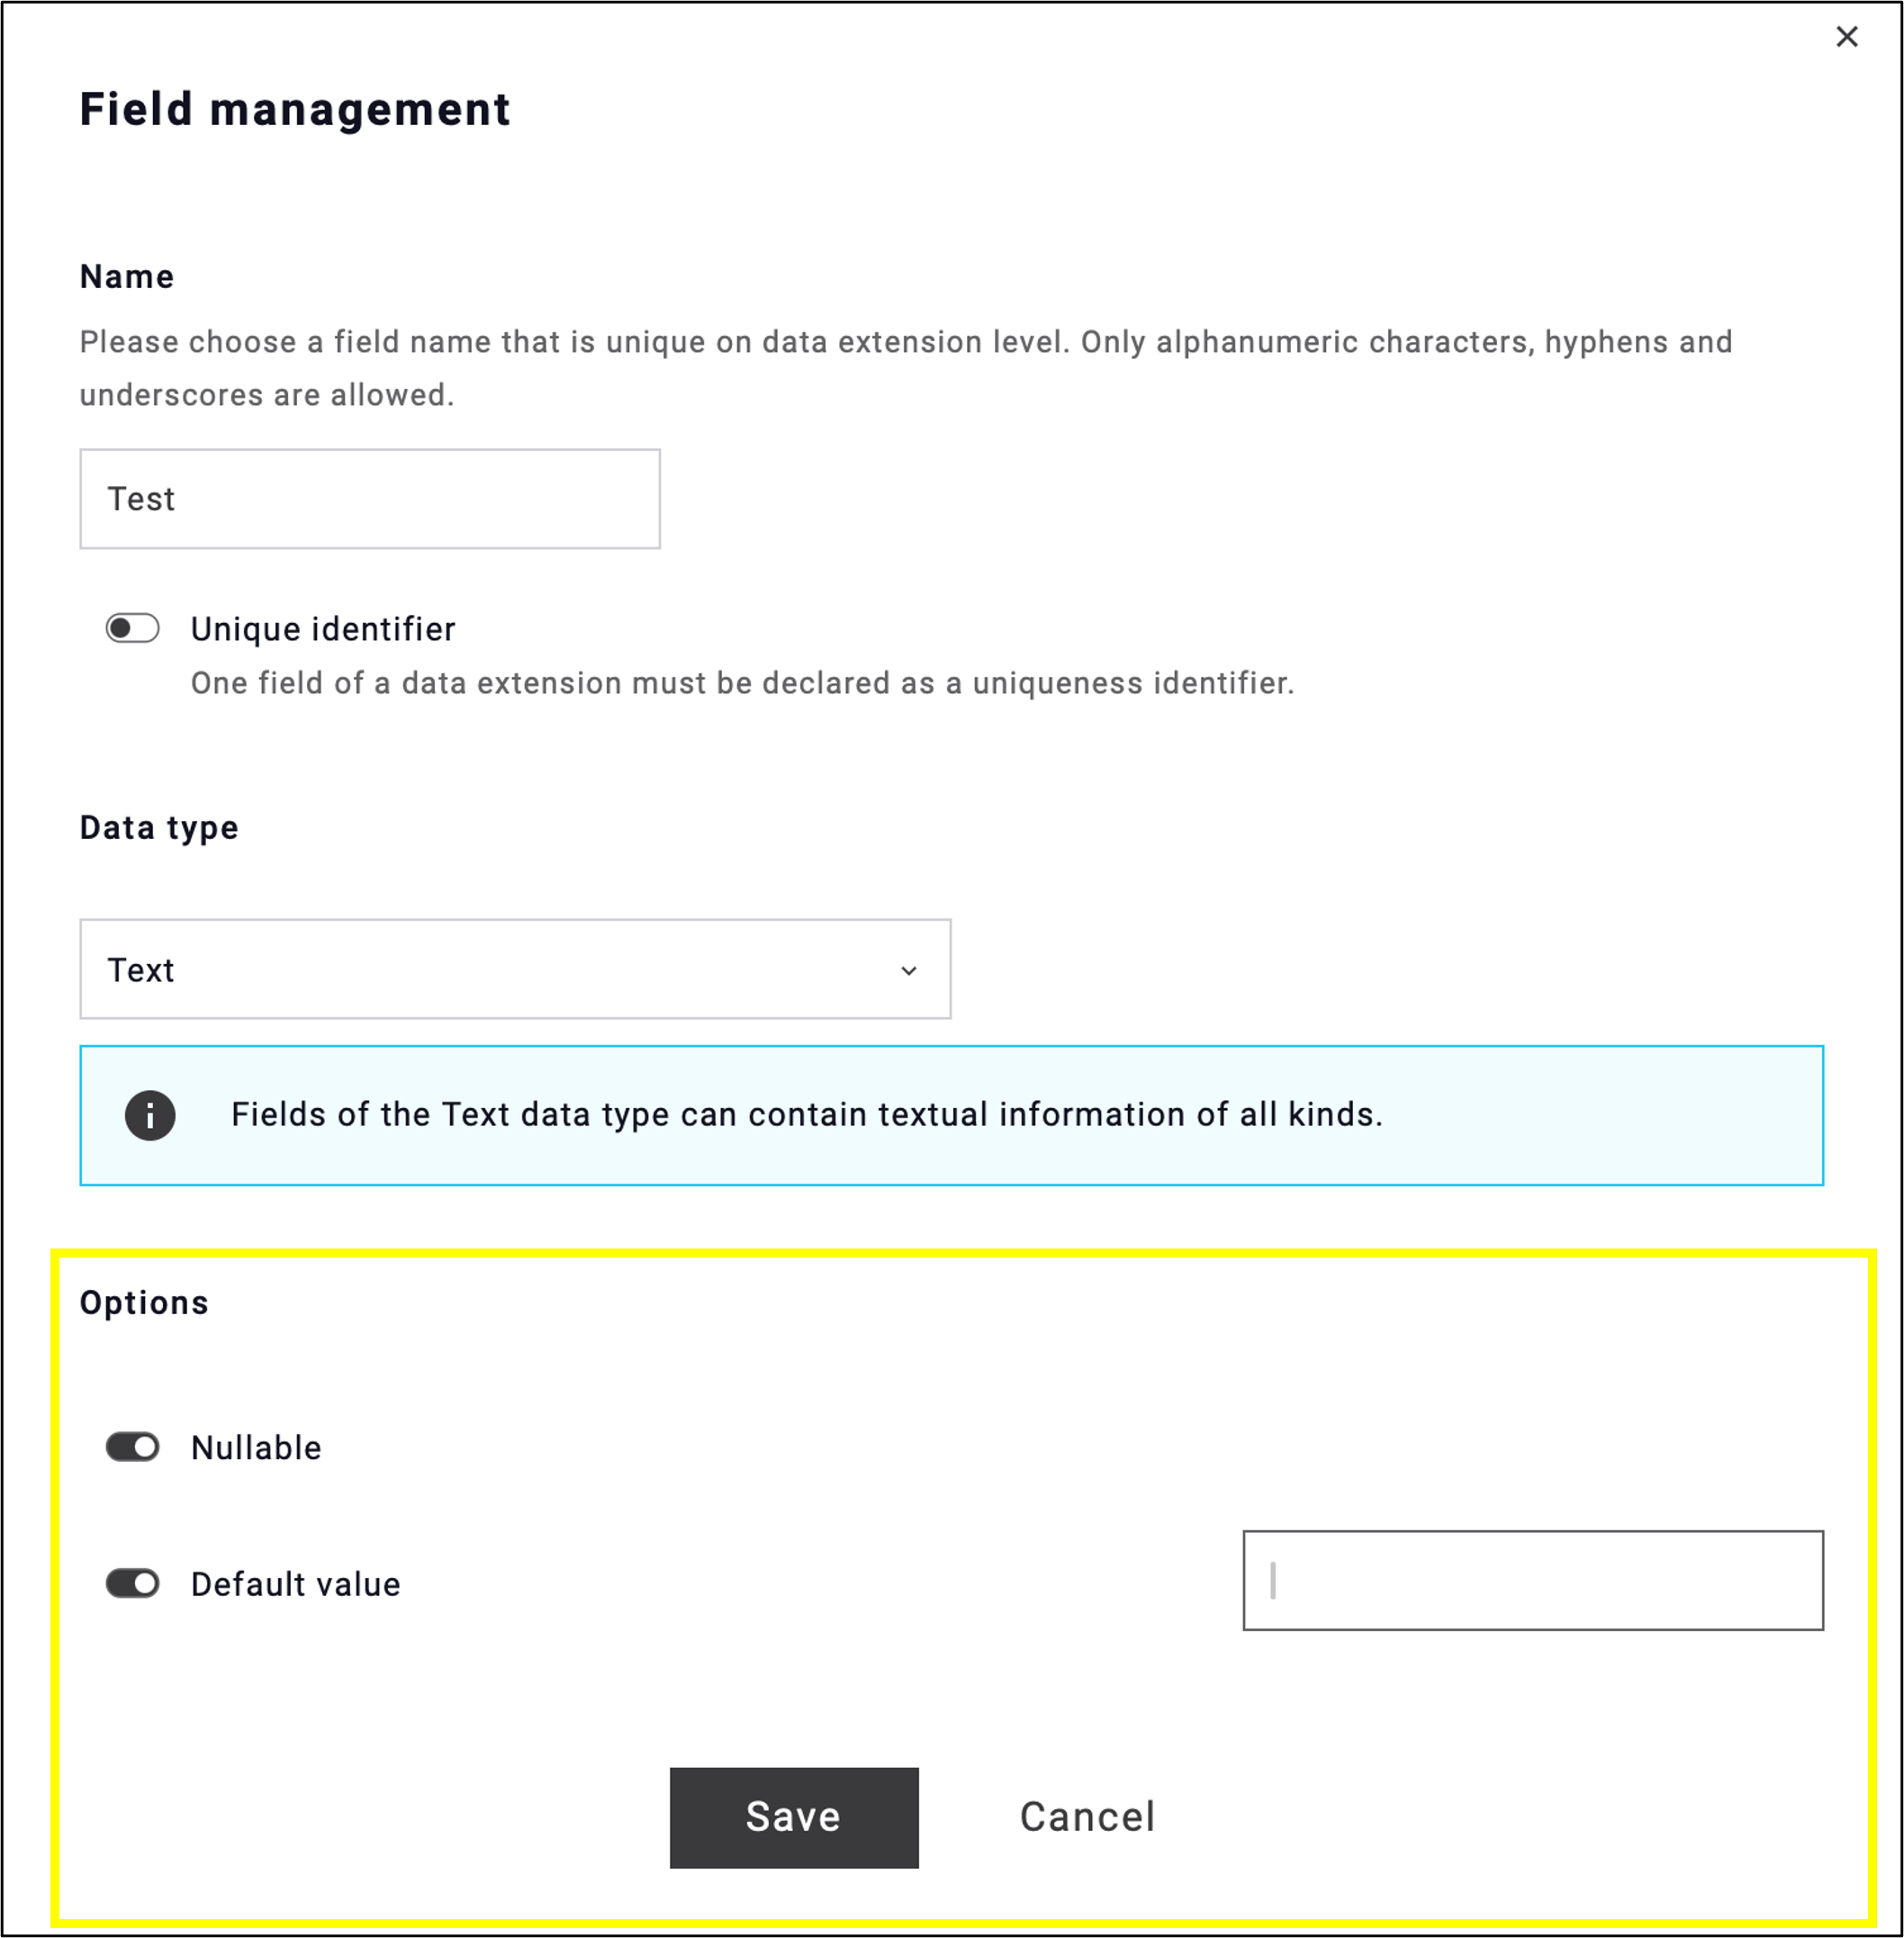
fig. 5: Define a unique identifier and configure whether the field can be nullable.
The completed data extensions are displayed on the middle tab, Data records (fig. 6).

fig. 6: Find the completed data records under ’Data records’ tab.
The third tab is Imports (fig. 7).
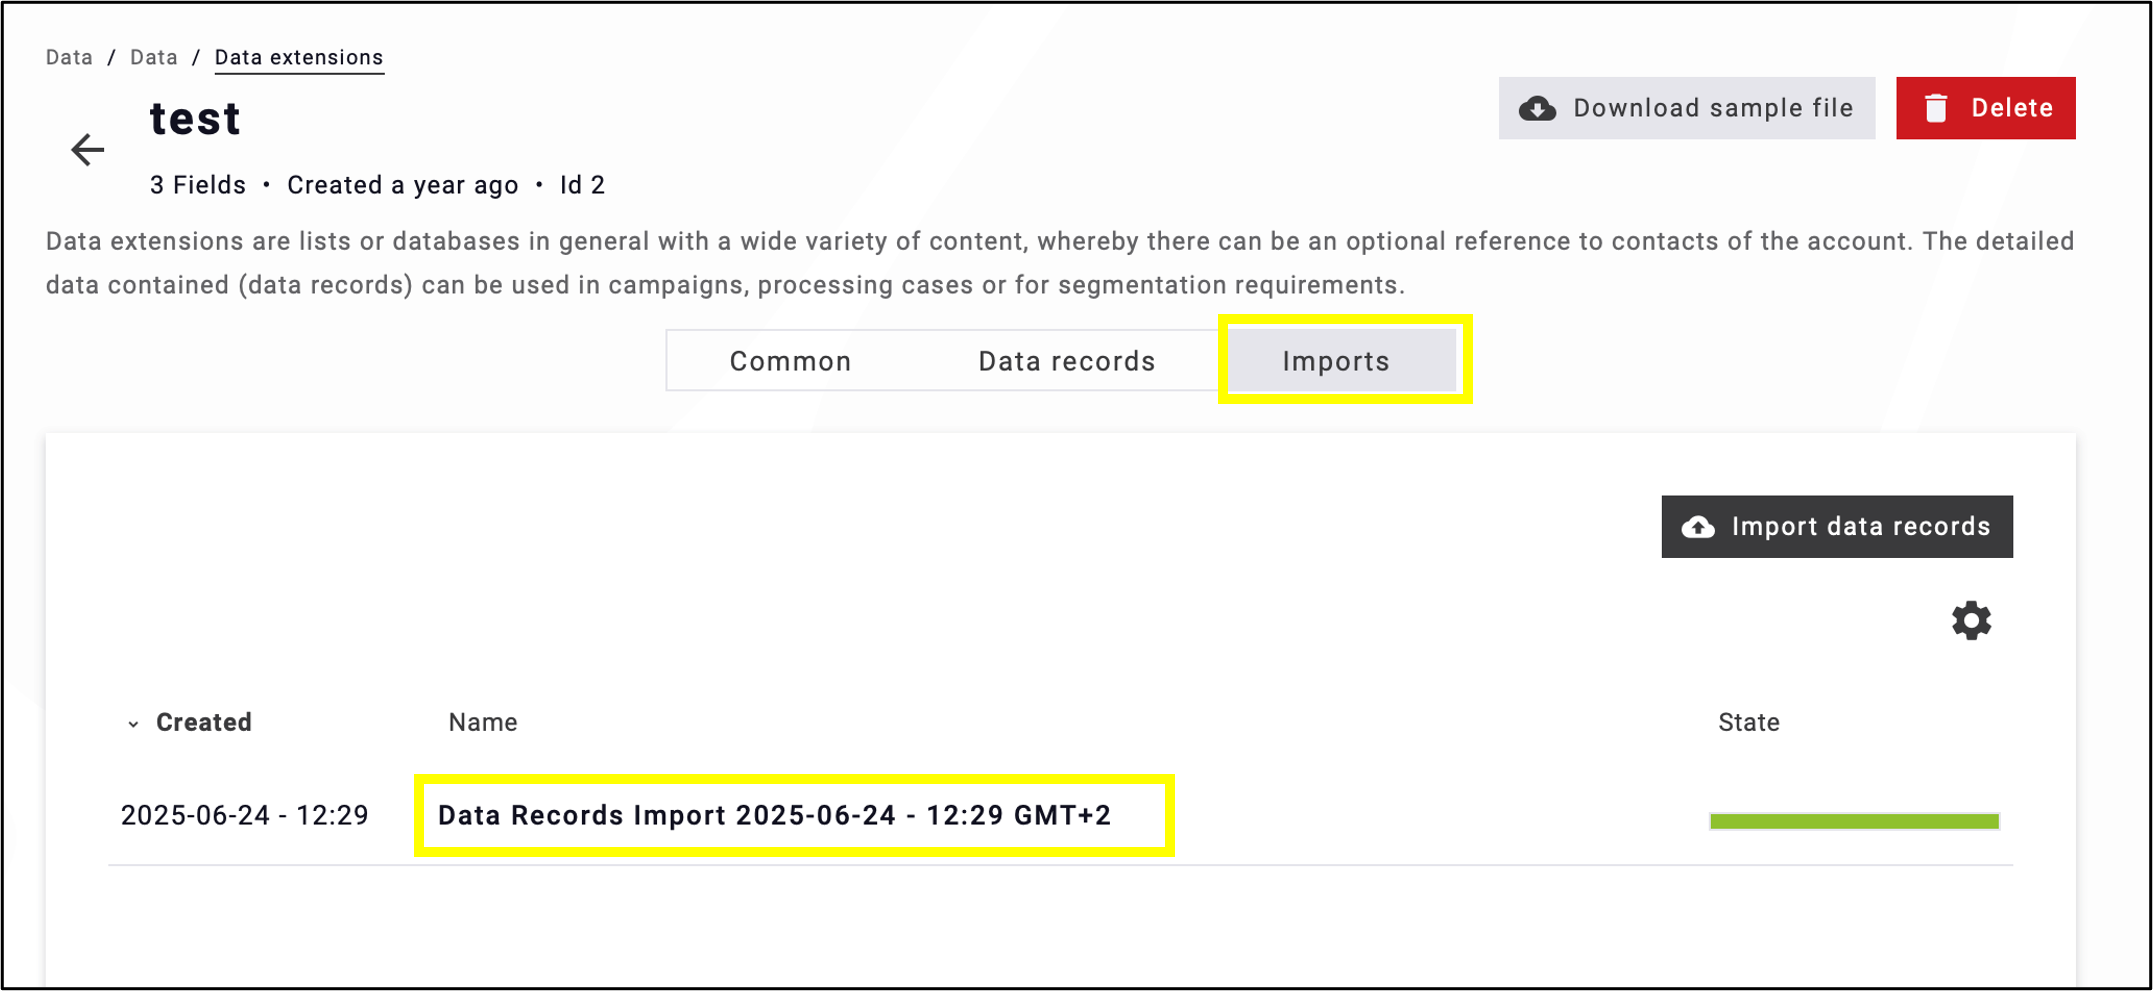
fig. 7: Click ’Data Records Import‘ in the ’Imports’ tab to display data record details.
When clicking on Data Records Import, it shows (fig. 8):
- how many rows were processed by the system
- the total number of data records
- the number of imported data records
- and whether any rows were skipped
![[OS1.1][VK1.2]fig. 8: Popup showing processed rows, total and imported records, and whether any rows were skipped.](https://support.maileon.com/wp-content/uploads/2026/07/Data_ExtensionsV2_Bild08.png)
fig. 8: Popup showing processed rows, total and imported records, and whether any rows were skipped.
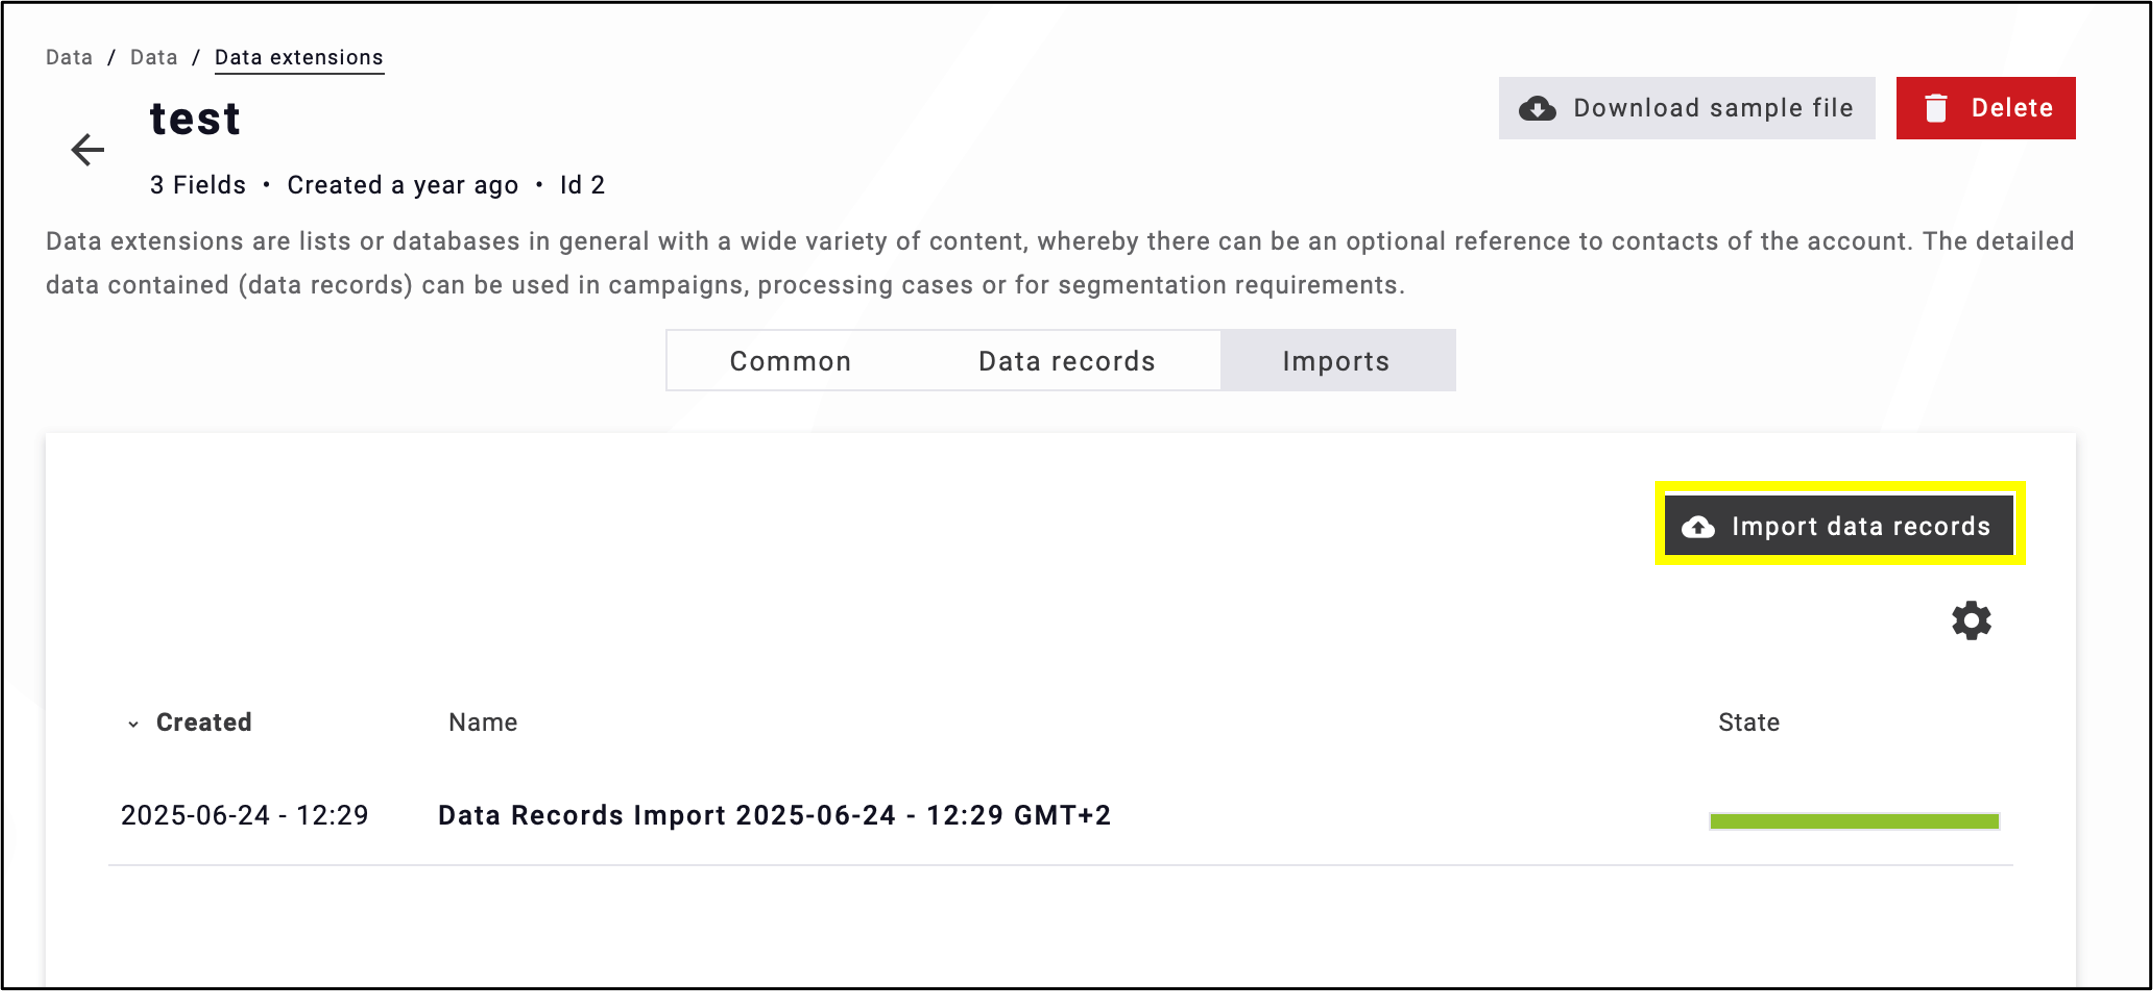 fig. 9: Enter new data by clicking ’Import data records’.This step can be performed manually or by dragging and dropping (fig. 10).
Note: Optionally download a template by clicking on the download icon, which shows the required format for entering the data. Once completed, the template can be uploaded back into the system.
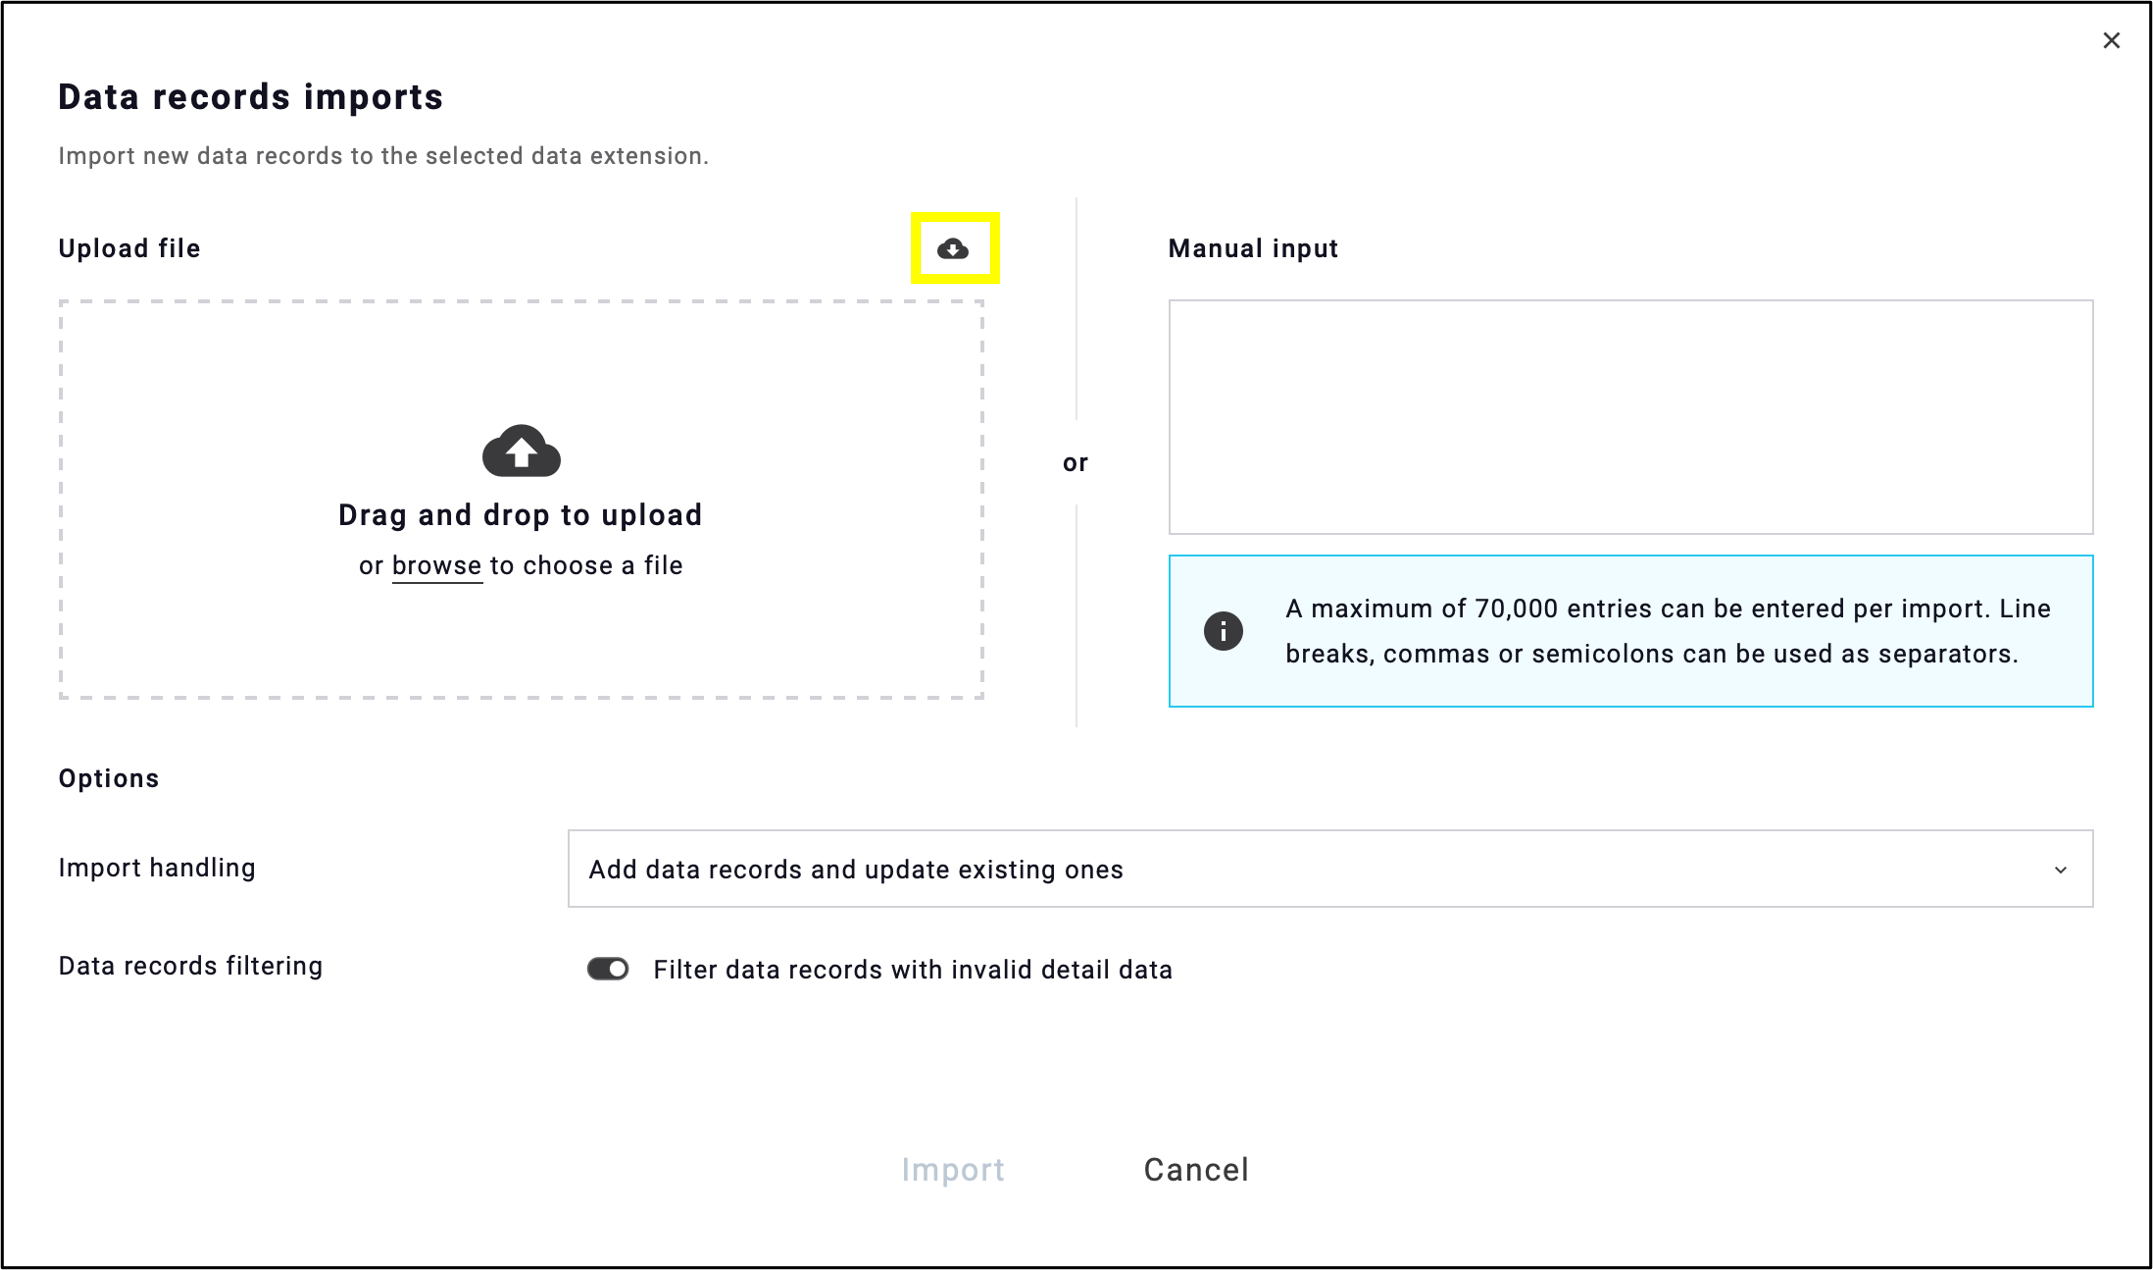
fig. 10: The download icon (cloud + arrow) allows you to download a template that can be filled in and uploaded back to the system.
Decide whether the system should update the existing data when adding new data (fig. 11).
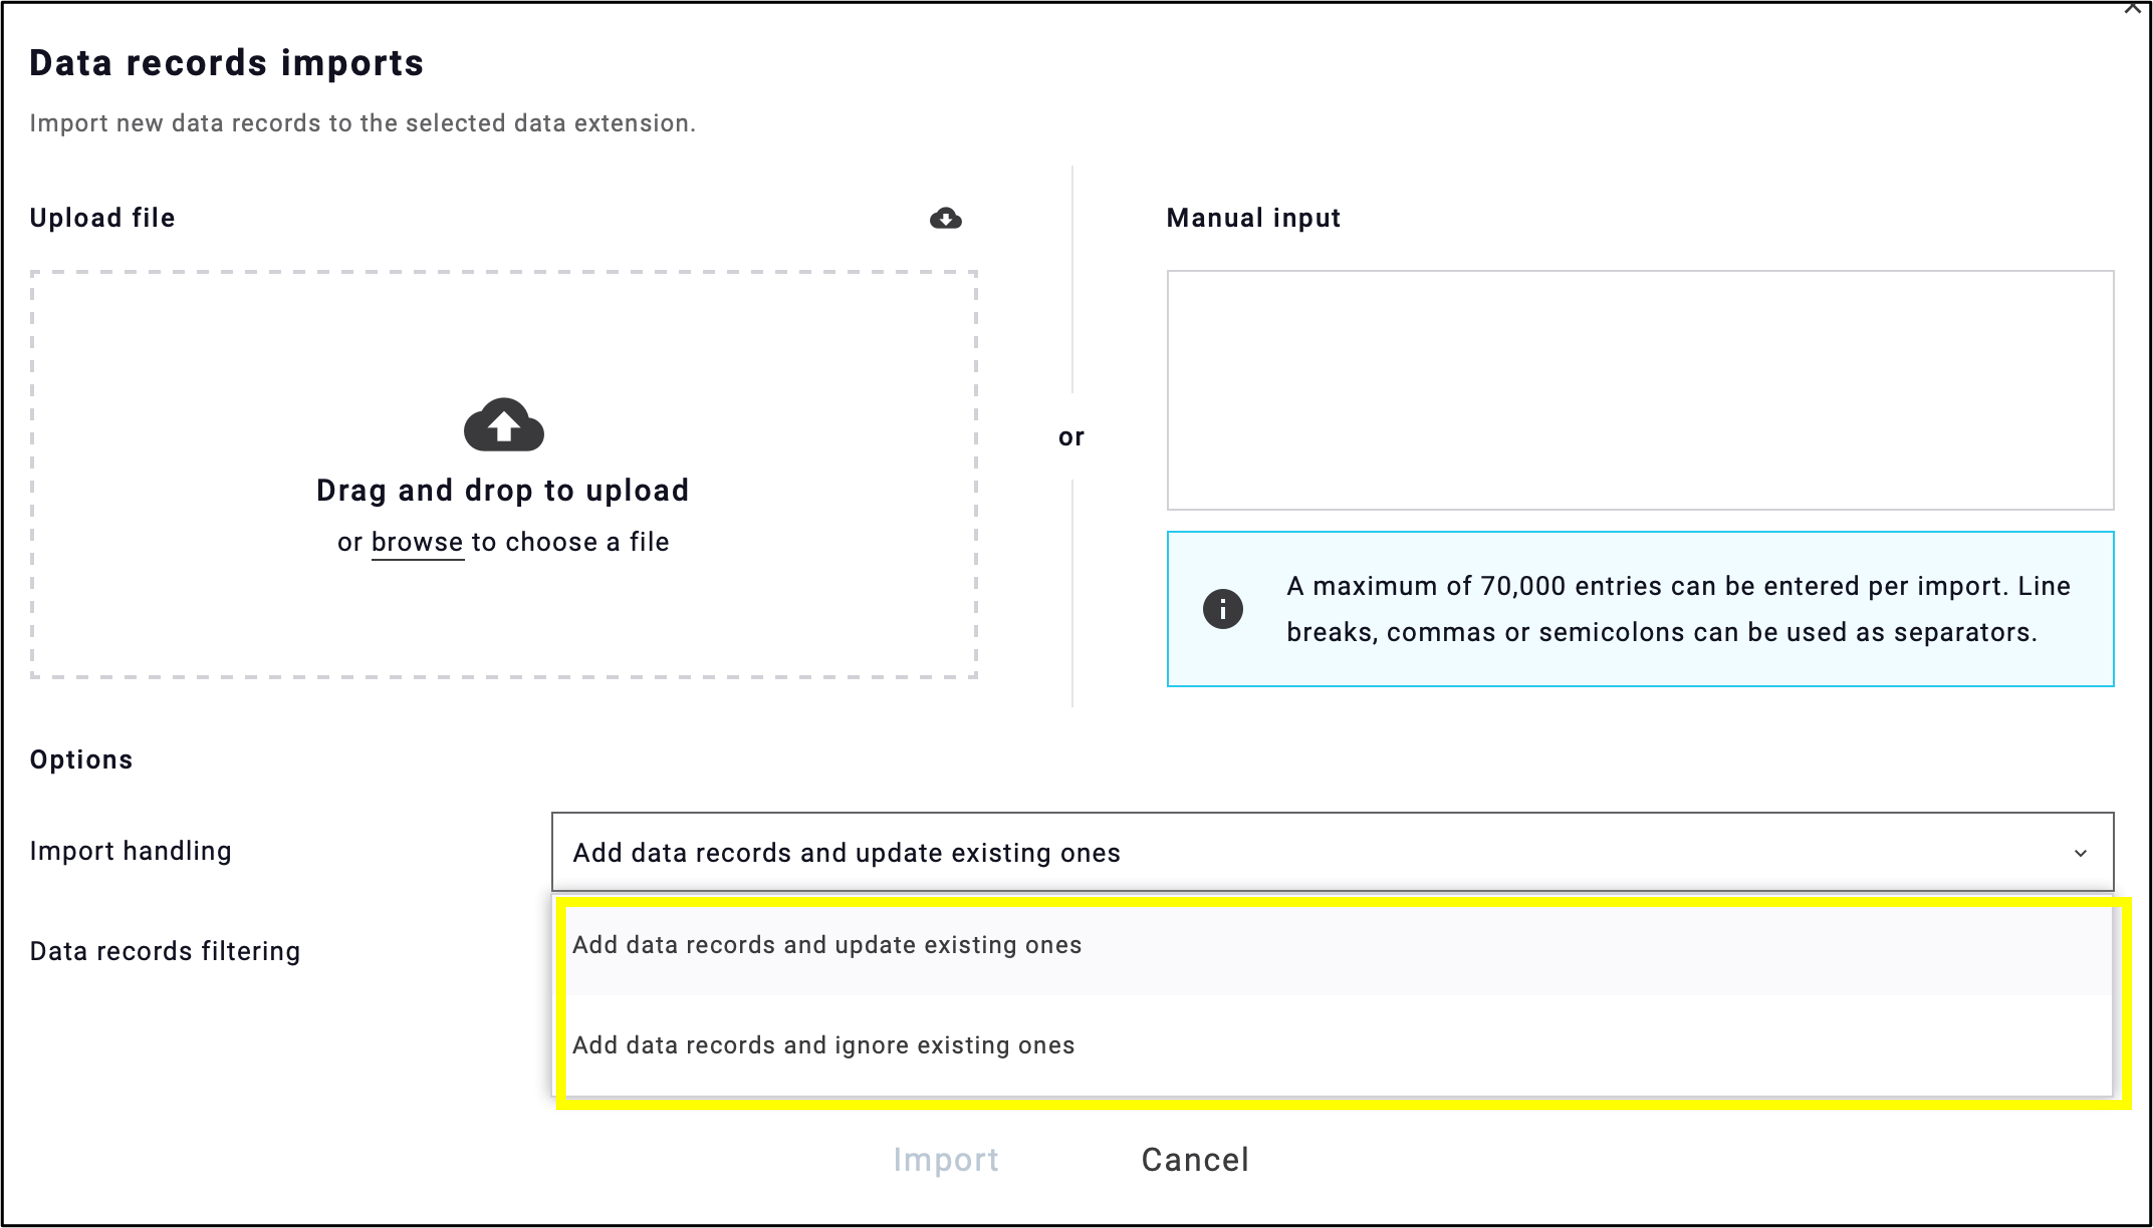
fig.11: Optionally you can update the existing data when adding new data.
Enable the Data records filtering option to filter out the rows that contain invalid data (fig. 12).
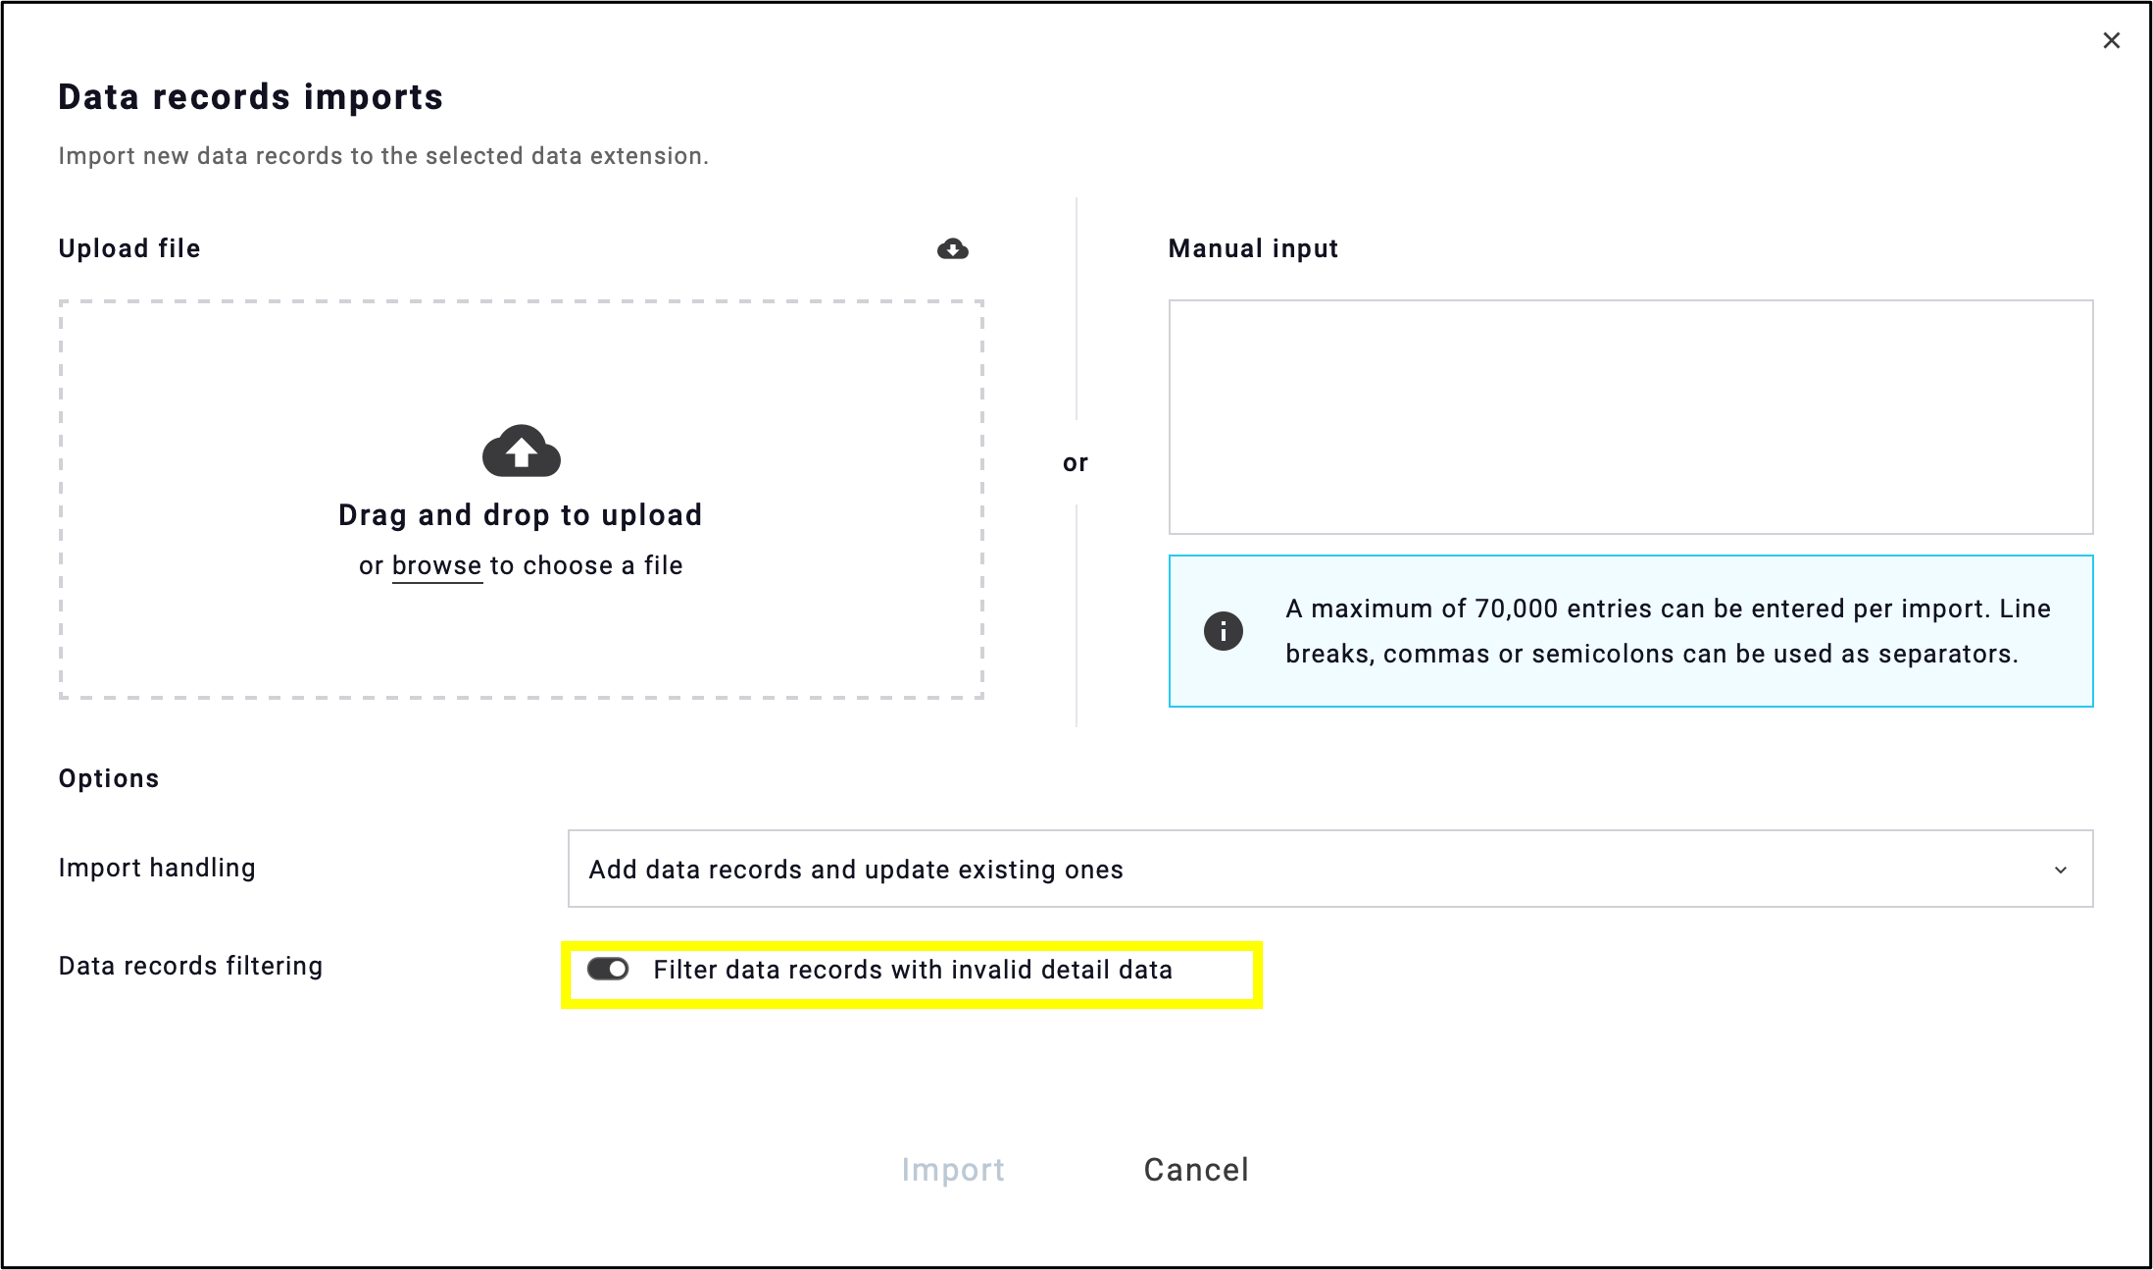
fig. 12: Filter out rows with invalid data by enabling the ’Filter Data Records’ option.
After setting up the desired options, click Import (fig. 13).
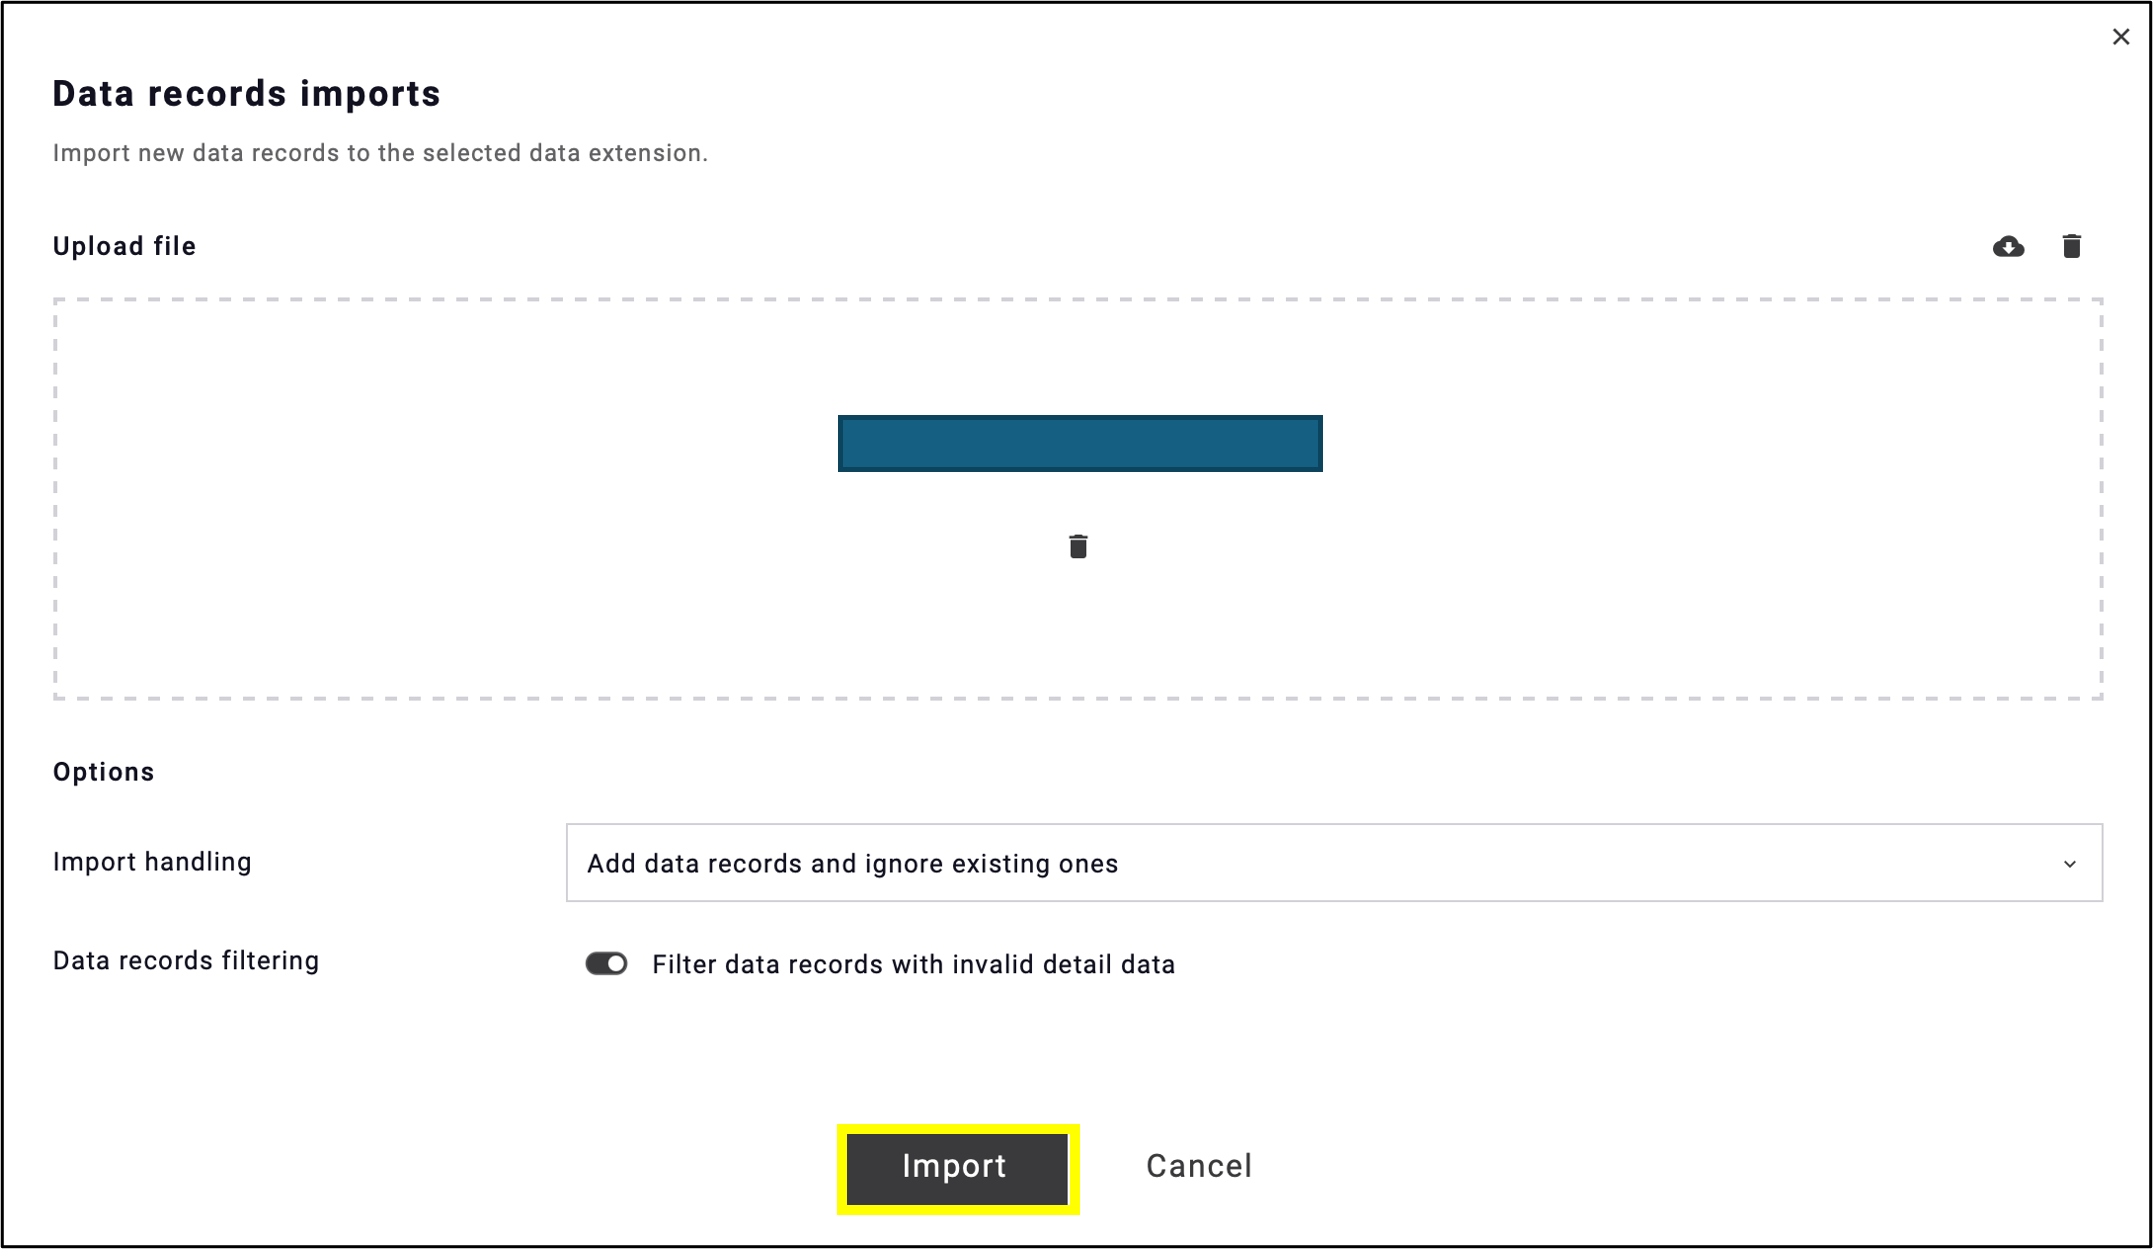
fig. 13: Click ’Import’ after configuring the settings.
Now you can see how many records are in the data extension.
Note 1: Clicking on the trash bin icon deletes only the data, while the broom icon deletes the records.
Note 2: The search function only supports searches based on the configured unique identifier (fig. 14). Only exact lookups using the configured unique identifier are supported.
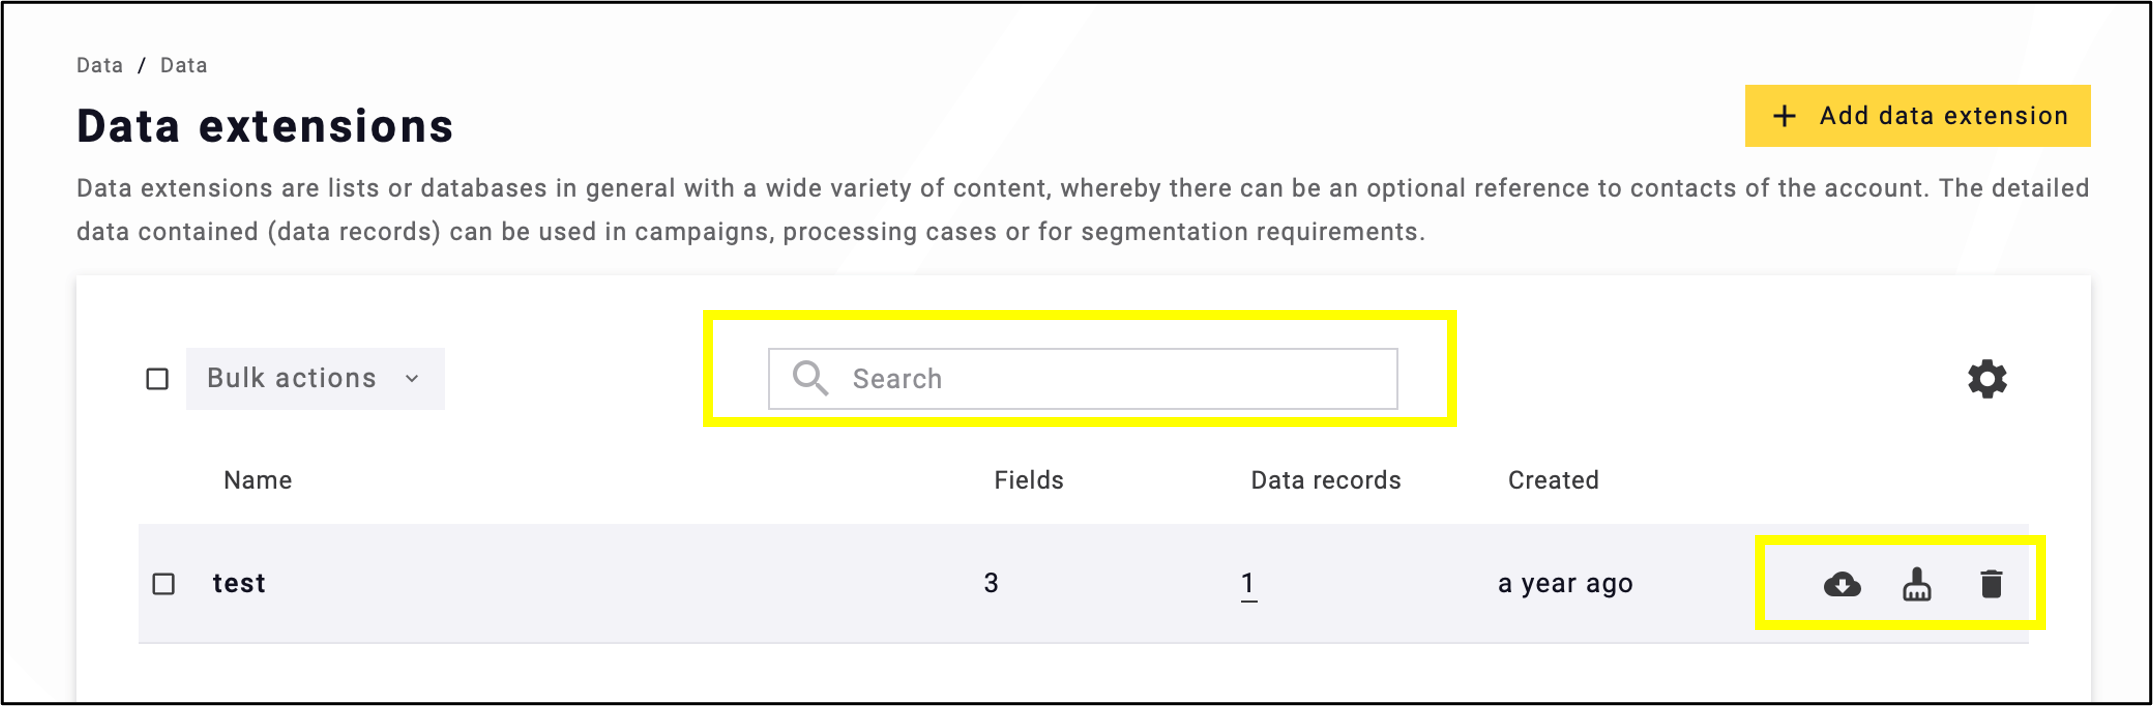
fig. 14. Data can be deleted via the trash bin (data only) or broom icon (records), and search is available only by unique ID.
Note: Since records in the data extension are not the same as contacts, the data extension cannot be used as a criterion when creating a contact filter. You can use and import data even without an email address, but in this case the contact filter will not be available. The filter becomes available once an email address is defined as the matching condition.
3. Placing Data Extension In The Emailing
Data Extensions can be inserted into an email using placeholders(fig. 15). The rendering behavior is comparable to Smart Content or RSS loops, except that the data does not come from an external source, but from what is stored in the data extension.
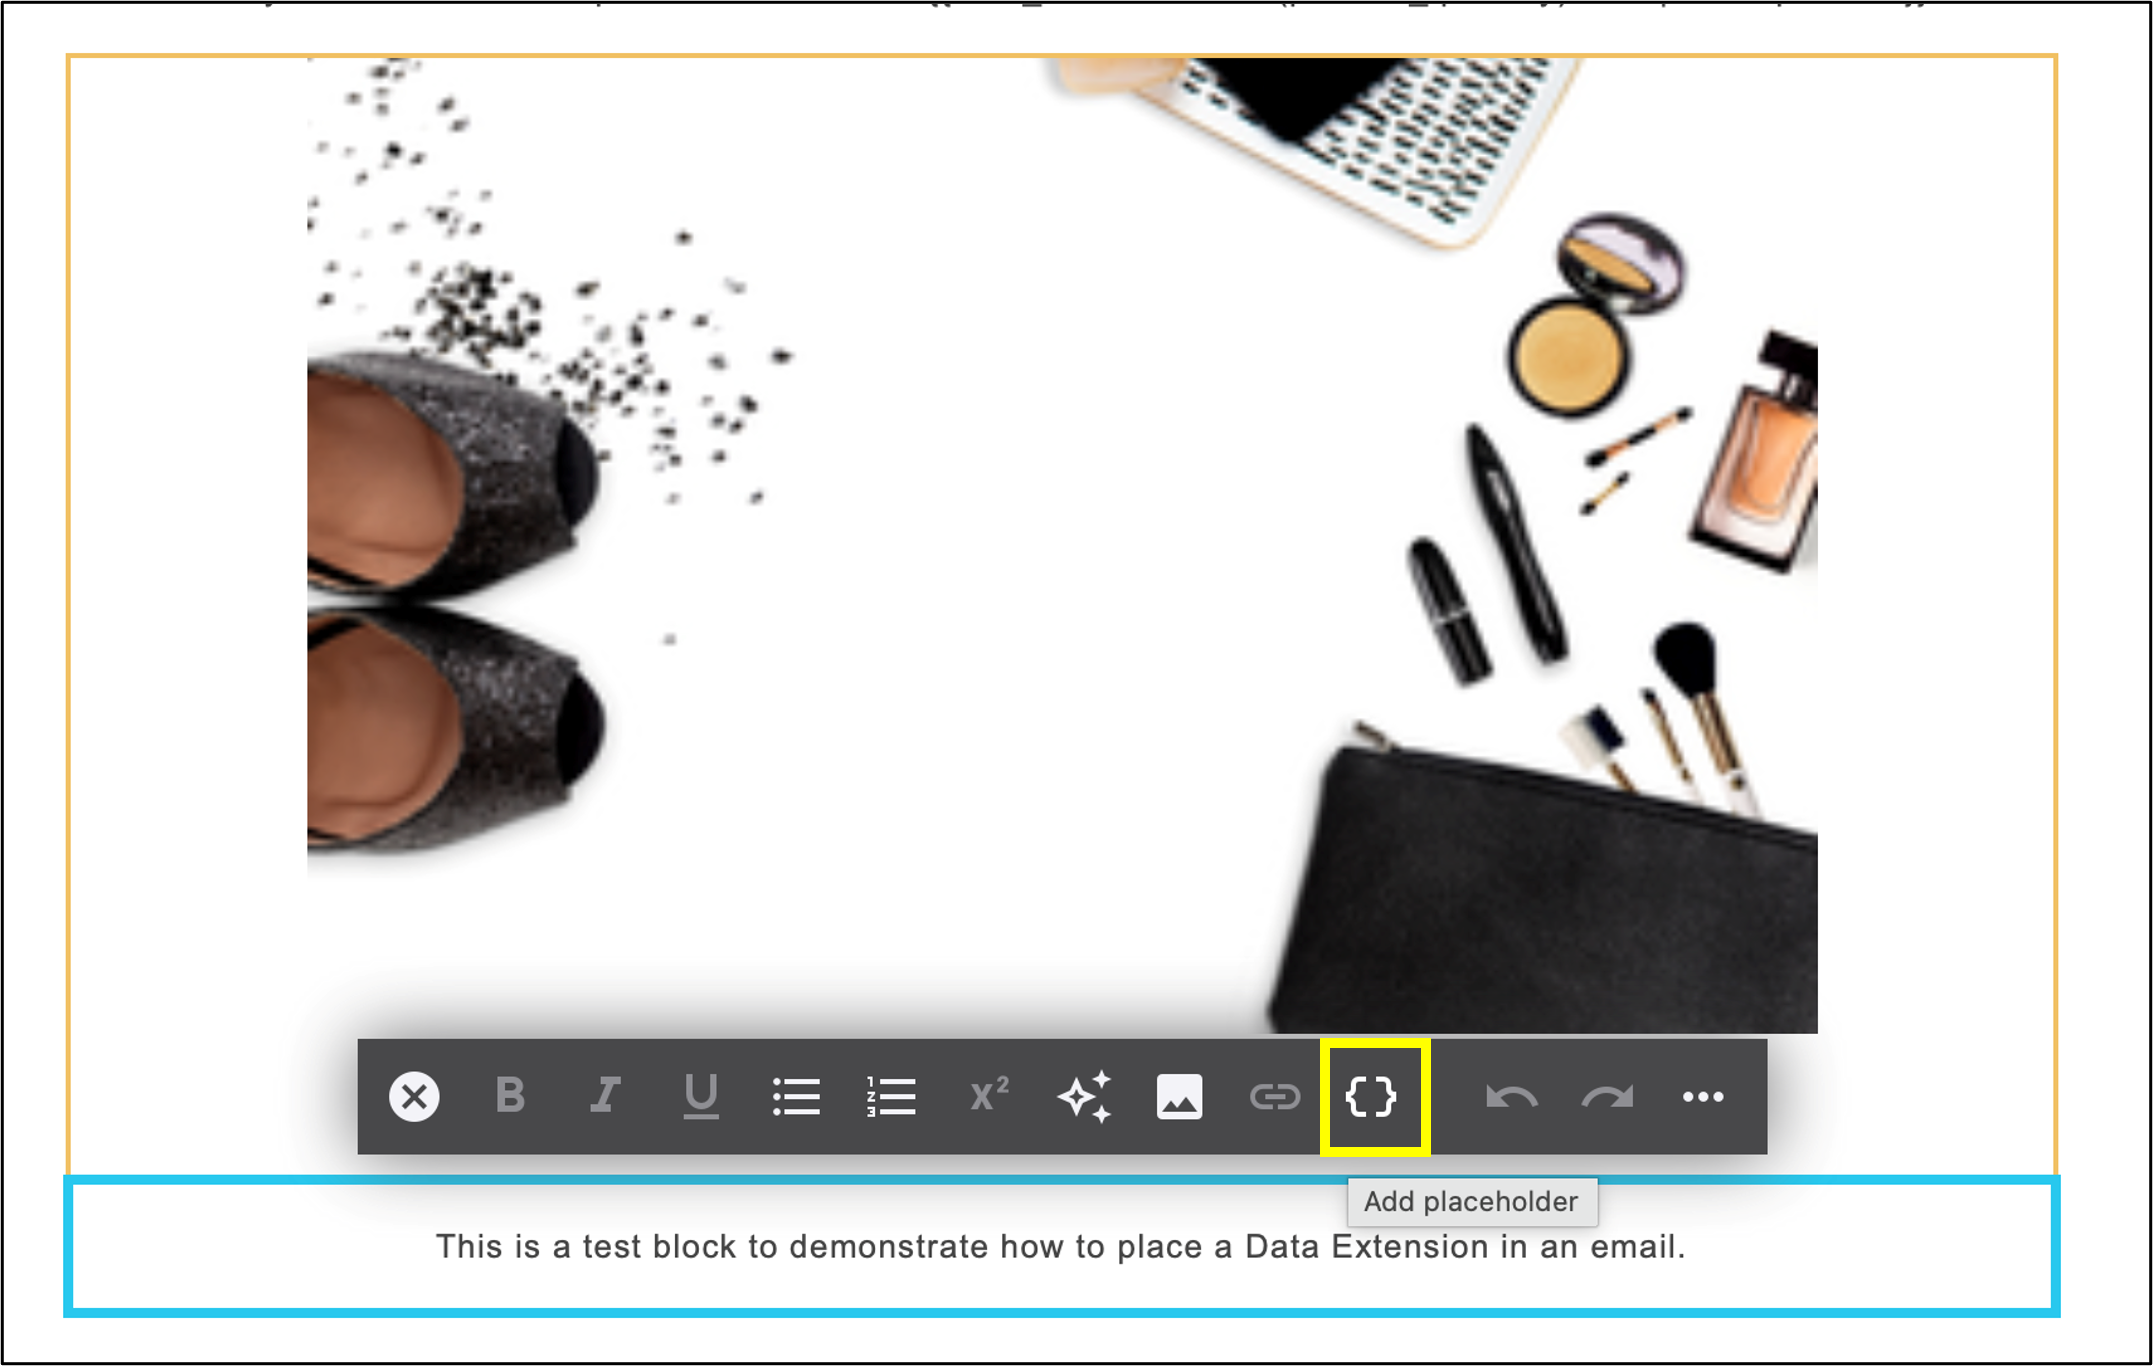
fig. 15: Use placeholders to place data extensions in emailing.
After selecting the insert placeholder icon, click Data extension placeholders option from the drop-down list (fig. 16).
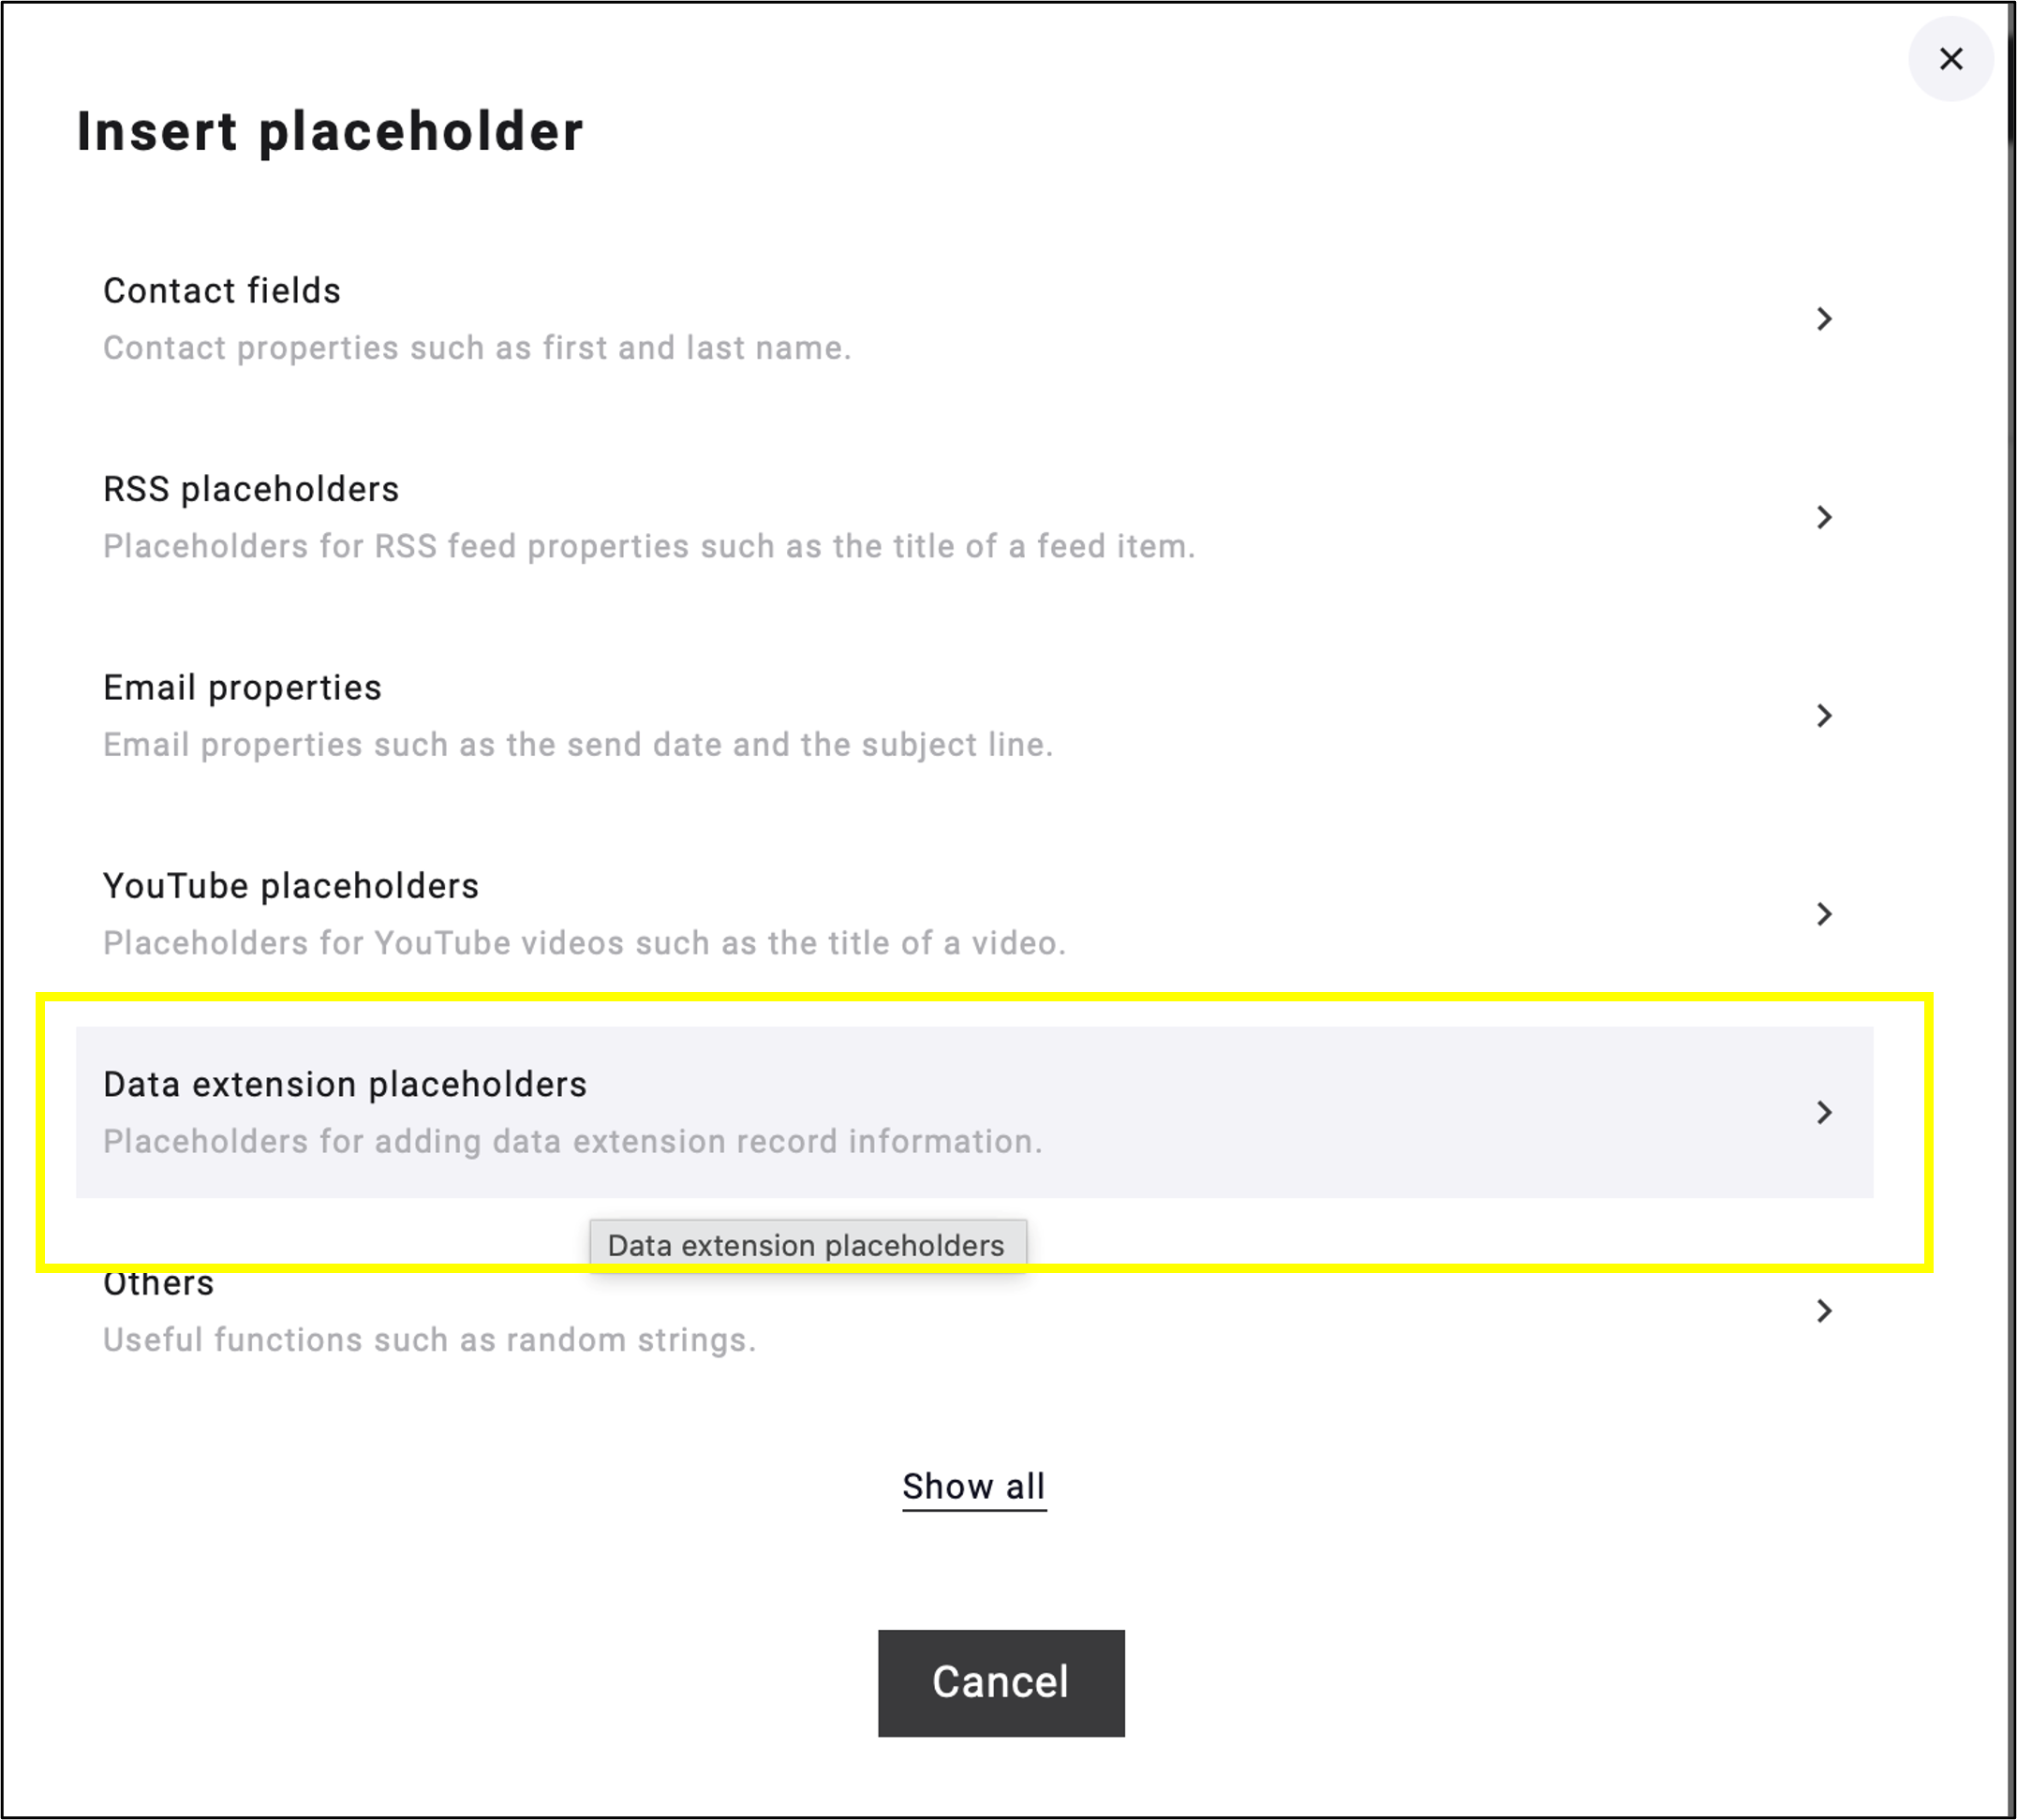
fig. 16: Select ’Data Extension Placeholders’ from the available placeholder options.
Select the data extension from which you want to add a placeholder, then select the placeholder itself (fig. 17, fig. 18).
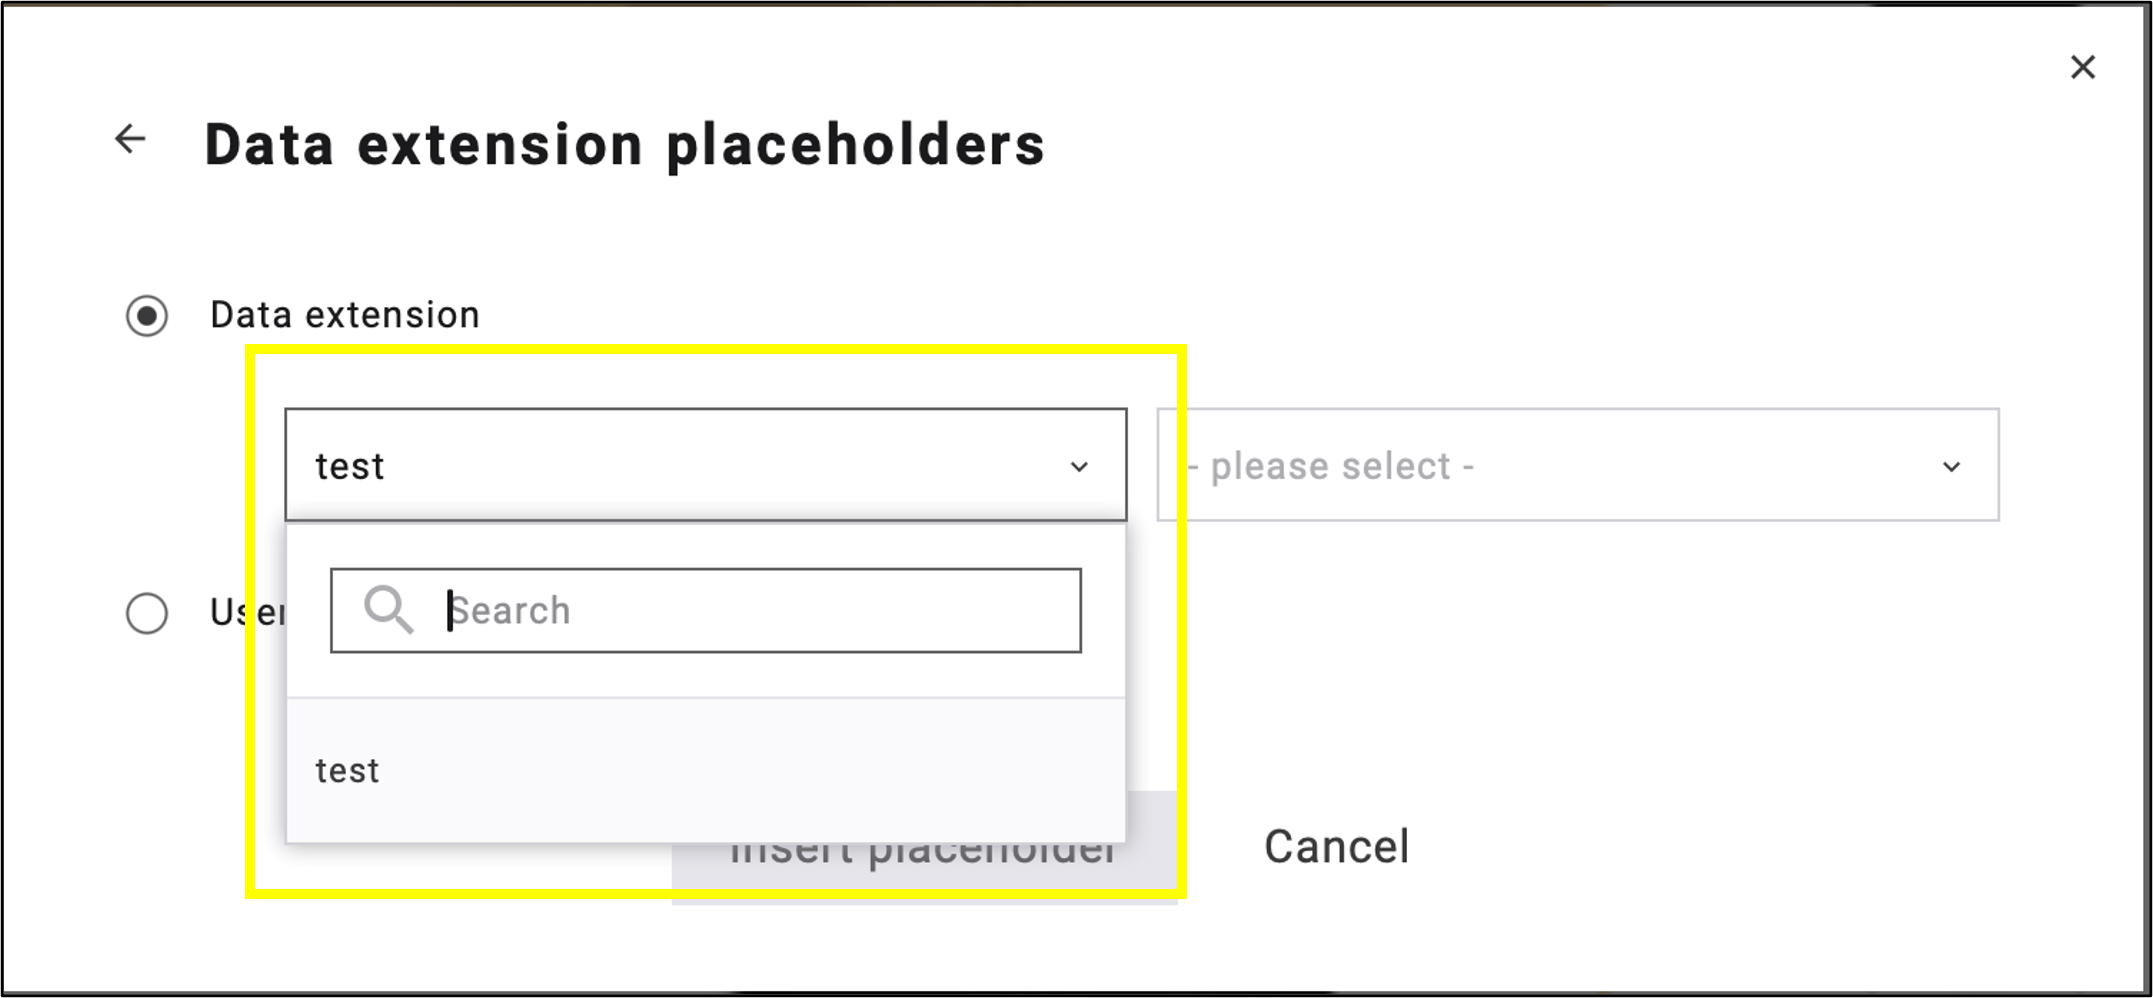
fig. 17: Select the data extension to use.
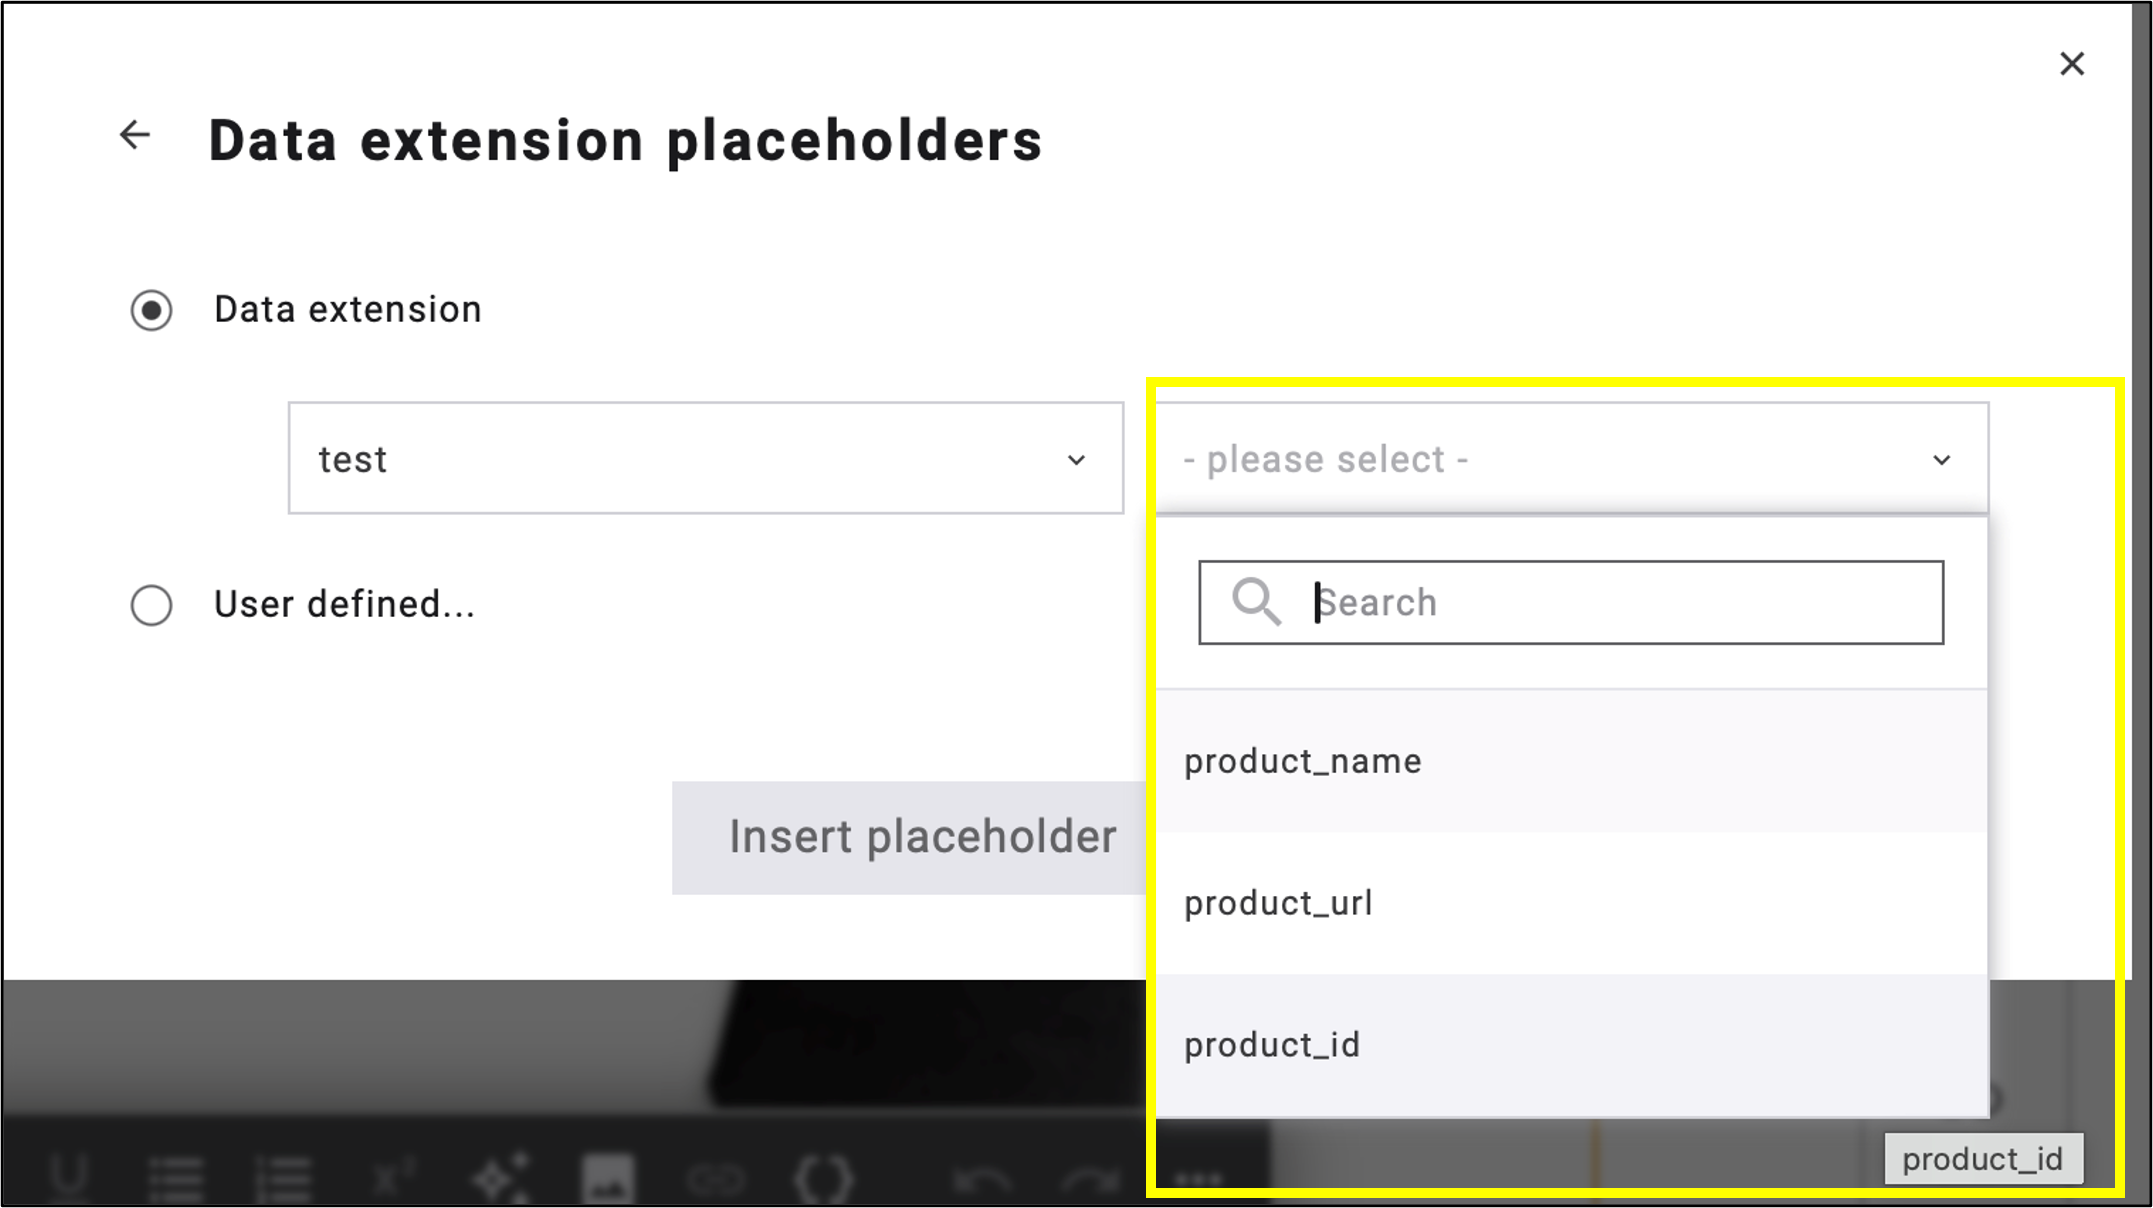
fig. 18: Choose the desired placeholder.
After selecting the placeholder, choose the appropriate Escape, then click Insert placeholder (fig. 19).
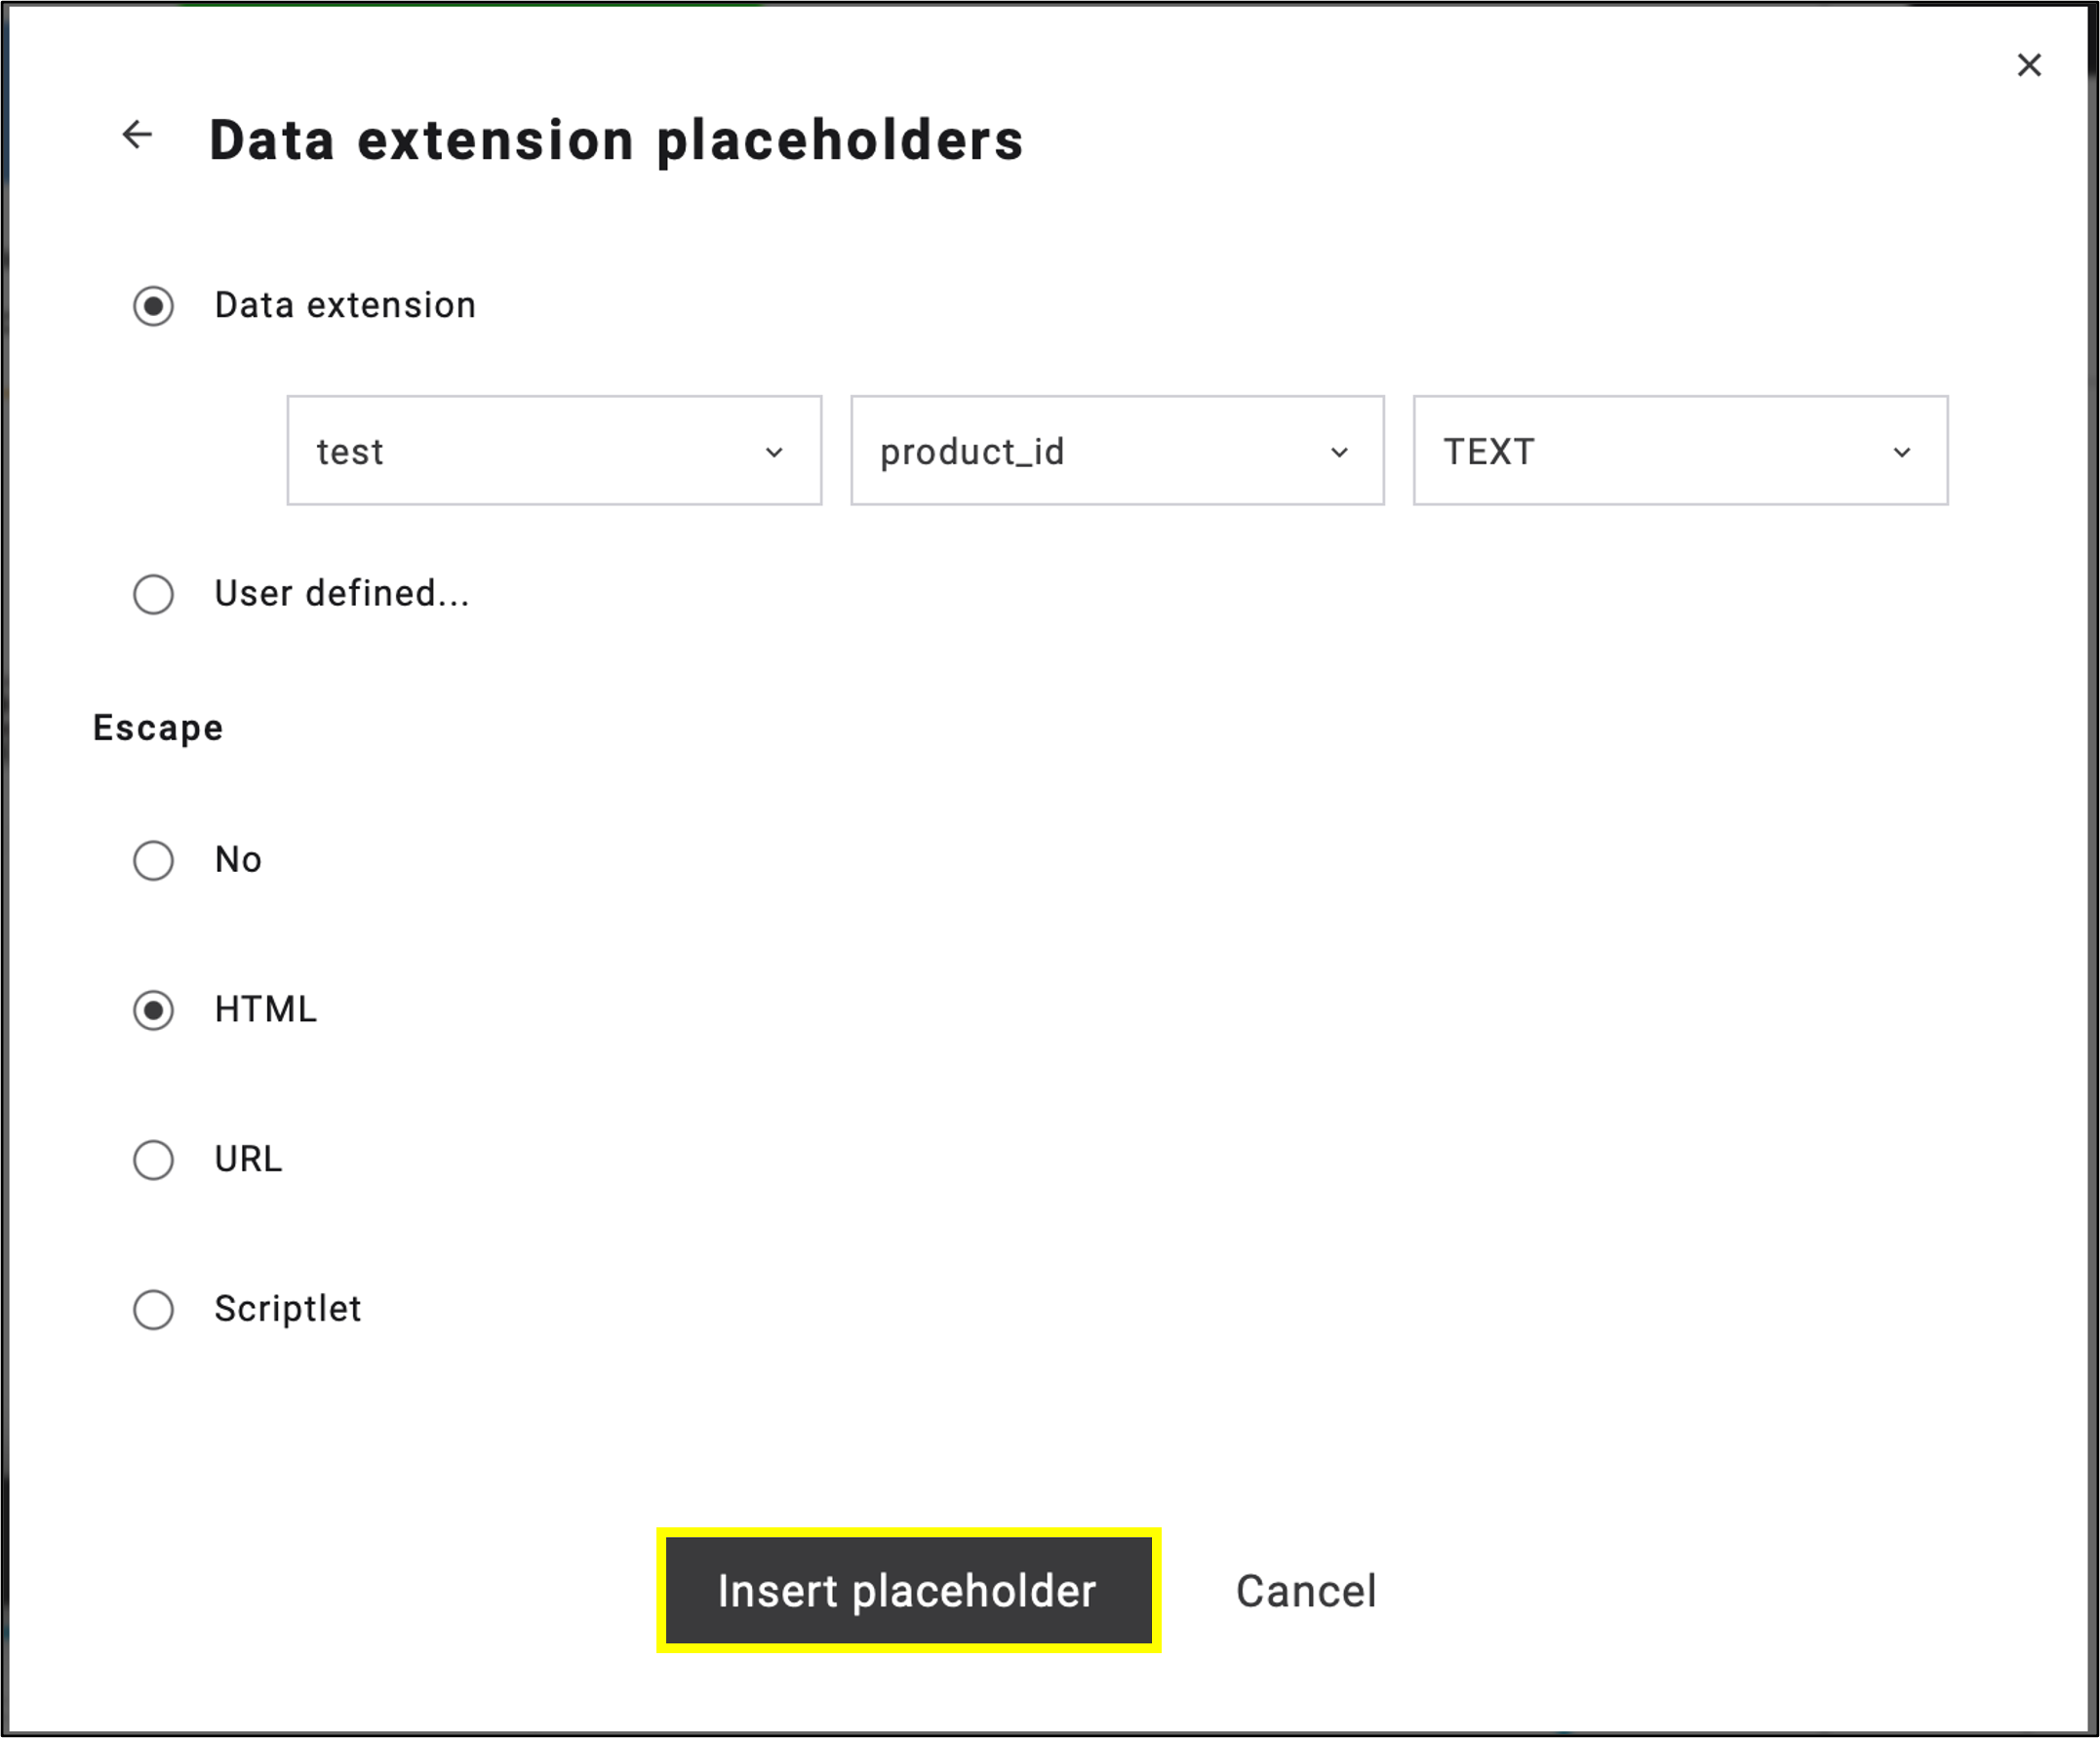
fig. 19: Select an ’Escape’ option after choosing the placeholder, then click ’Insert placeholder’.
After creating the placeholders, select the Data Extension widget (fig. 20).
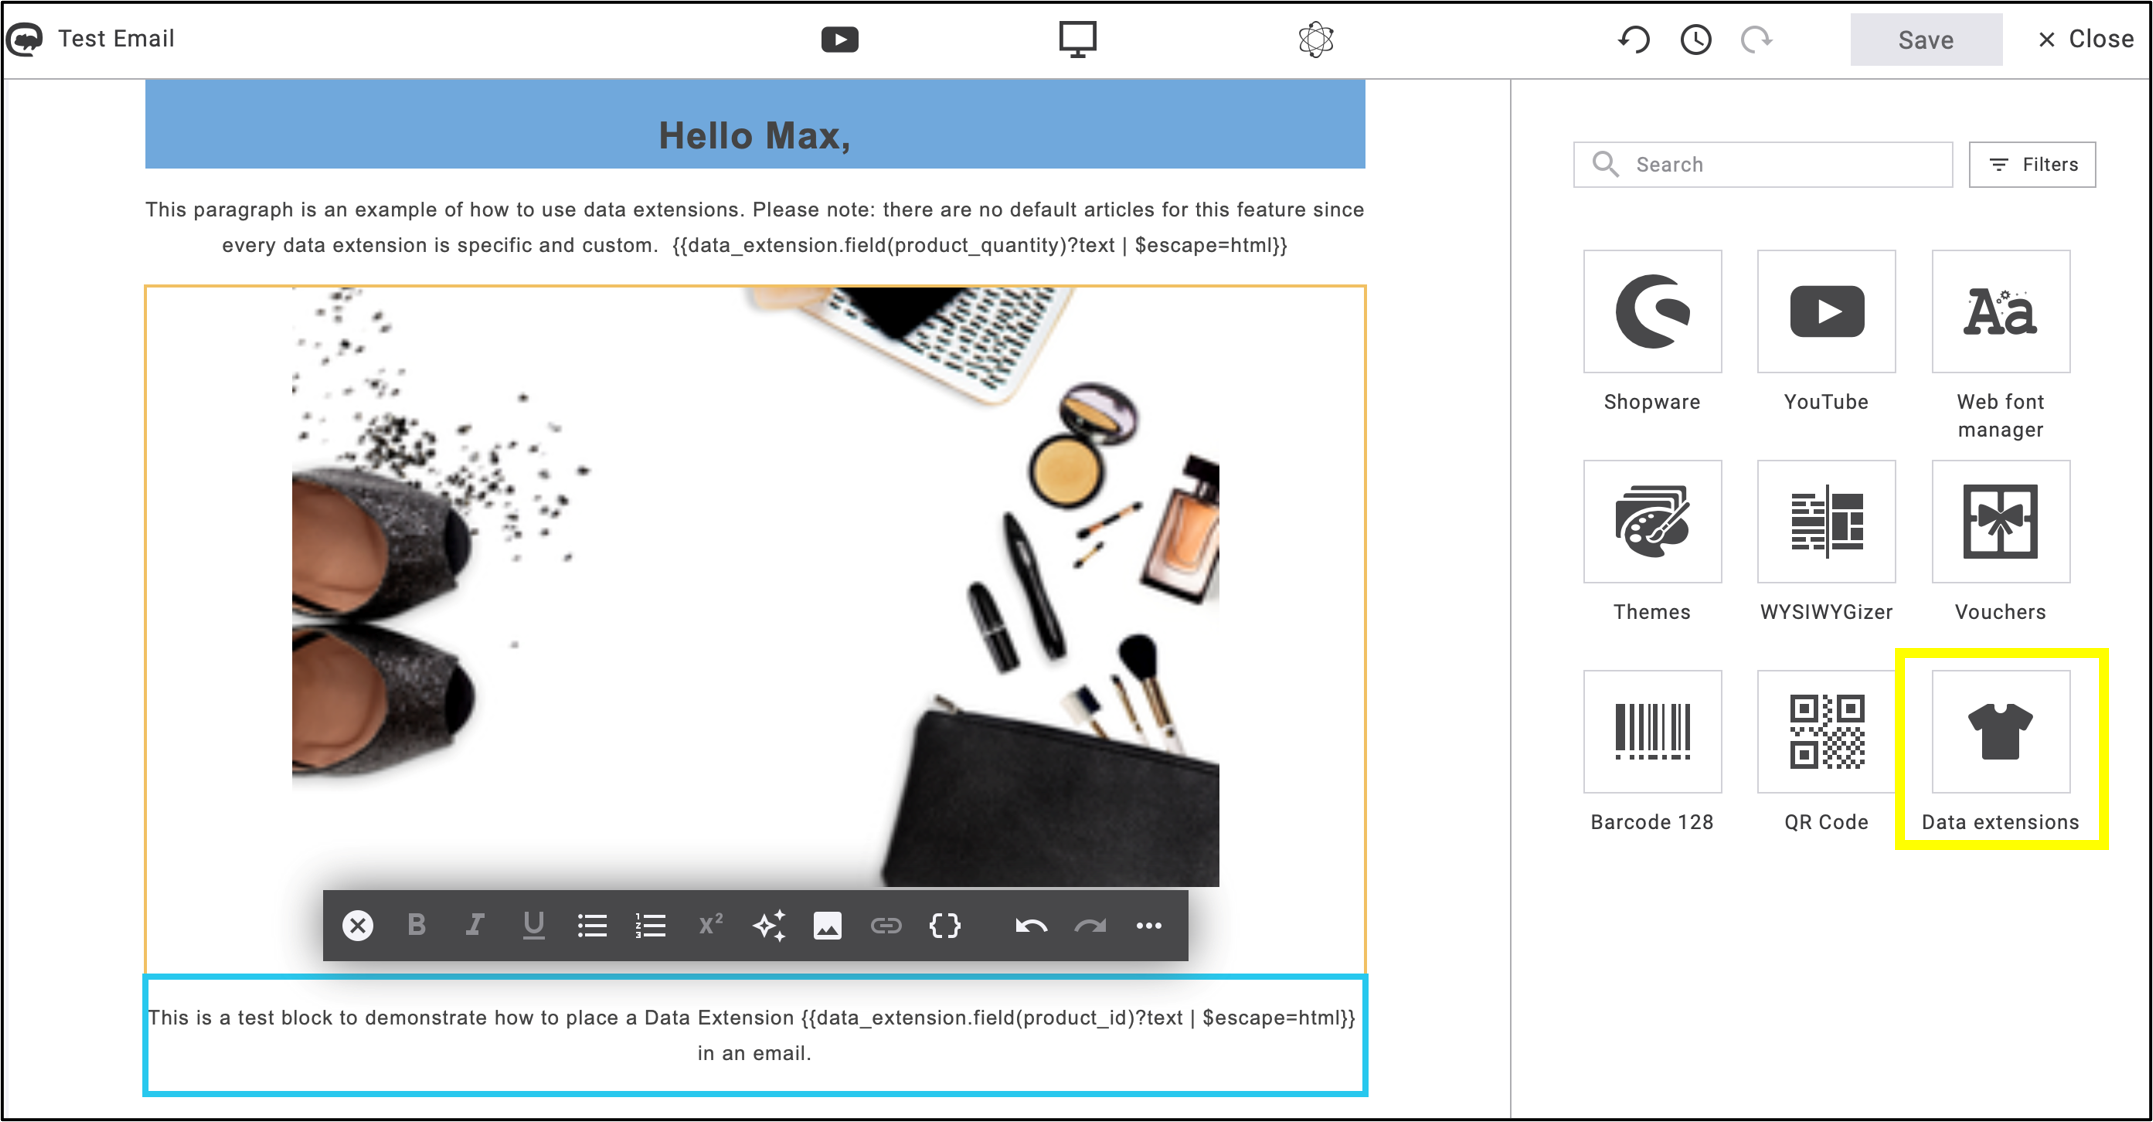
fig. 20: Select the ’Data Extension’ widget after creating the placeholders.
After opening the widget, proceed through the process using steps similar to those in Maileon Smart Content.
First step: Select the appropriate block. This block will be duplicated for each selected news feed item, and the placeholders will be populated with the corresponding fields from each item.
In this step, decide what should happen if a placeholder has no corresponding value when the data is loaded.
Then click Next (fig. 21).
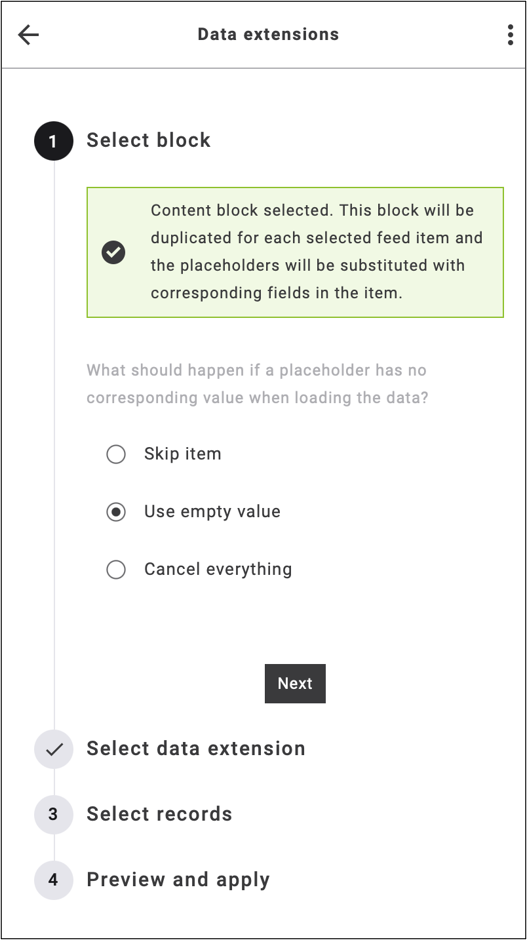
fig. 21: Select the appropriate block and define how to handle placeholders with missing values during data loading.
Second step: From the drop-down menu, select the data extension from which you want to upload the data, then click Next (fig. 22).
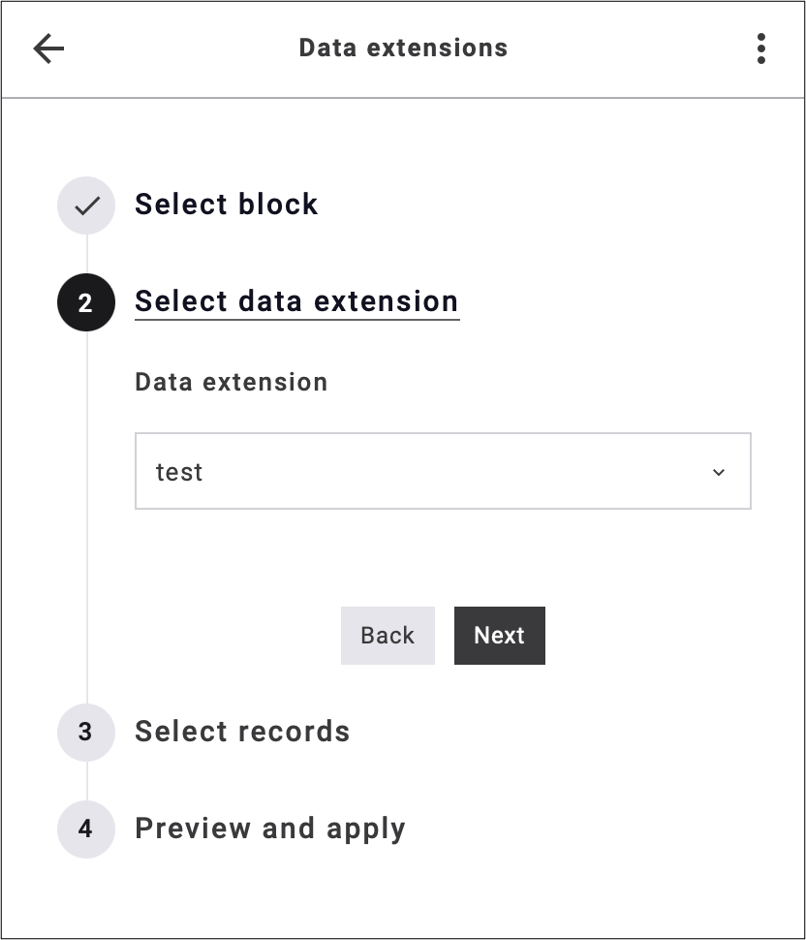
fig. 22: Select the data extension from the drop-down menu, then click ‘Next’.
Third step: Enter the unique ID (Fig. 23). If there are multiple IDs, separate them with commas, without spaces.
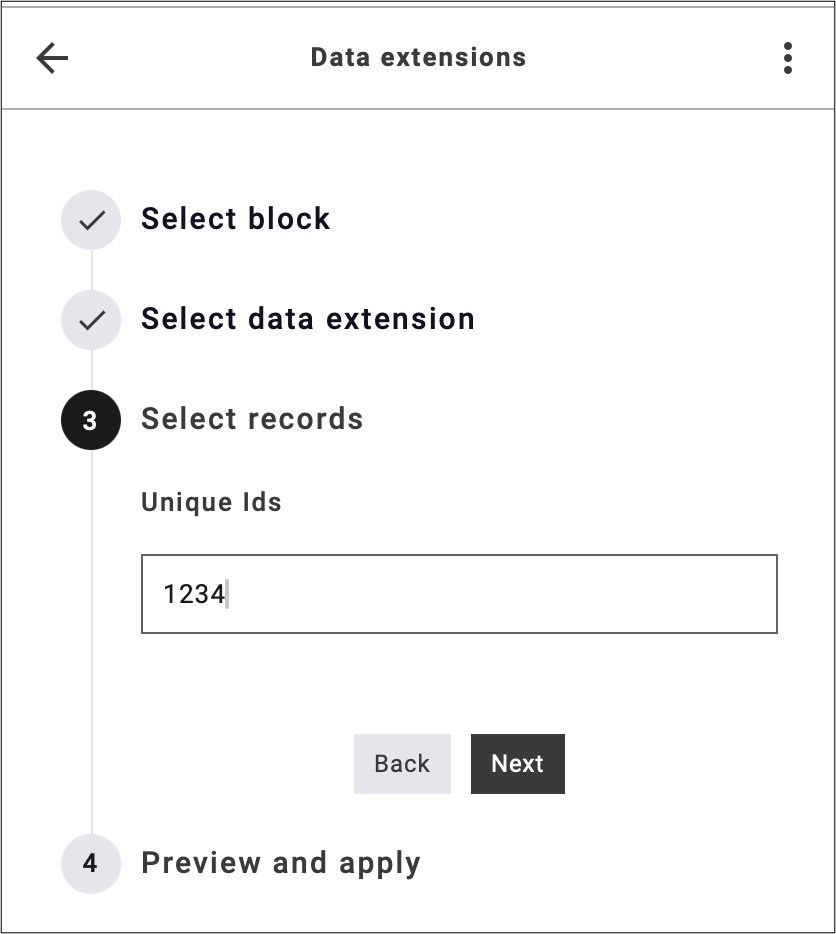
fig. 23: Enter the unique ID, separating multiple IDs with commas and no spaces.
Fourth step: Review the data retrieved by the unique ID, optionally select the item to include in the emailing, and click Apply (fig. 24).
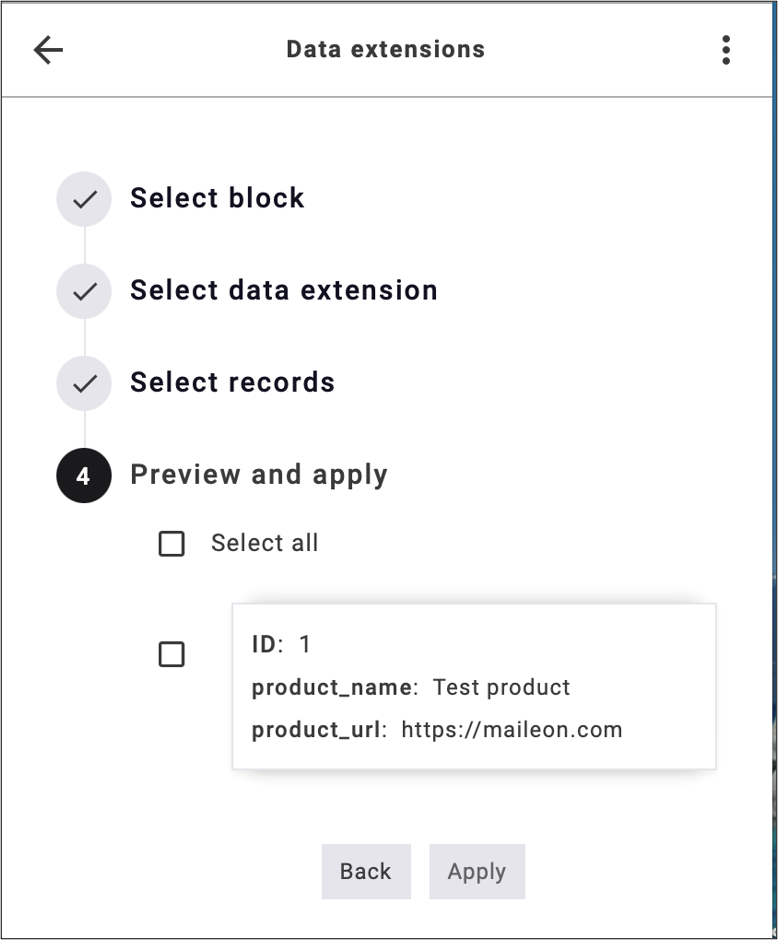
fig. 24: Review the retrieved data, select the item optionally, and click ‘Apply’ to include it in the emailing.
The selected data extension will then appear in the block (fig. 25).
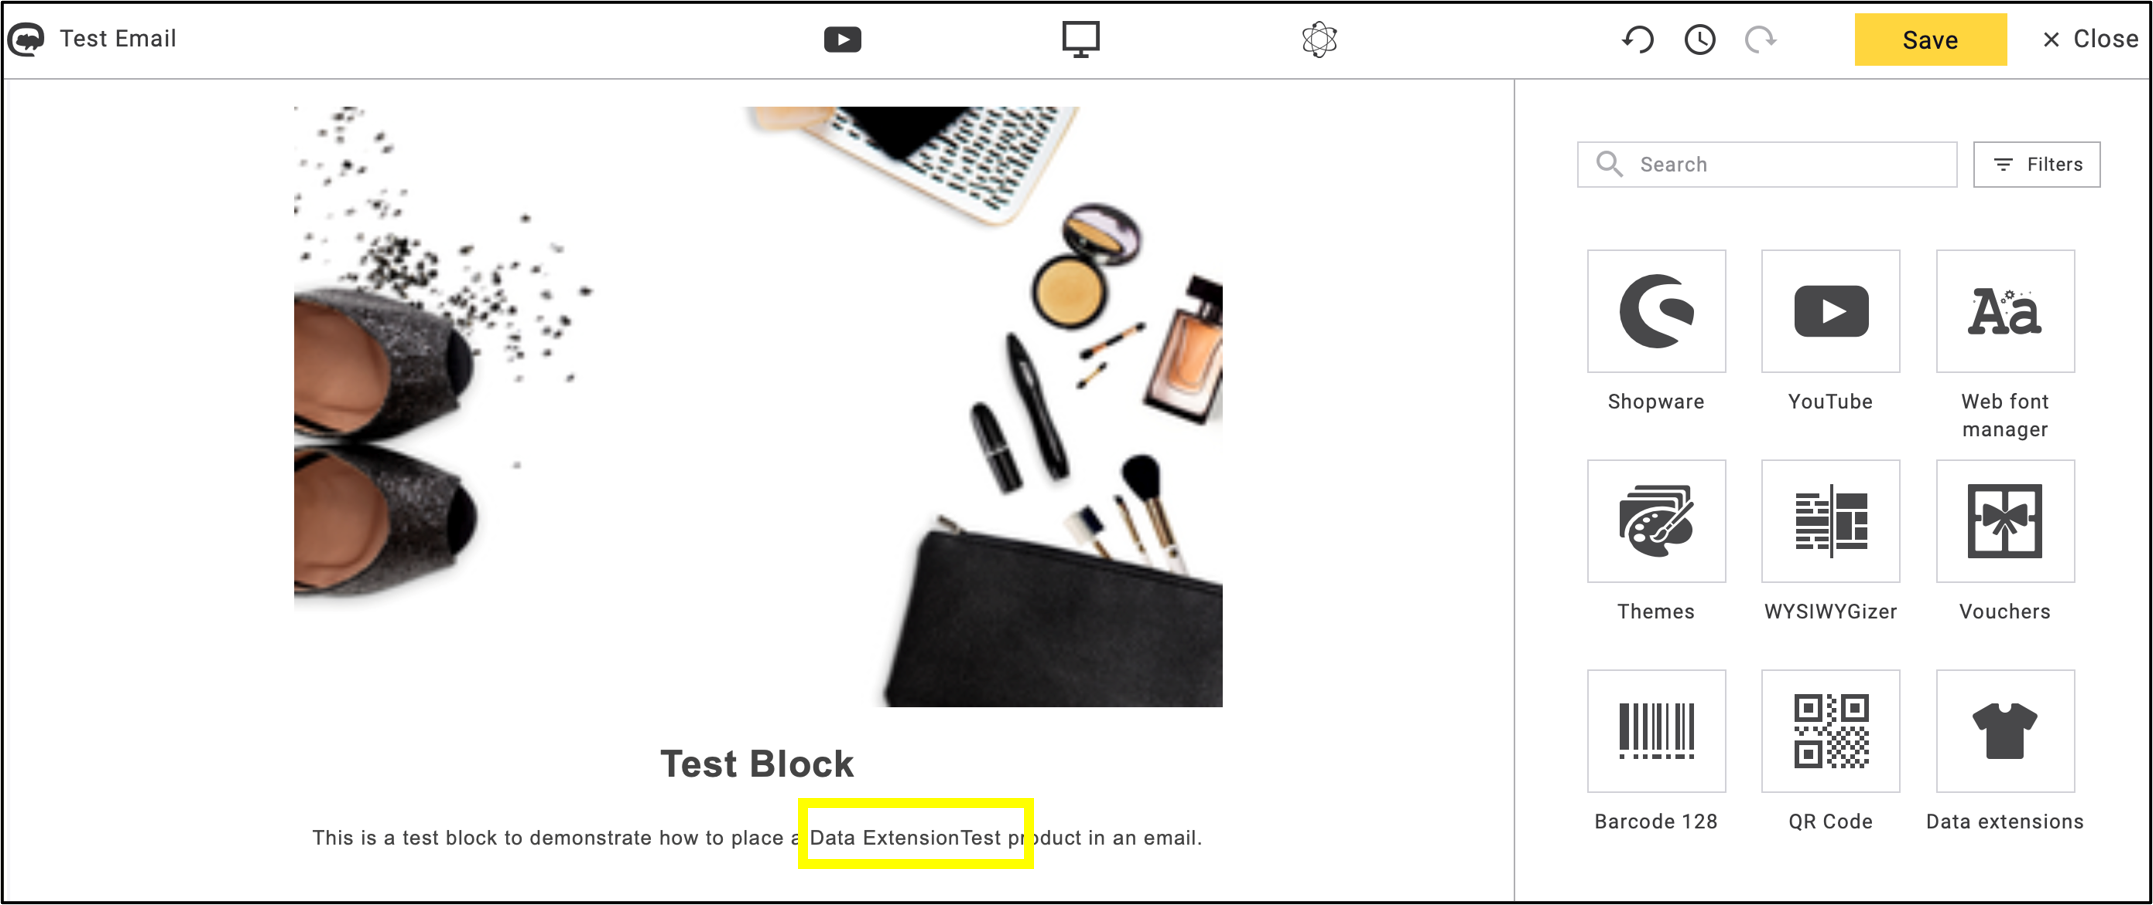
fig. 25: The selected data extension will appear in the block.
Common Questions and Answers About Using Data Extensions in Emailings
- Are the records displayed exactly in this order?
→ The records are displayed in the order in which their checkboxes are selected (fig. 26).
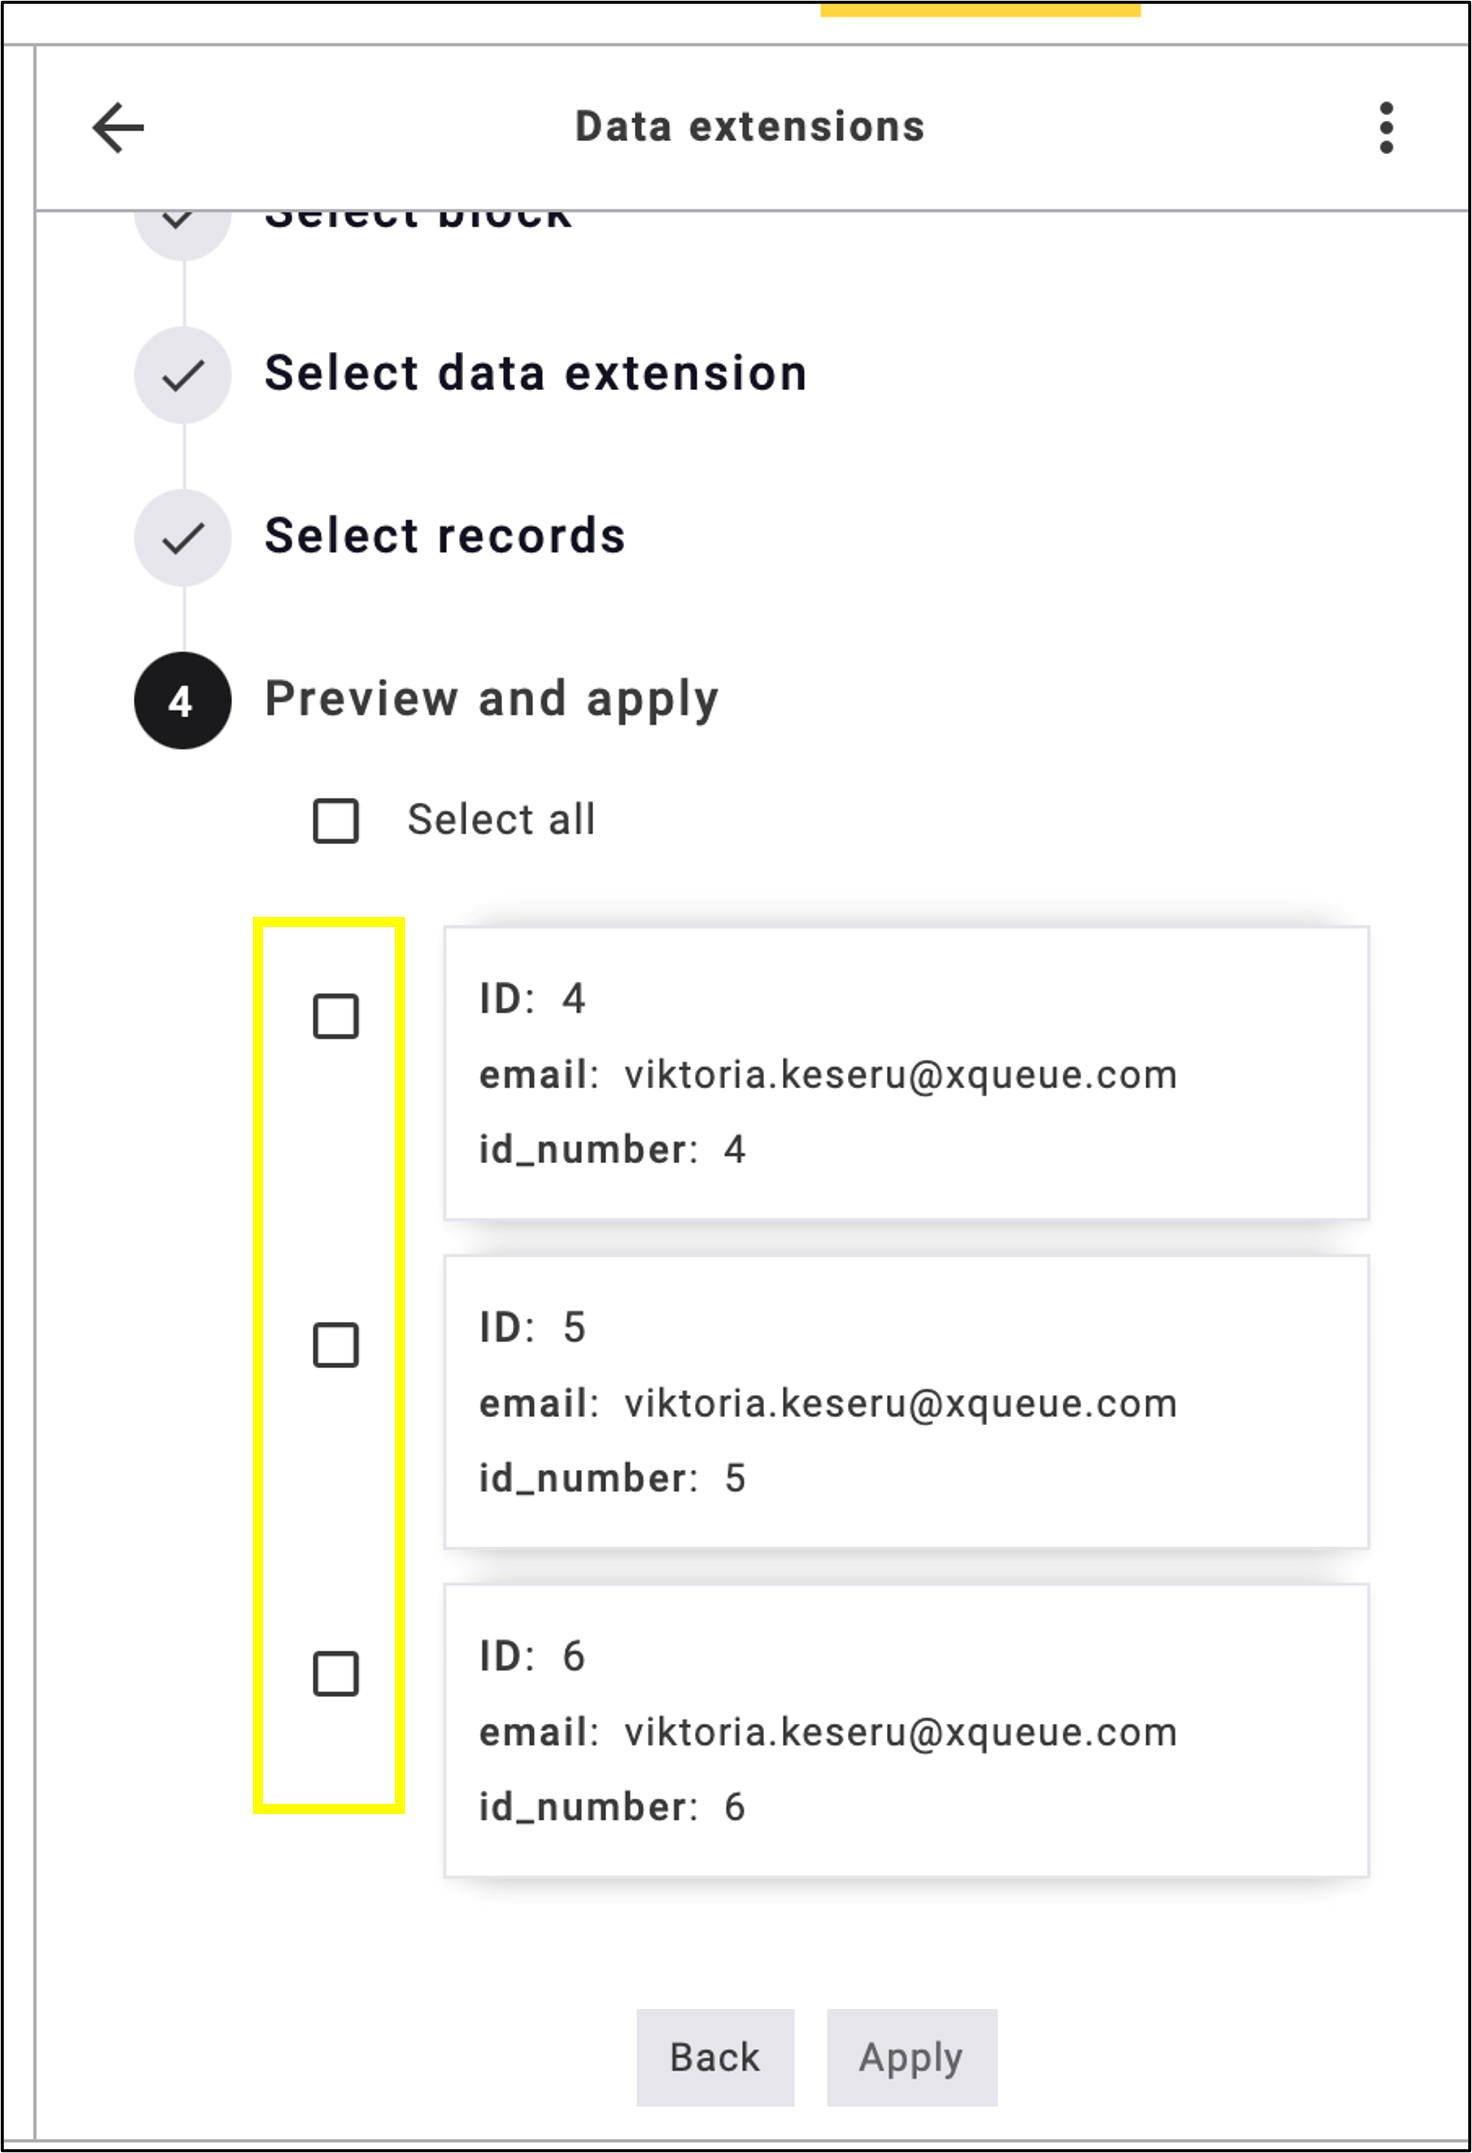
fig. 26: Records follow the order of the selected checkboxes.
- What happens with invalid IDs?
→ If an invalid unique ID is entered, no corresponding record is displayed among the selectable items.
- Are duplicates ignored?
→ Duplicate records are displayed only once among the selectable items.
4. Data Extension Usage In Scriplets and via API
More complex, dynamic content blocks can be built using scriplets. These blocks can connect data tables, compare data, and generate recommendations. For example, a single content box can display up to four products.
Scriplets can be used to connect data tables with the contact data table, for example to enable recommendation logic or similar use cases.
They can also be used to display the same product and its description under different names depending on the country. The system will always retrieve the correct data table, as the data tables are linked to the mailing locale defined in the basic settings.
In special cases, Maileon also allows the creation of data extensions that display different values across multiple accounts and subaccounts while still being connected to a single underlying database.
The creation of data extensions using scriplets is described in a separate, detailed documentation here.
The data in Maileon’s data extensions can be updated, deleted, or expanded at any time via the API. Find more detailed technical documentation on this topic here.
Summary
Maileon’s Data Extension functionality does not work like a product recommendation engine. Products cannot be ranked based on popularity or any other criteria. Records are processed in the order in which they were uploaded. For example, if you use a scriplet to instruct the system to select three products from a specific category, the selection will not be based on popularity but on the order in which the records were added to the Data Extension.
Once a Data Extension has been created, its fields cannot be modified. If changes to the structure are required, a new Data Extension must be created using a different name. This should also be taken into account when referencing the Data Extension in email templates via scriplets, as any field or Data Extension name changes will require corresponding updates in the scriplet code.
Using this tool not only saves time but also eliminates the need to import large volumes of information as contact fields. Instead of expanding the contact profile with data that is not directly related to the contact itself, this information can be managed separately in a structured and scalable way through Data Extensions.
When using data extensions, the default limit on the number of records is set to 500,000. If you would like to increase this limit, please contact us.