
Im Maileon Help-Center finden Sie umfassende Dokumentationen zu unserem System.
Beliebte Suchanfragen: Importe | Rest-API | Integrationen | SMS
-
Maileon Anleitungen
-
-
-
-
- 1. Basiseinstellungen
- 2. Template Editor2.0
- 3. Inhalt im Editor2.0 bearbeiten
- 3a - Editor 2.0 - App Panel Widgets
- 3b - Accessible Tables in the WYSIWYG Editor
- 3b - Barrierefreie Tabellen im WYSIWYG Editor (DE)
- 3d - SmartContent - Shopware 6 (DE)
- 3e - SmartContent - Shopware 6 (EN)
- 3f - Addition of Anchor-Links
- 4. Verteilerliste auswählen
- 5. Qualitätssicherung
- 6. Newsletter-Versand
-
- Bald verfügbar
-
-
-
-
- Bald verfügbar
-
FAQs
-
Grundlagen
-
Für Entwickler
-
-
- Adding Unsubscription Reason to Already Unsubscribed Contact
- Contacts
- Count Active Contacts By Filter ID
- Count Contacts By Filter ID
- Create Contact
- Create Contact (JSON)
- Create Contact by External ID
- Create Contact by External ID (JSON)
- Create Contact Preference
- Create Contact Preference Category
- Create Custom Field
- Custom Contact Fields
- Delete All Contacts
- Delete Contact By Email
- Delete Contact By Maileon ID
- Delete Contact Preference
- Delete Contact Preference Category
- Delete Contacts By External ID
- Delete Custom Field
- Delete Custom Field Values
- Delete Standard Field Values
- Delete Unsubscription-Marker
- Get Blocked Contacts
- Get Contact By Email
- Get Contact By Maileon ID
- Get Contact Preference
- Get Contact Preference Categories
- Get Contact Preference Category by Name
- Get Contacts
- Get Contacts By Email
- Get Contacts By External Id
- Get Contacts By Filter Id
- Get Count Contacts
- Get Custom Fields
- Get Preferences of Contact Preferences Category
- Get Unsubscription-Marker
- Rename Custom Field
- Set Unsubscription-Marker
- Standard Contact Fields
- Synchronize Contacts
- Synchronize Contacts Error Codes
- Unsubscribe Contact By Maileon Id
- Unsubscribe Contacts By Email
- Unsubscribe Contacts by External Id
- Update Contact By Email
- Update Contact By External ID
- Update Contact By Maileon ID
- Update Contact Preference
- Update Contact Preference Category
- Alle Artikel anzeigen ( 34 ) Artikel zusammenklappen
-
- Get Blocks
- Get Bounces
- Get Clicks
- Get Conversions
- Get Filtered Contacts
- Get Mailing Summaries
- Get Opens
- Get Recipients
- Get Replies
- Get Revenue
- Get Subscribers
- Get Unique Bounces
- Get Unique Clicks
- Get Unique Conversions
- Get Unique Opens
- Get Unsubscription Reasons
- Get Unsubscriptions
- Social Networks List
- Alle Artikel anzeigen ( 3 ) Artikel zusammenklappen
-
- Add Mailing Blacklist to Mailing
- Copy Mailing
- Create Dispatching
- Create Mailing
- Delete Mailing
- Delete Mailing Blacklist from Mailing
- Delete Trigger
- Get CMS2 Mailing As Zip
- Get Dispatching
- Get limit on number of contacts
- Get Mailing Archive URL
- Get Mailing Blacklists for Mailing
- Get Mailing ID By Name
- Get Mailing Report URL
- Get Mailing Thumbnail
- Get Mailing Thumbnail URL
- Get Mailings By Creator Name
- Get Mailings By Keywords
- Get Mailings By Schedule Time
- Get Mailings By States
- Get Mailings By Subject
- Get Mailings By Types
- Get Preview
- Get Preview Text
- Get Template
- Get Templates for CMS2
- Get The Reply-To Address
- Mailing – Add Attachment
- Mailing – Add Custom Mailing Properties
- Mailing – Copy Attachments
- Mailing – Create Schedule
- Mailing – Delete Attachment
- Mailing – Delete Attachments
- Mailing – Delete Schedule
- Mailing – Disable QoS Checks
- Mailing – Enable Target Group Update
- Mailing – Fill RSS SmartMailing Tags
- Mailing – Get “Ignore Permission” State
- Mailing – Get “Post Sendout Cleanup” State
- Mailing – Get Archival Duration
- Mailing – Get Attachment
- Mailing – Get Attachments
- Mailing – Get Count Attachments
- Mailing – Get DOI Mailing Key
- Mailing – Get HTML
- Mailing – Get List of Custom Mailing Properties
- Mailing – Get Locale
- Mailing – Get Mailing Domain
- Mailing – Get Max Attachment Size
- Mailing – Get Max Content Size
- Mailing – Get Name
- Mailing – Get Recipient Alias
- Mailing – Get result for Link Quality Check
- Mailing – Get result for Message Size Quality Check
- Mailing – Get result for Personalization Quality Check
- Mailing – Get result for Spam Quality Check
- Mailing – Get results for Approval Sendout Quality Check
- Mailing – Get results for Bounce Quality Check
- Mailing – Get results for Display Quality Check
- Mailing – Get results for Image Quality Check
- Mailing – Get results for Test Mail Sendout
- Mailing – Get Schedule
- Mailing – Get Sender Address
- Mailing – Get Sender Alias
- Mailing – Get Speed Level
- Mailing – Get State
- Mailing – Get Subject
- Mailing – Get Tags
- Mailing – Get Target Group Id
- Mailing – Get Target Group Update status
- Mailing – Get Text
- Mailing – Get Tracking Duration
- Mailing – Get Tracking Strategy
- Mailing – Get Type
- Mailing – Is Sealed
- Mailing – Remove Custom Mailing Property
- Mailing – Send Approval Mail to Targetgroup
- Mailing – Send Now
- Mailing – Send Testmail to Single Emailaddress
- Mailing – Send Testmail to Targetgroup
- Mailing – Set “Ignore Permission” State
- Mailing – Set “Post Sendout Cleanup” State
- Mailing – Set DOI Mailing Key
- Mailing – Set Html
- Mailing – Set Locale
- Mailing – Set Name
- Mailing – Set Recipient Alias
- Mailing – Set Sender Address
- Mailing – Set Sender Alias
- Mailing – Set Speed Level
- Mailing – Set Subject
- Mailing – Set Tags
- Mailing – Set Target Group Id
- Mailing – Set Text
- Mailing – Set Tracking Strategy
- Mailing – Start Bounce Quality Check
- Mailing – Start Image Quality Check
- Mailing – Start Link Quality Check
- Mailing – Start Message Size Quality Check
- Mailing – Start Personalization Quality Check
- Mailing – Start Quality Check
- Mailing – Update Custom Mailing Property
- Mailing – Update Schedule
- Reset Contents to Template
- Save CMS2 Mailing to Media Library
- Set limit on number of contacts before sending mailing
- Set Preview Text
- Set Template
- Set Template for CMS2 Mailing
- Set The Reply-To Address
- Upload CMS2 Mailing Contents
- Alle Artikel anzeigen ( 96 ) Artikel zusammenklappen
-
- Bald verfügbar
Default lists (UI2)
Default Lists in UI2
Default lists have a similar structure in the UI2 editor. Find it in Audiences → Segments & Lists → Lists → Default Lists tab (fig. 1). Create a new test list by clicking Add default list.
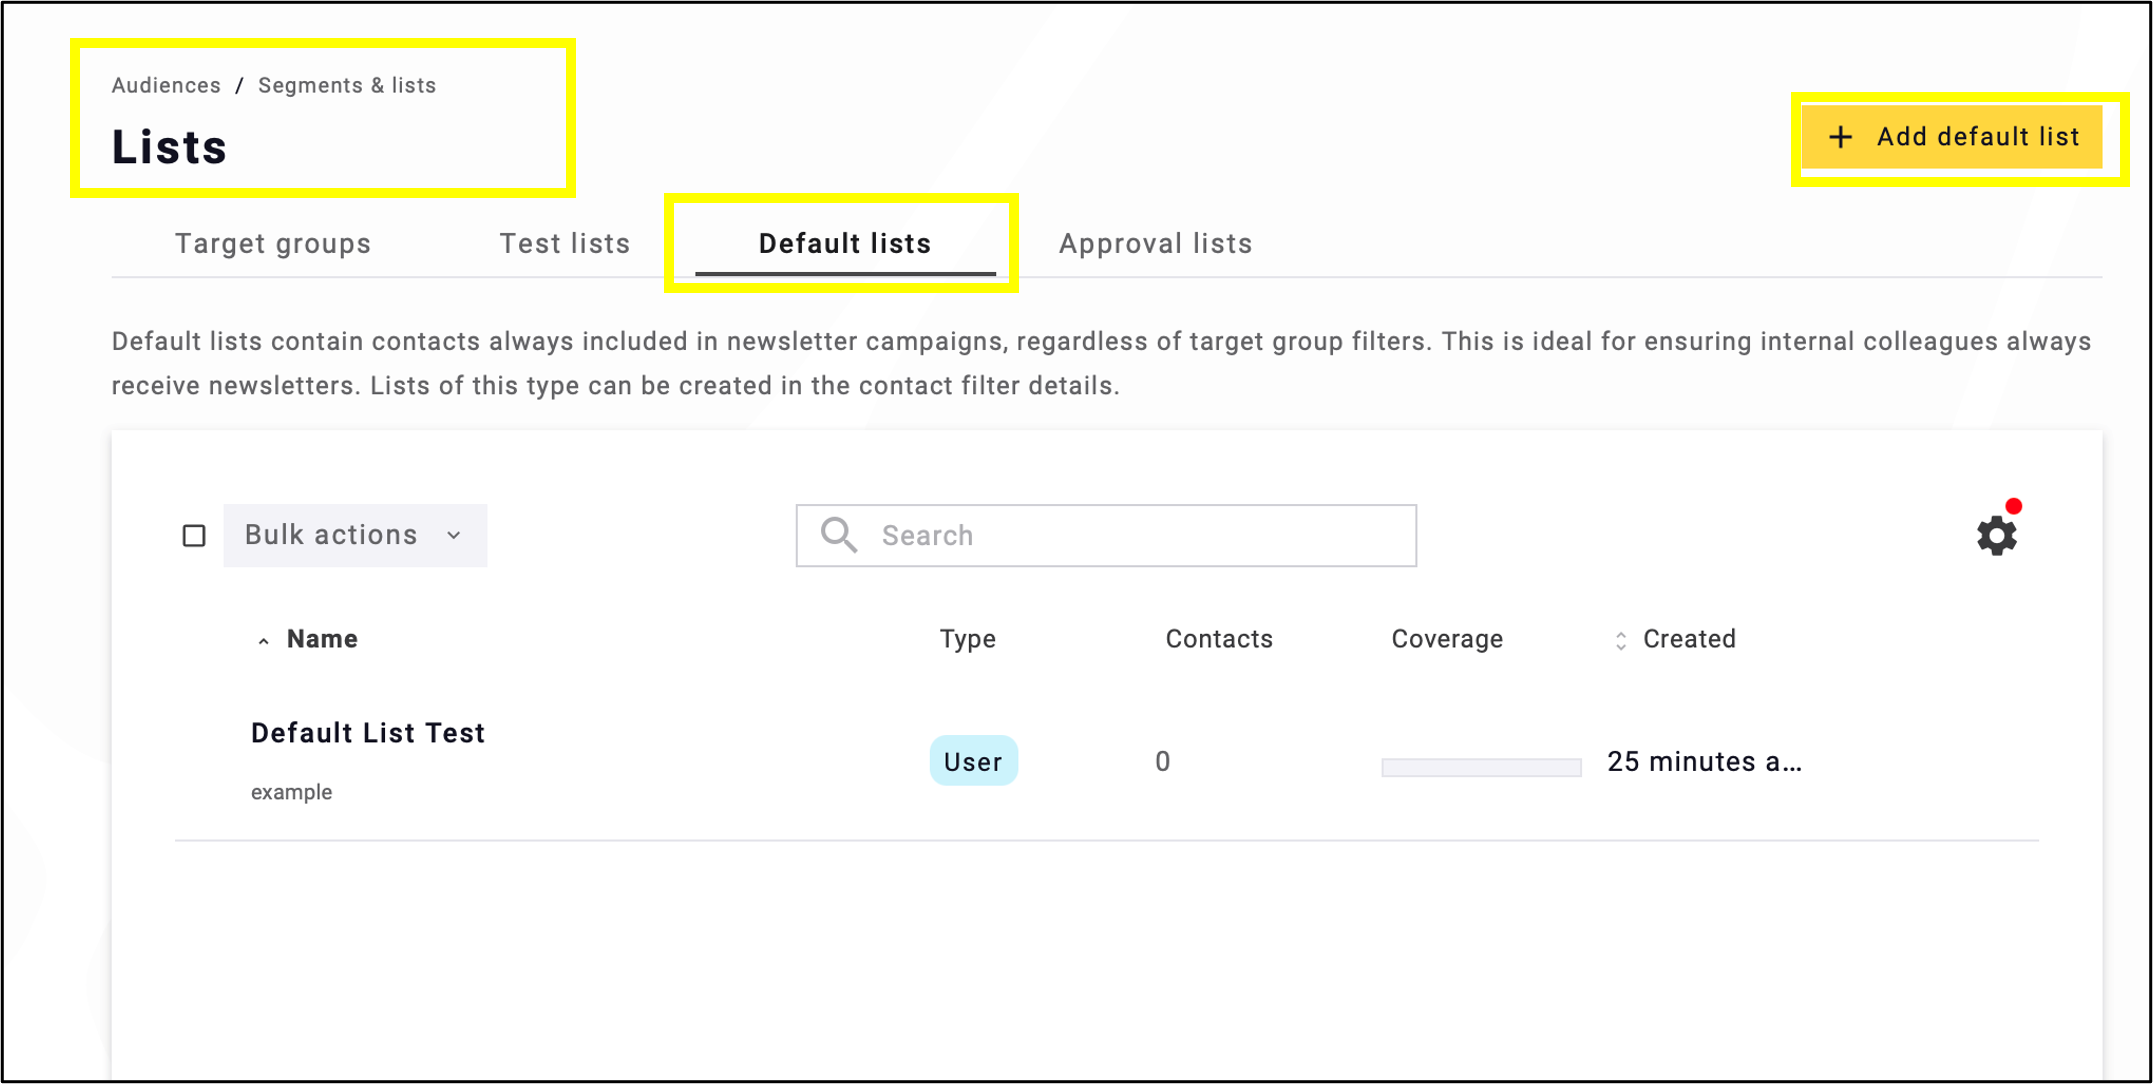
fig. 1: Click ‘Add default list’ in ‘Audiences’ → ‘Segments & Lists’ → ‘Lists’ → ‘Default Lists’ in UI2.
Add a name and choose the contact filter by clicking + Select contact filter (fig. 51).
Note: When using this list, the maximum number of contacts is limited to 2500. The contacts are randomly selected.

fig. 2: Add a name and select the contact filter for the new default list.
Once you have selected the contact filter, click Apply (fig. 3).

fig. 3: Click ‘Apply’ after you have selected the contact filter.
Note: It is not possible to create a contact filter at this step in UI2.
As the final step, click Save to create the list (fig. 4).

fig. 4: Click ‘Save’ to finish the process.
The approval list is now complete (fig. 5).

fig. 5: The default list is completed.