
Im Maileon Help-Center finden Sie umfassende Dokumentationen zu unserem System.
Beliebte Suchanfragen: Importe | Rest-API | Integrationen | SMS
-
Maileon Anleitungen
-
-
-
-
- 1. Basiseinstellungen
- 2. Template Editor2.0
- 3. Inhalt im Editor2.0 bearbeiten
- 3a - Editor 2.0 - App Panel Widgets
- 3b - Accessible Tables in the WYSIWYG Editor
- 3b - Barrierefreie Tabellen im WYSIWYG Editor (DE)
- 3d - SmartContent - Shopware 6 (DE)
- 3e - SmartContent - Shopware 6 (EN)
- 3f - Addition of Anchor-Links
- 4. Verteilerliste auswählen
- 5. Qualitätssicherung
- 6. Newsletter-Versand
-
- Bald verfügbar
-
-
-
-
- Bald verfügbar
-
FAQs
-
Grundlagen
-
Für Entwickler
-
-
- Adding Unsubscription Reason to Already Unsubscribed Contact
- Contacts
- Count Active Contacts By Filter ID
- Count Contacts By Filter ID
- Create Contact
- Create Contact (JSON)
- Create Contact by External ID
- Create Contact by External ID (JSON)
- Create Contact Preference
- Create Contact Preference Category
- Create Custom Field
- Custom Contact Fields
- Delete All Contacts
- Delete Contact By Email
- Delete Contact By Maileon ID
- Delete Contact Preference
- Delete Contact Preference Category
- Delete Contacts By External ID
- Delete Custom Field
- Delete Custom Field Values
- Delete Standard Field Values
- Delete Unsubscription-Marker
- Get Blocked Contacts
- Get Contact By Email
- Get Contact By Maileon ID
- Get Contact Preference
- Get Contact Preference Categories
- Get Contact Preference Category by Name
- Get Contacts
- Get Contacts By Email
- Get Contacts By External Id
- Get Contacts By Filter Id
- Get Count Contacts
- Get Custom Fields
- Get Preferences of Contact Preferences Category
- Get Unsubscription-Marker
- Rename Custom Field
- Set Unsubscription-Marker
- Standard Contact Fields
- Synchronize Contacts
- Synchronize Contacts Error Codes
- Unsubscribe Contact By Maileon Id
- Unsubscribe Contacts By Email
- Unsubscribe Contacts by External Id
- Update Contact By Email
- Update Contact By External ID
- Update Contact By Maileon ID
- Update Contact Preference
- Update Contact Preference Category
- Alle Artikel anzeigen ( 34 ) Artikel zusammenklappen
-
- Get Blocks
- Get Bounces
- Get Clicks
- Get Conversions
- Get Filtered Contacts
- Get Mailing Summaries
- Get Opens
- Get Recipients
- Get Replies
- Get Revenue
- Get Subscribers
- Get Unique Bounces
- Get Unique Clicks
- Get Unique Conversions
- Get Unique Opens
- Get Unsubscription Reasons
- Get Unsubscriptions
- Social Networks List
- Alle Artikel anzeigen ( 3 ) Artikel zusammenklappen
-
- Add Mailing Blacklist to Mailing
- Copy Mailing
- Create Dispatching
- Create Mailing
- Delete Mailing
- Delete Mailing Blacklist from Mailing
- Delete Trigger
- Get CMS2 Mailing As Zip
- Get Dispatching
- Get limit on number of contacts
- Get Mailing Archive URL
- Get Mailing Blacklists for Mailing
- Get Mailing ID By Name
- Get Mailing Report URL
- Get Mailing Thumbnail
- Get Mailing Thumbnail URL
- Get Mailings By Creator Name
- Get Mailings By Keywords
- Get Mailings By Schedule Time
- Get Mailings By States
- Get Mailings By Subject
- Get Mailings By Types
- Get Preview
- Get Preview Text
- Get Template
- Get Templates for CMS2
- Get The Reply-To Address
- Mailing – Add Attachment
- Mailing – Add Custom Mailing Properties
- Mailing – Copy Attachments
- Mailing – Create Schedule
- Mailing – Delete Attachment
- Mailing – Delete Attachments
- Mailing – Delete Schedule
- Mailing – Disable QoS Checks
- Mailing – Enable Target Group Update
- Mailing – Fill RSS SmartMailing Tags
- Mailing – Get “Ignore Permission” State
- Mailing – Get “Post Sendout Cleanup” State
- Mailing – Get Archival Duration
- Mailing – Get Attachment
- Mailing – Get Attachments
- Mailing – Get Count Attachments
- Mailing – Get DOI Mailing Key
- Mailing – Get HTML
- Mailing – Get List of Custom Mailing Properties
- Mailing – Get Locale
- Mailing – Get Mailing Domain
- Mailing – Get Max Attachment Size
- Mailing – Get Max Content Size
- Mailing – Get Name
- Mailing – Get Recipient Alias
- Mailing – Get result for Link Quality Check
- Mailing – Get result for Message Size Quality Check
- Mailing – Get result for Personalization Quality Check
- Mailing – Get result for Spam Quality Check
- Mailing – Get results for Approval Sendout Quality Check
- Mailing – Get results for Bounce Quality Check
- Mailing – Get results for Display Quality Check
- Mailing – Get results for Image Quality Check
- Mailing – Get results for Test Mail Sendout
- Mailing – Get Schedule
- Mailing – Get Sender Address
- Mailing – Get Sender Alias
- Mailing – Get Speed Level
- Mailing – Get State
- Mailing – Get Subject
- Mailing – Get Tags
- Mailing – Get Target Group Id
- Mailing – Get Target Group Update status
- Mailing – Get Text
- Mailing – Get Tracking Duration
- Mailing – Get Tracking Strategy
- Mailing – Get Type
- Mailing – Is Sealed
- Mailing – Remove Custom Mailing Property
- Mailing – Send Approval Mail to Targetgroup
- Mailing – Send Now
- Mailing – Send Testmail to Single Emailaddress
- Mailing – Send Testmail to Targetgroup
- Mailing – Set “Ignore Permission” State
- Mailing – Set “Post Sendout Cleanup” State
- Mailing – Set DOI Mailing Key
- Mailing – Set Html
- Mailing – Set Locale
- Mailing – Set Name
- Mailing – Set Recipient Alias
- Mailing – Set Sender Address
- Mailing – Set Sender Alias
- Mailing – Set Speed Level
- Mailing – Set Subject
- Mailing – Set Tags
- Mailing – Set Target Group Id
- Mailing – Set Text
- Mailing – Set Tracking Strategy
- Mailing – Start Bounce Quality Check
- Mailing – Start Image Quality Check
- Mailing – Start Link Quality Check
- Mailing – Start Message Size Quality Check
- Mailing – Start Personalization Quality Check
- Mailing – Start Quality Check
- Mailing – Update Custom Mailing Property
- Mailing – Update Schedule
- Reset Contents to Template
- Save CMS2 Mailing to Media Library
- Set limit on number of contacts before sending mailing
- Set Preview Text
- Set Template
- Set Template for CMS2 Mailing
- Set The Reply-To Address
- Upload CMS2 Mailing Contents
- Alle Artikel anzeigen ( 96 ) Artikel zusammenklappen
-
- Bald verfügbar
3f – Addition of Anchor-Links
Introduction
Anchor links help you to navigate within the emailing and guiding to predefined points, such as from the table of contents to product categories, forms, CTA buttons, etc.
Multiple anchors can be placed within a page, allowing navigation to different destinations. A ‚Go to the top of the page‘ link or button functions in the same way.
In Maileon Editor 2, placing anchor links is quick and easy. Below you will find two methods for placing an anchor link. Method 1 demonstrates how to place an anchor link within the body of the text, while Method 2 explains how to create an automatic table of contents.
Method 1: Create the anchor links manually while editing your emailing draft
This method is effective if you want to link to individual points of information located anywhere in the emailing.
1. Highlight the text in your table of content you would like to indicate with the anchor link and click on the Insert Link icon (fig. 1).
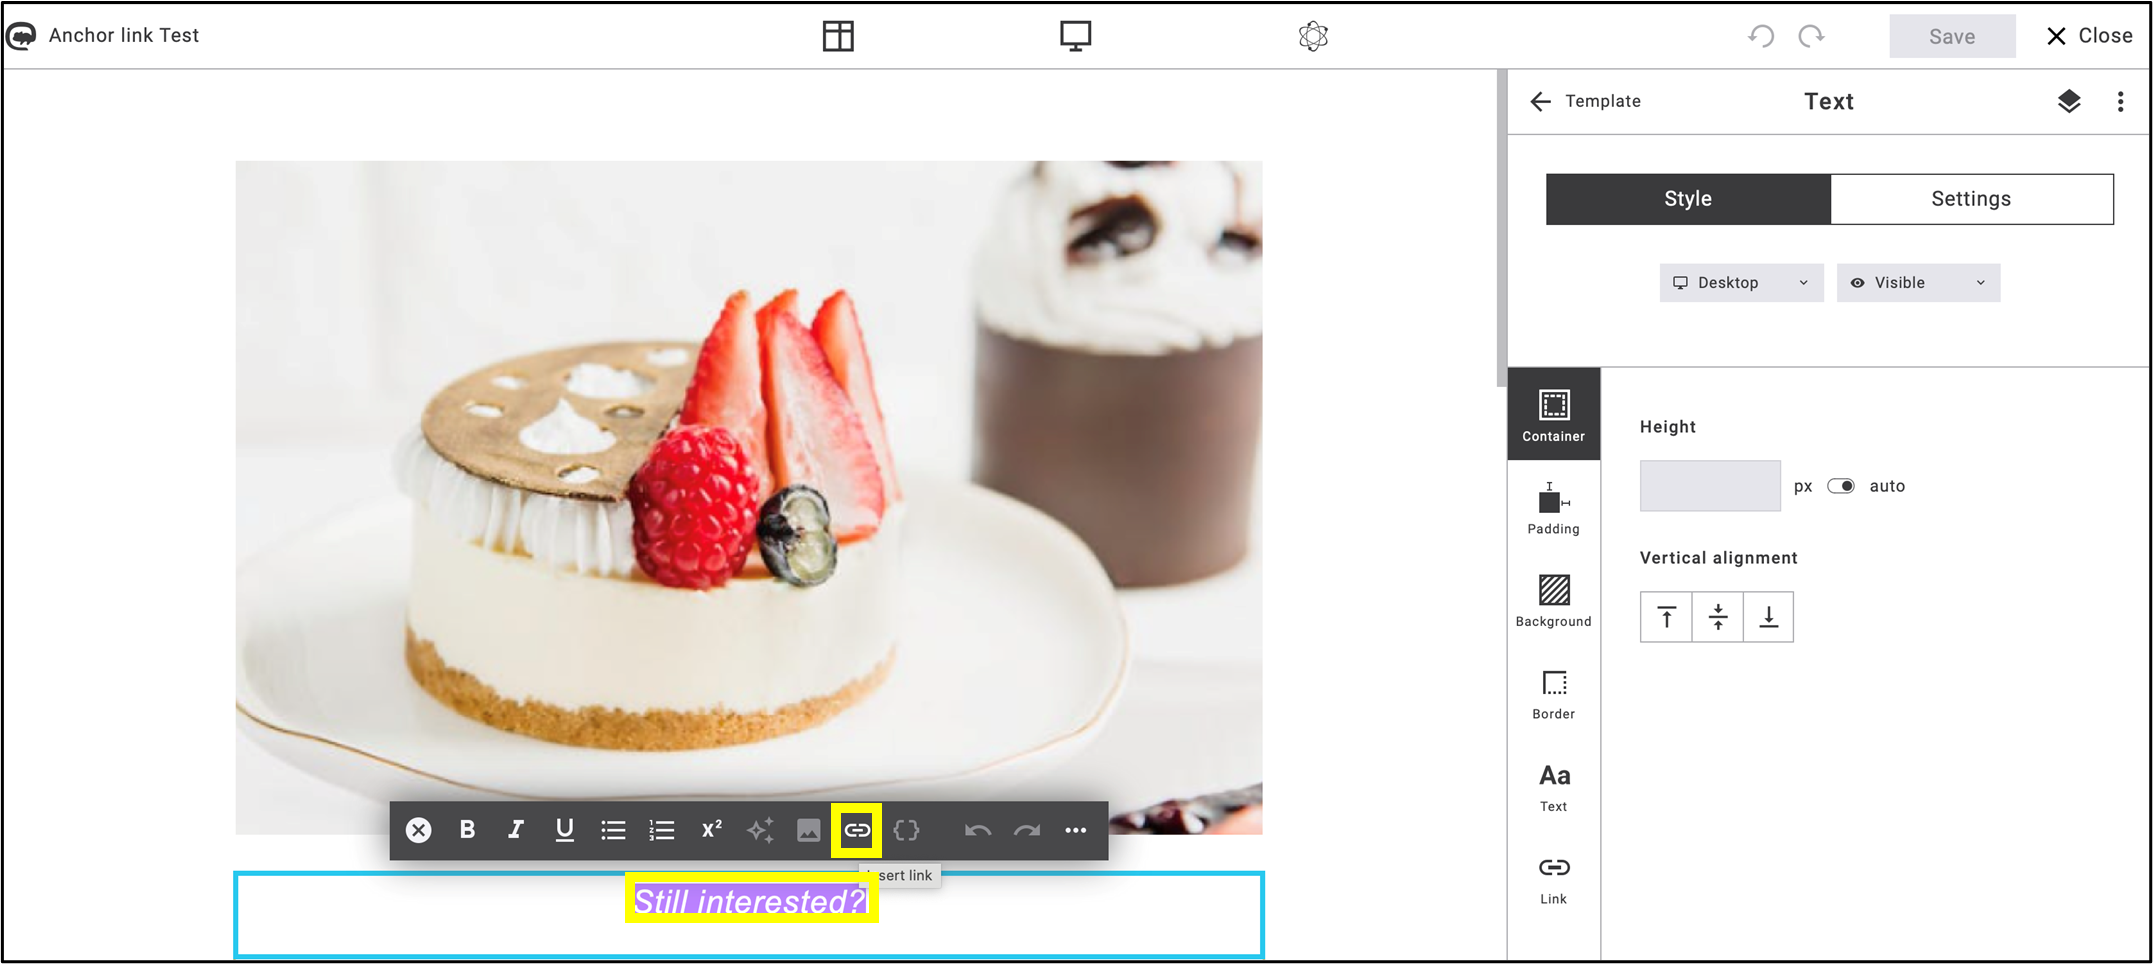
fig. 1: Highlight the text you want to anchor, then click on the ’Insert link’ icon.
2. Choose the Web Address function and insert a ‘#’ (hashtag sign) followed by the keyword you want to jump to in the table of contents (fig. 2).

fig. 2: Use a hashtag before the keyword that will serve as the anchor.
Note: Track clicks must be deactivated for the anchor link to work!
Click on Save.
3. Select the text block in the emailing where you want to place the anchor.
- In Settings, select Anchor link.
- Add the previously set keyword to the checkbox related to the anchor link, without the hashtag sign ‘#’ (fig. 3).
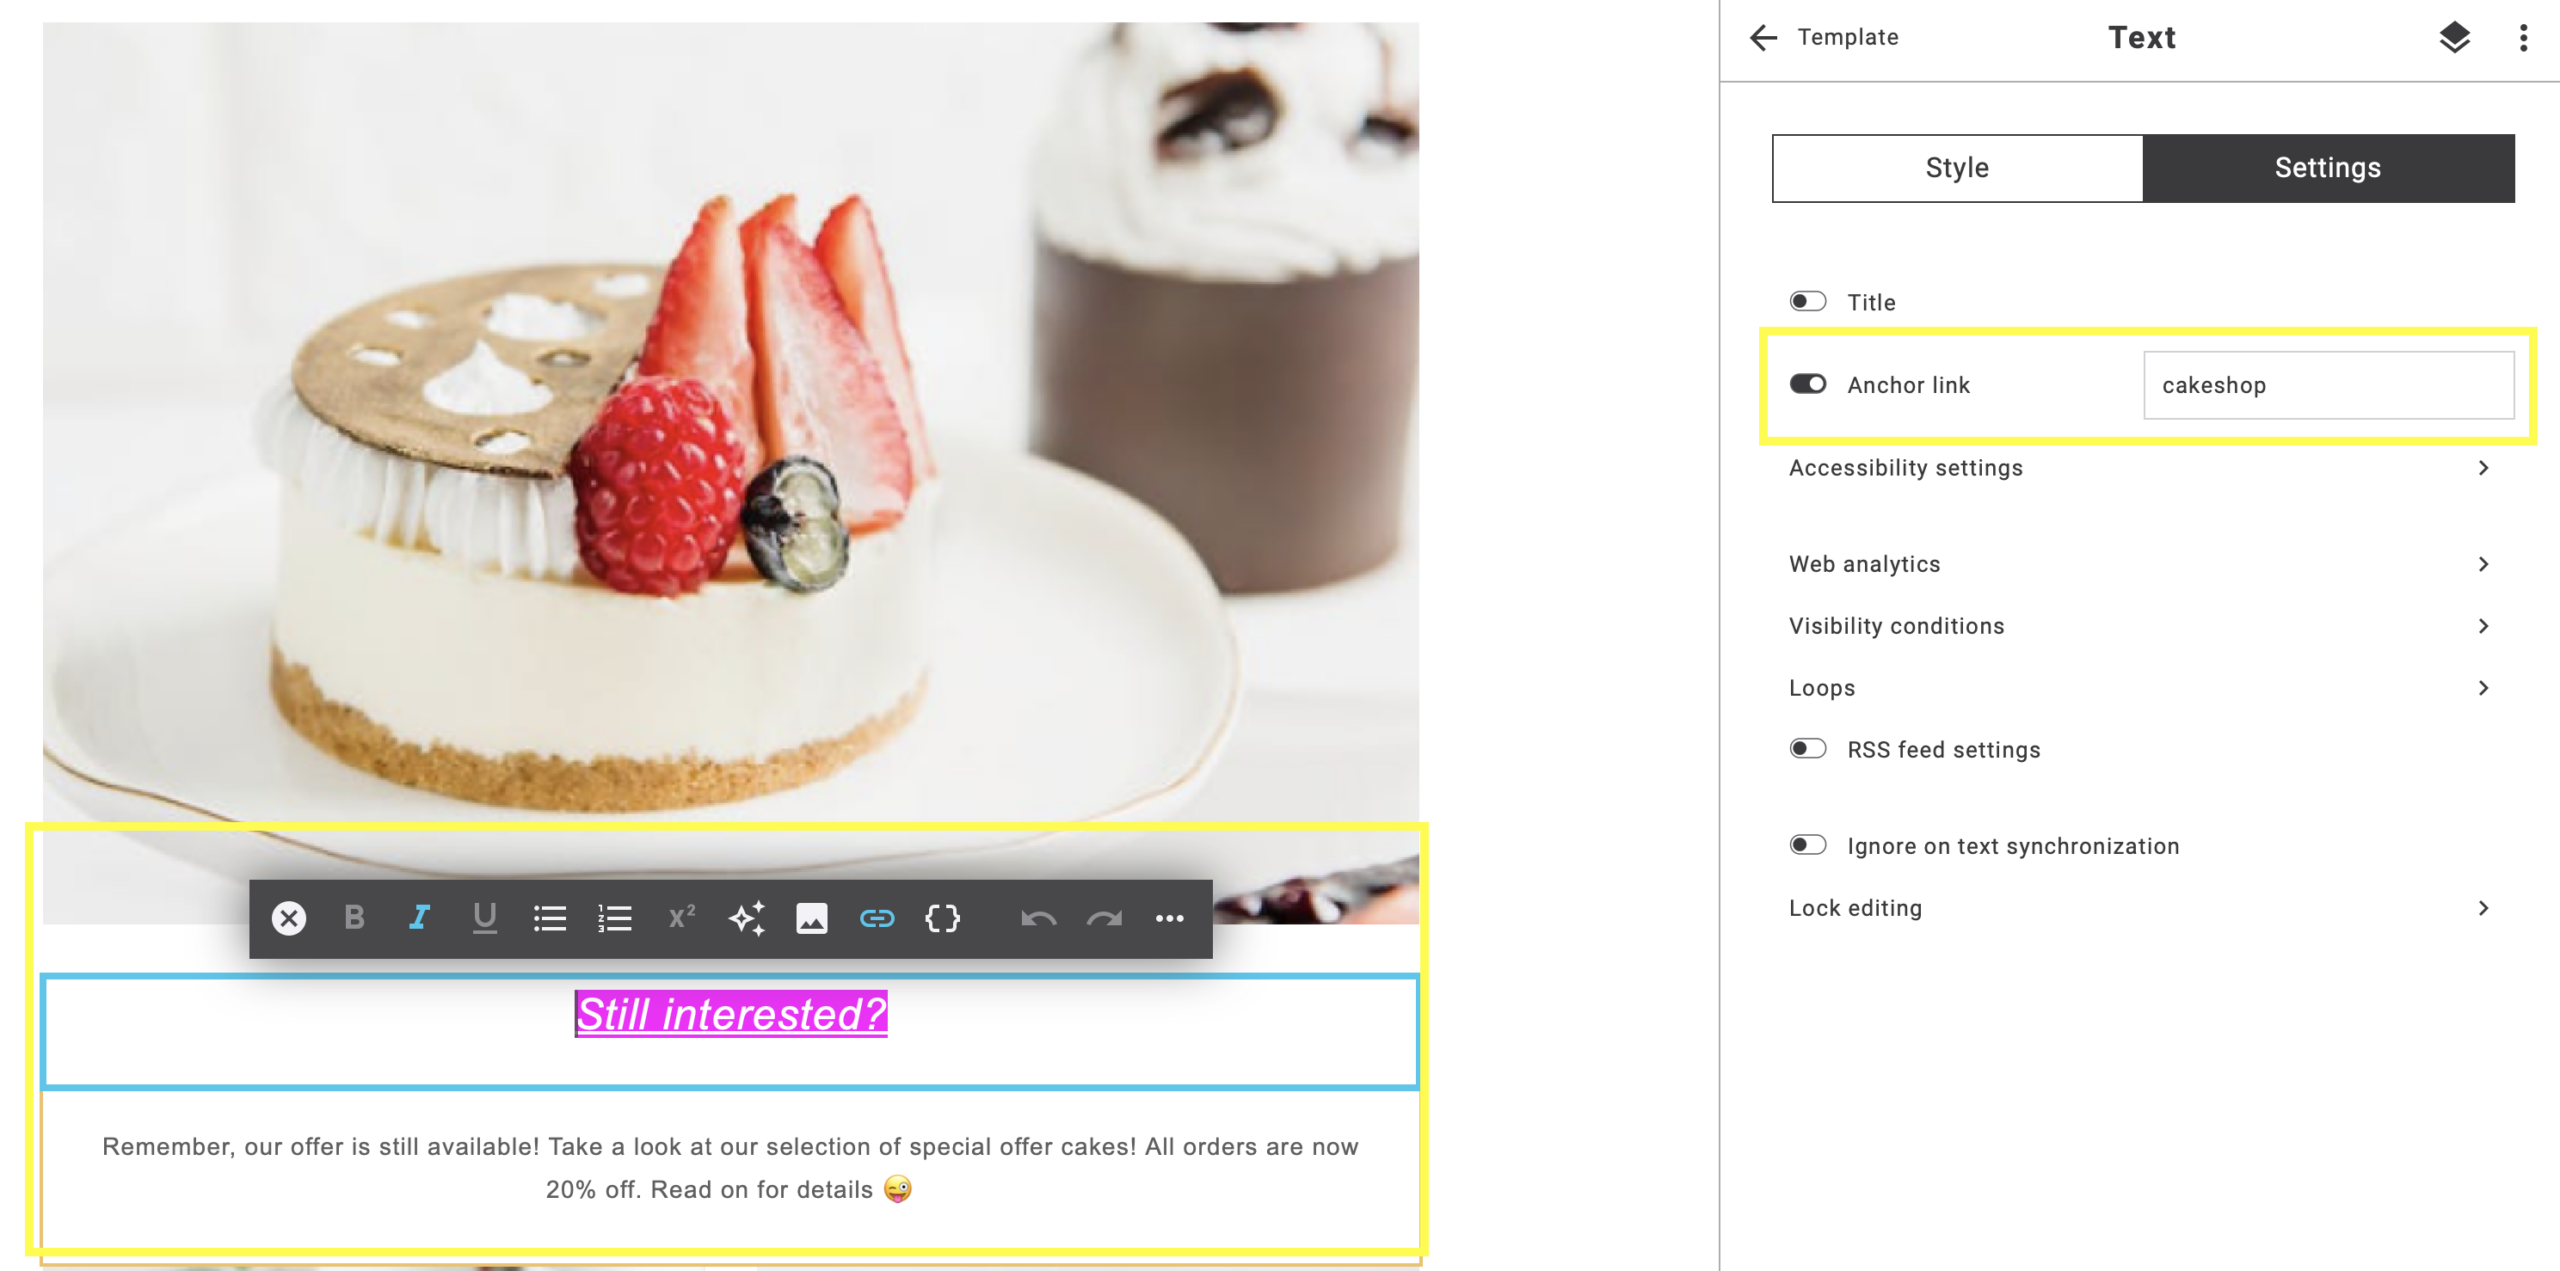 fig. 3: Follow the steps to set the text box as the destination of the anchor link.
4. Go to Preview and click on the highlighted text (fig. 4).
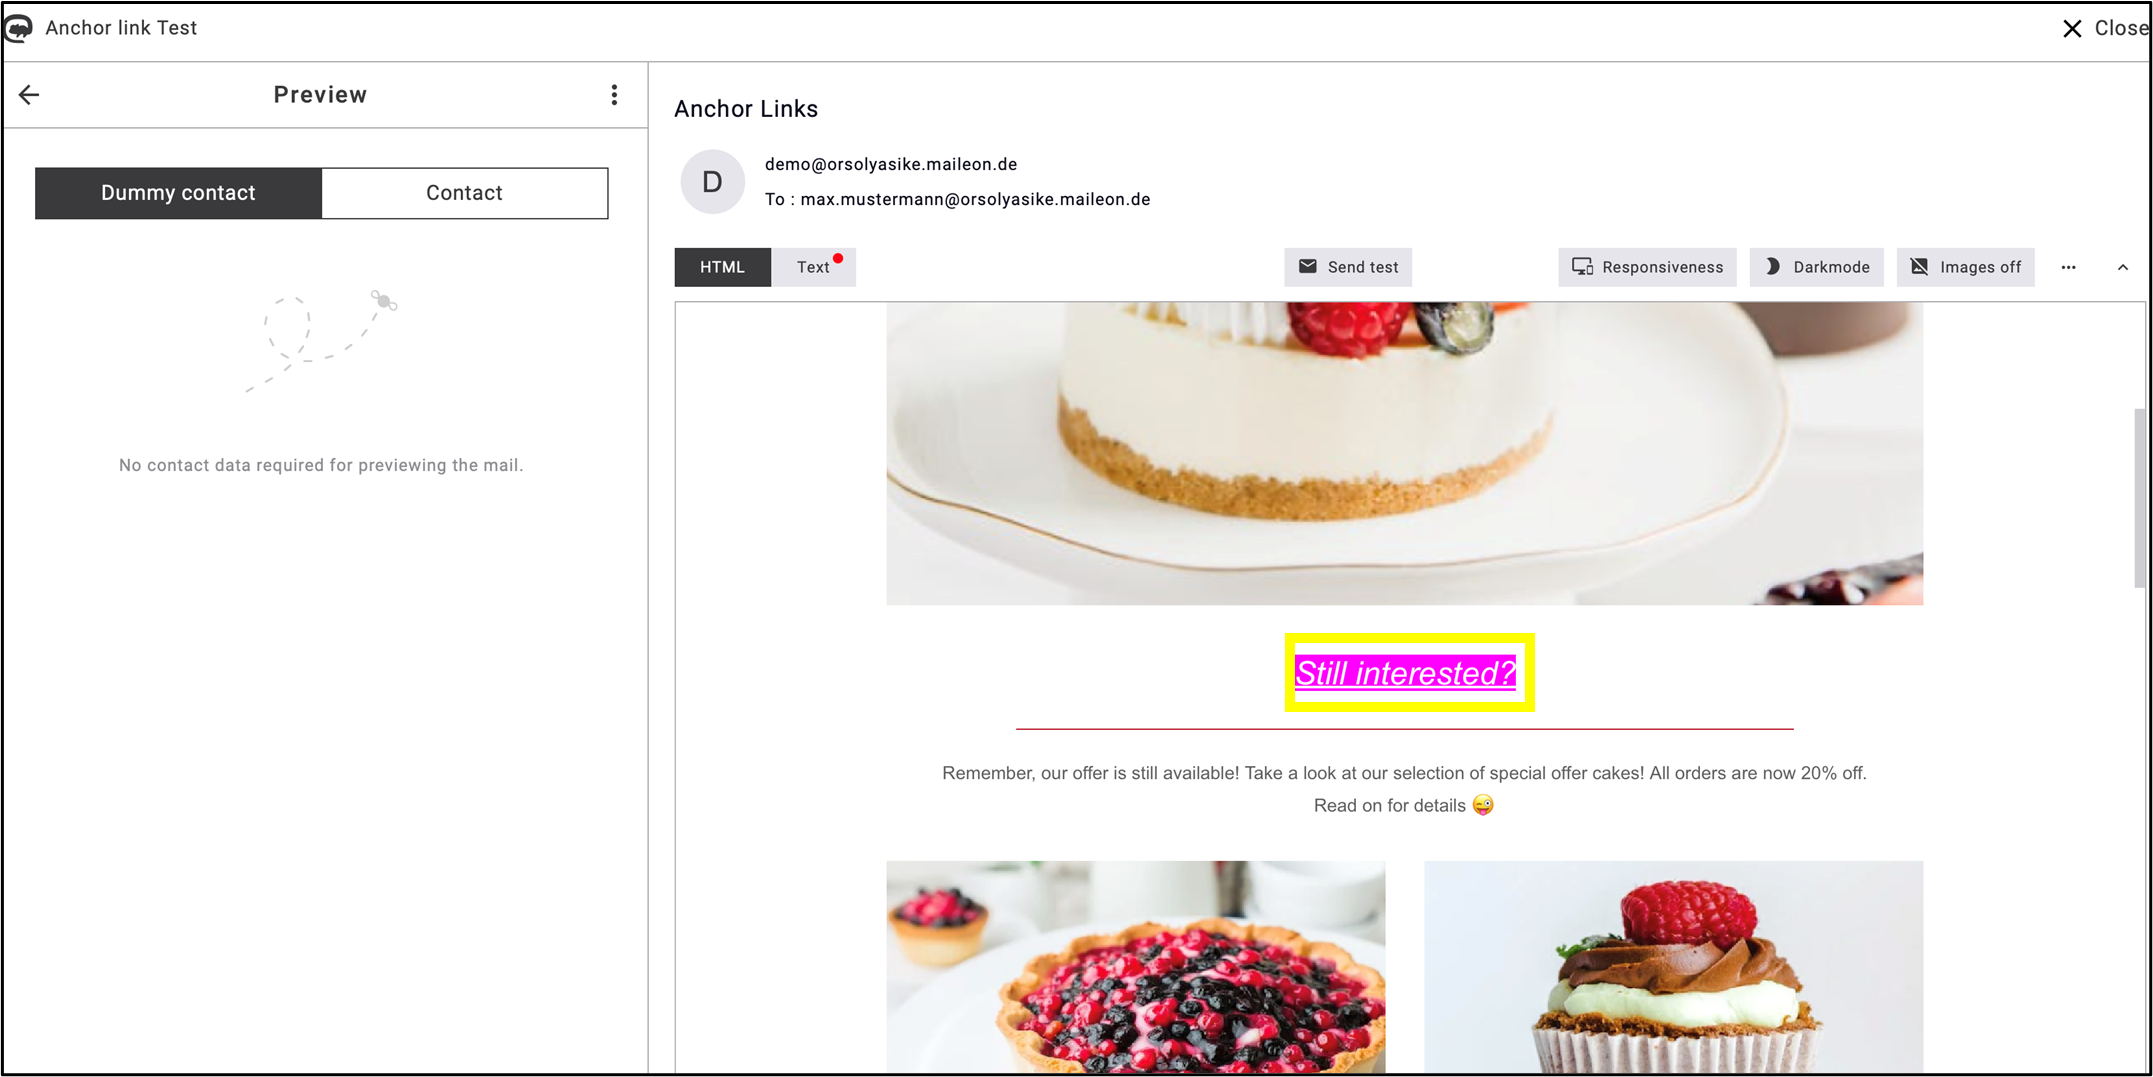
fig. 4: By clicking the anchor link you will jump directly to the point where the anchor keyword is set.
Method 2: Create an automatic table of contents
This method is useful if you wish to include a table of contents at the beginning/as an introduction of the emailing.
1. Create a new text block for your table of contents and click on the ‘Insert placeholder’ { } icon in the editing bar (fig. 5).
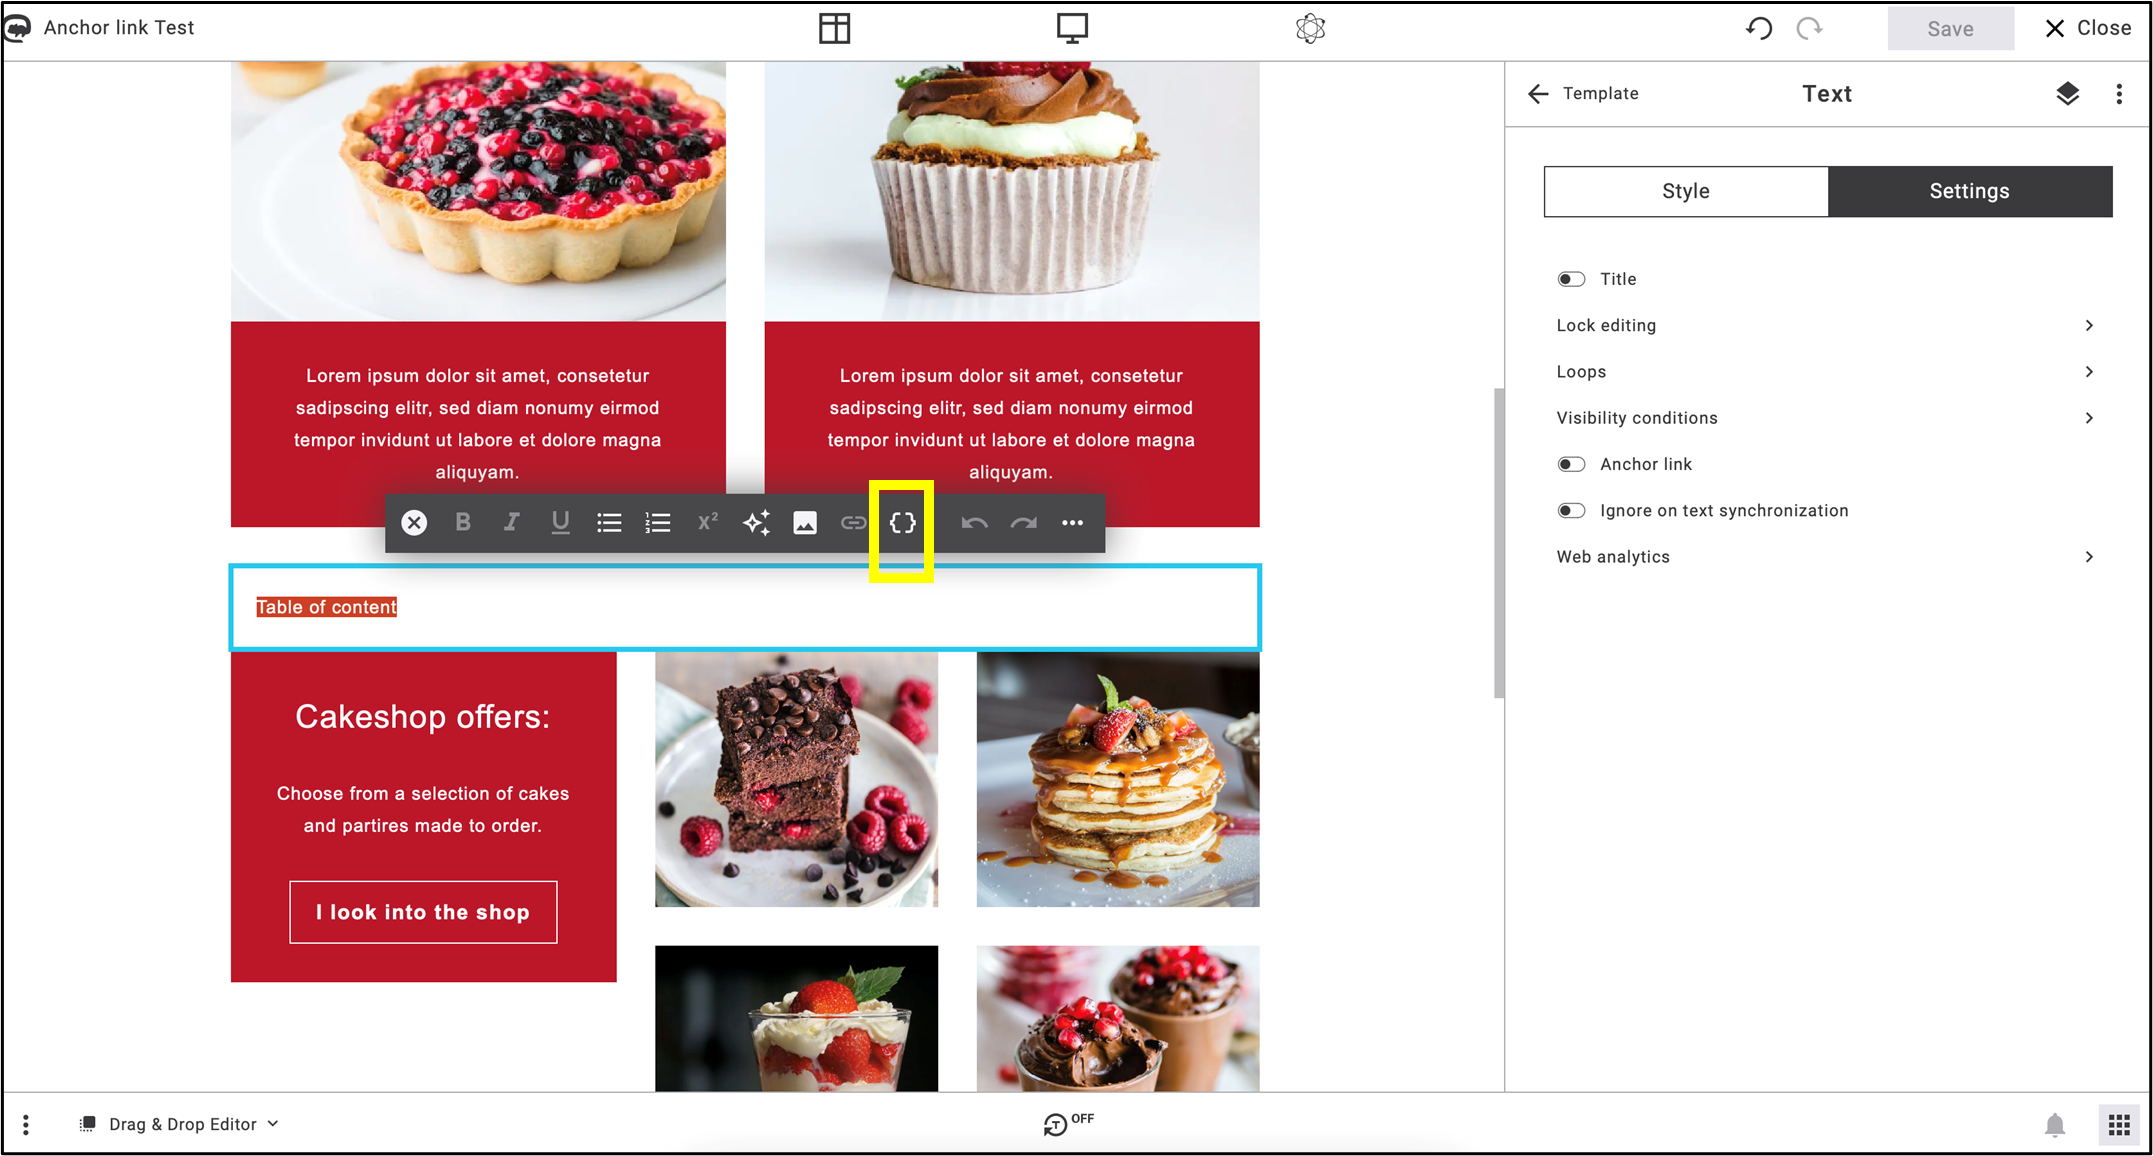
fig. 5: Select the text and click on the ‘Insert placeholder’ icon to create the automatic table of contents.
2. Select Advanced placeholders (fig. 6.) -> Table of contents list iterator (fig. 7.).
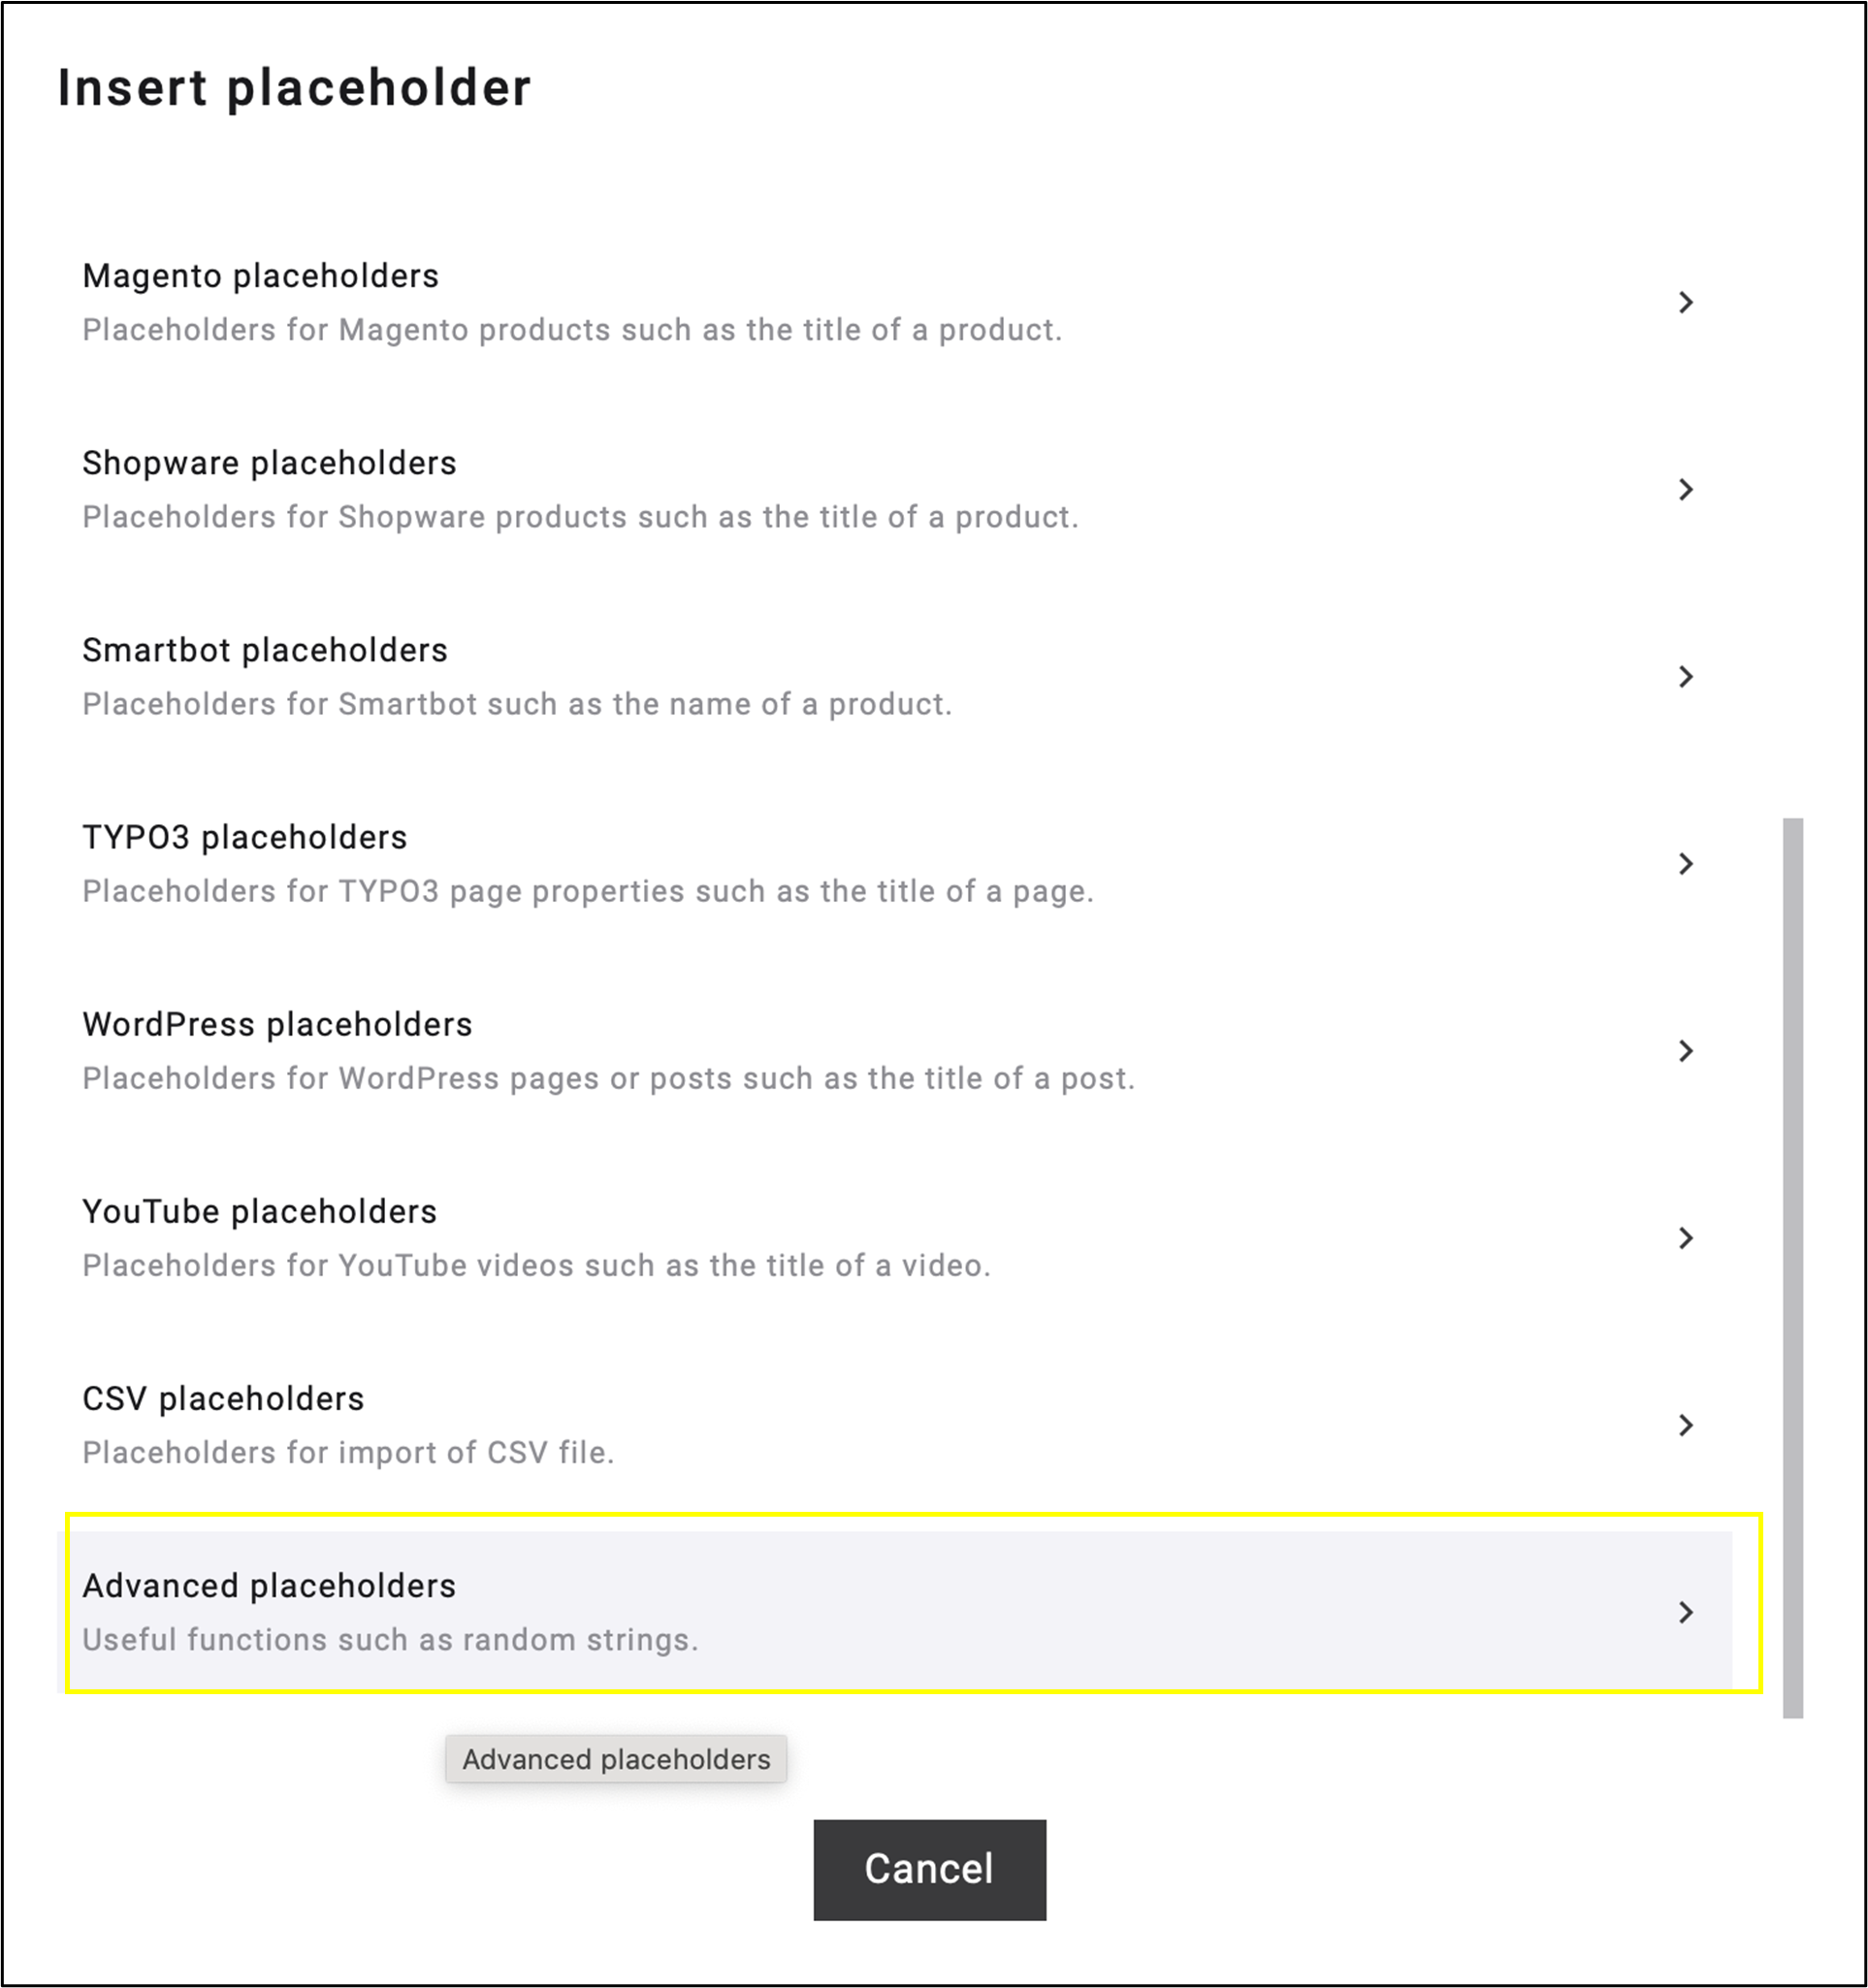
fig. 6: In the dropdown menu of ‘Insert placeholder’, select ‘Advanced placeholders’.

fig. 7: In ‘Advanced placeholders’, select ‘Table of content list iterator.’
Note: This function may appear in the Others menu after clicking on the Insert Placeholder icon (fig. 8). You will also find the Table of content list iterator function in the Others dropdown menu (fig. 9).
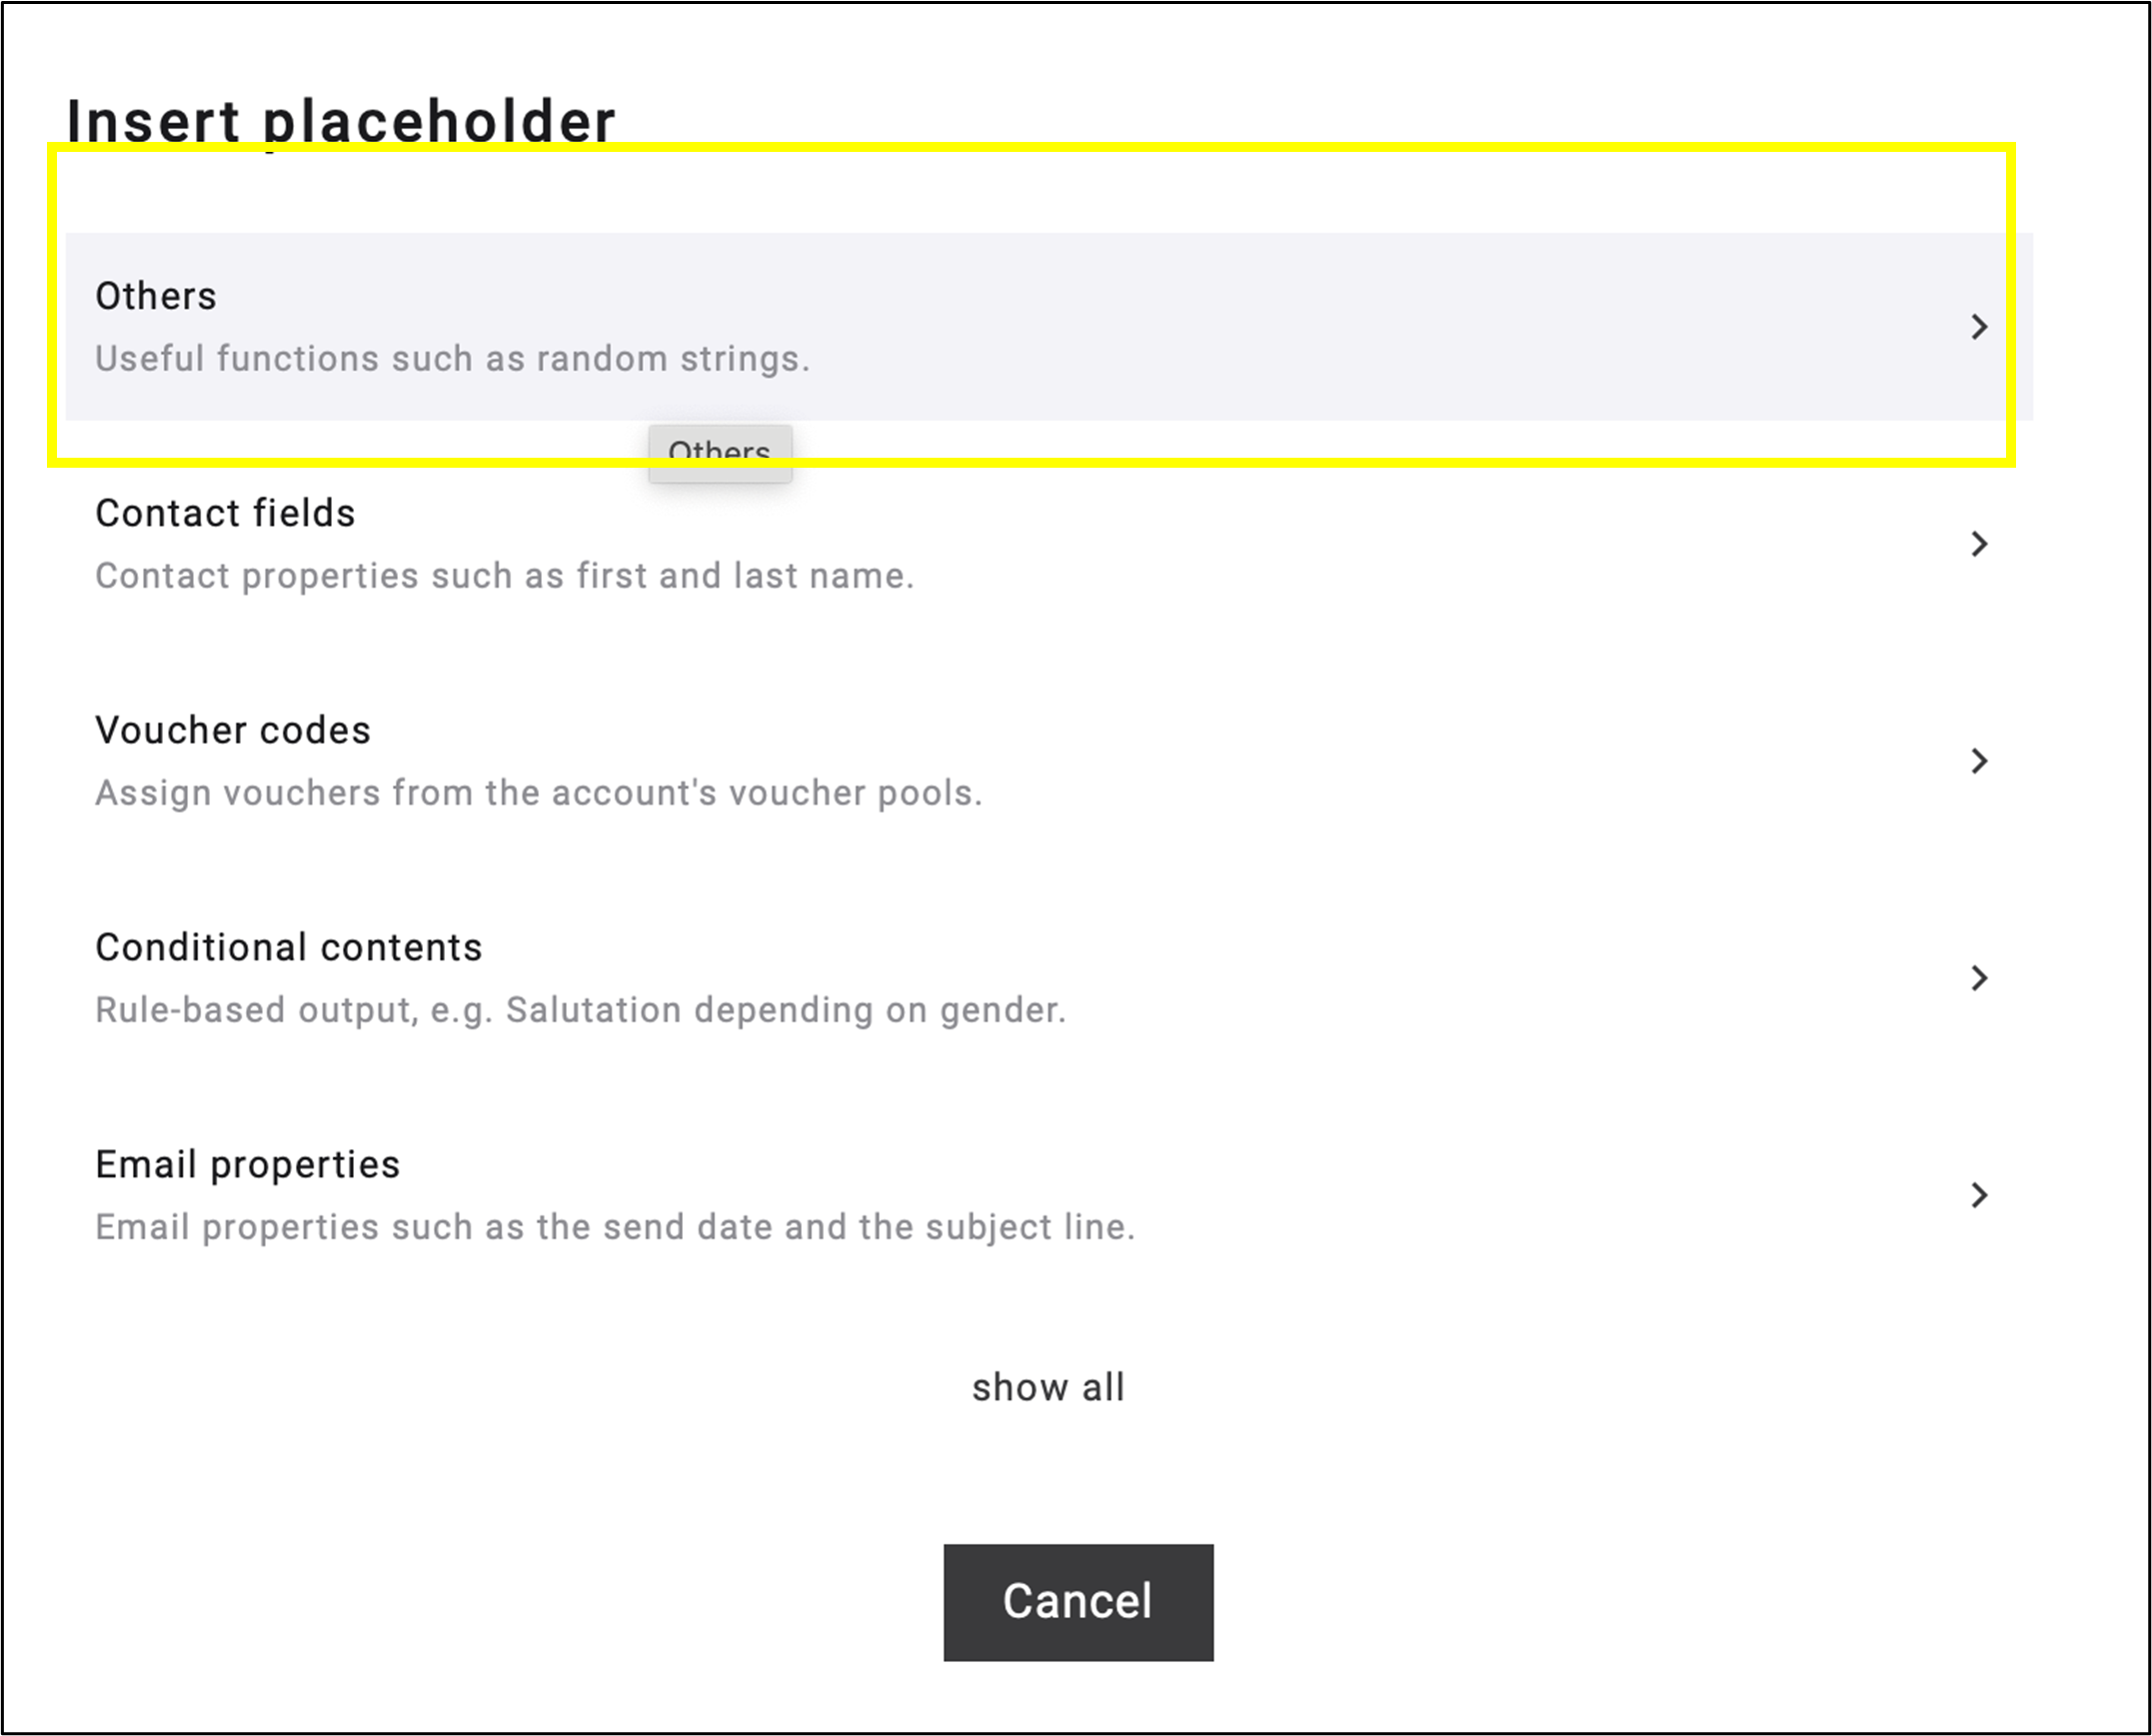
fig. 8: You may find this function in the ‚Others‘ menu after selecting the ‚Insert placeholder‘ icon.

fig. 9: ‘Others’ menu also includes ‘Table of content list iterator’ function.
3. After applying Table of contents list iterator, a code will be inserted in your textbox. Delete the dots in the middle of the code that are outside the brackets (fig. 10).
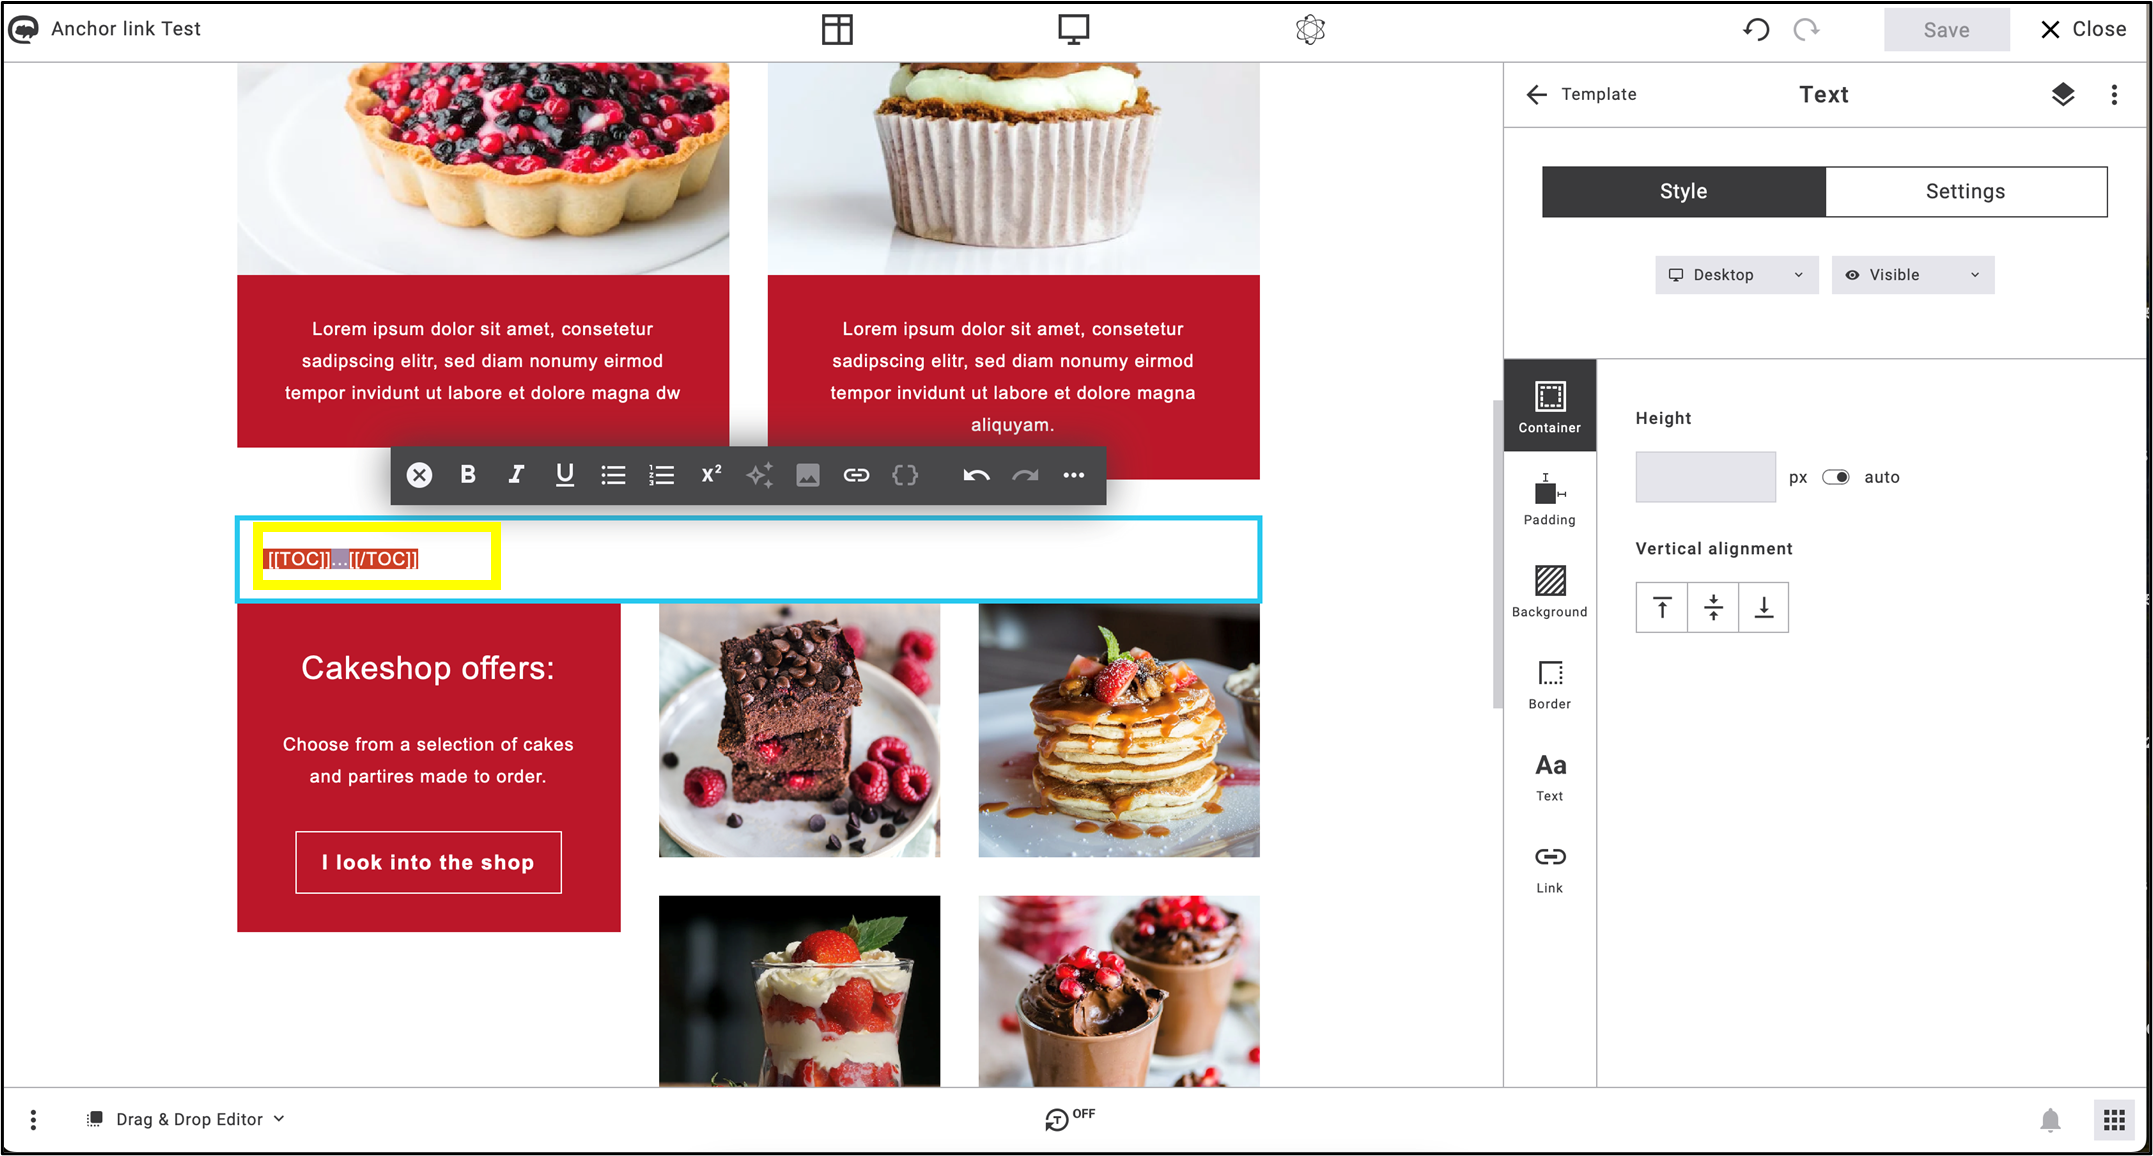
fig. 10: After the code has been inserted, delete just the dots from the middle
4. Click on the Insert placeholder icon again and among Other placeholders, select Table of content anchor (fig. 11).
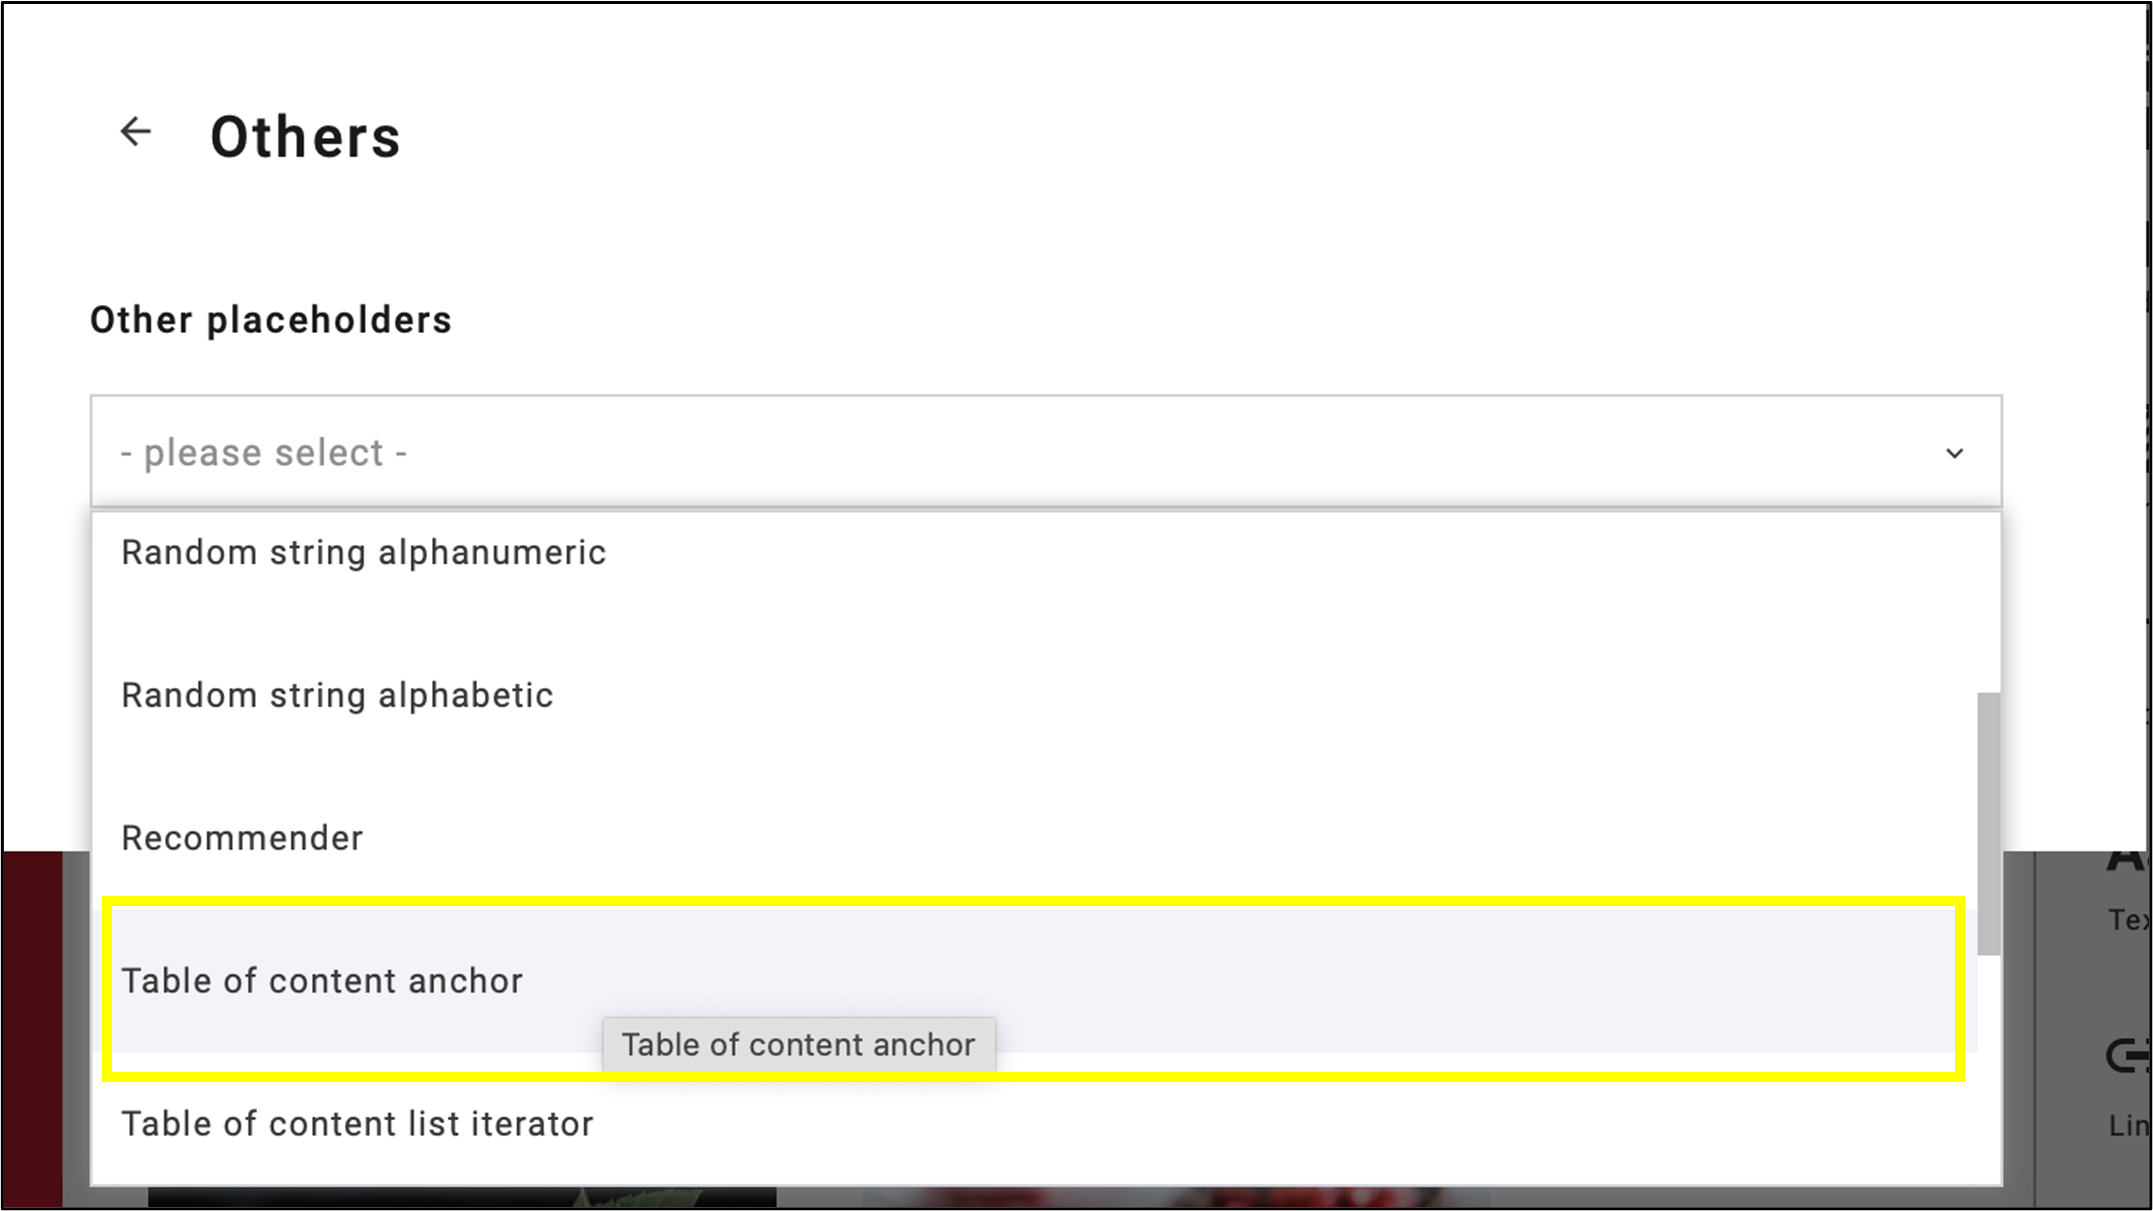
fig. 11: Choose ‘Table of content anchor’ among ‘Other placeholders’.
The code [[TOC-TITLE]] of Table of Contents Anchor will be inserted into your textbox (fig. 12).

fig. 12: The code [[TOC-TITLE]], placed within the code for the entire table of contents, has been inserted into the textbox.
5. Define the anchor structure: Create, place and name the blocks in the body of the mailing where the table of contents will link to (fig. 13).
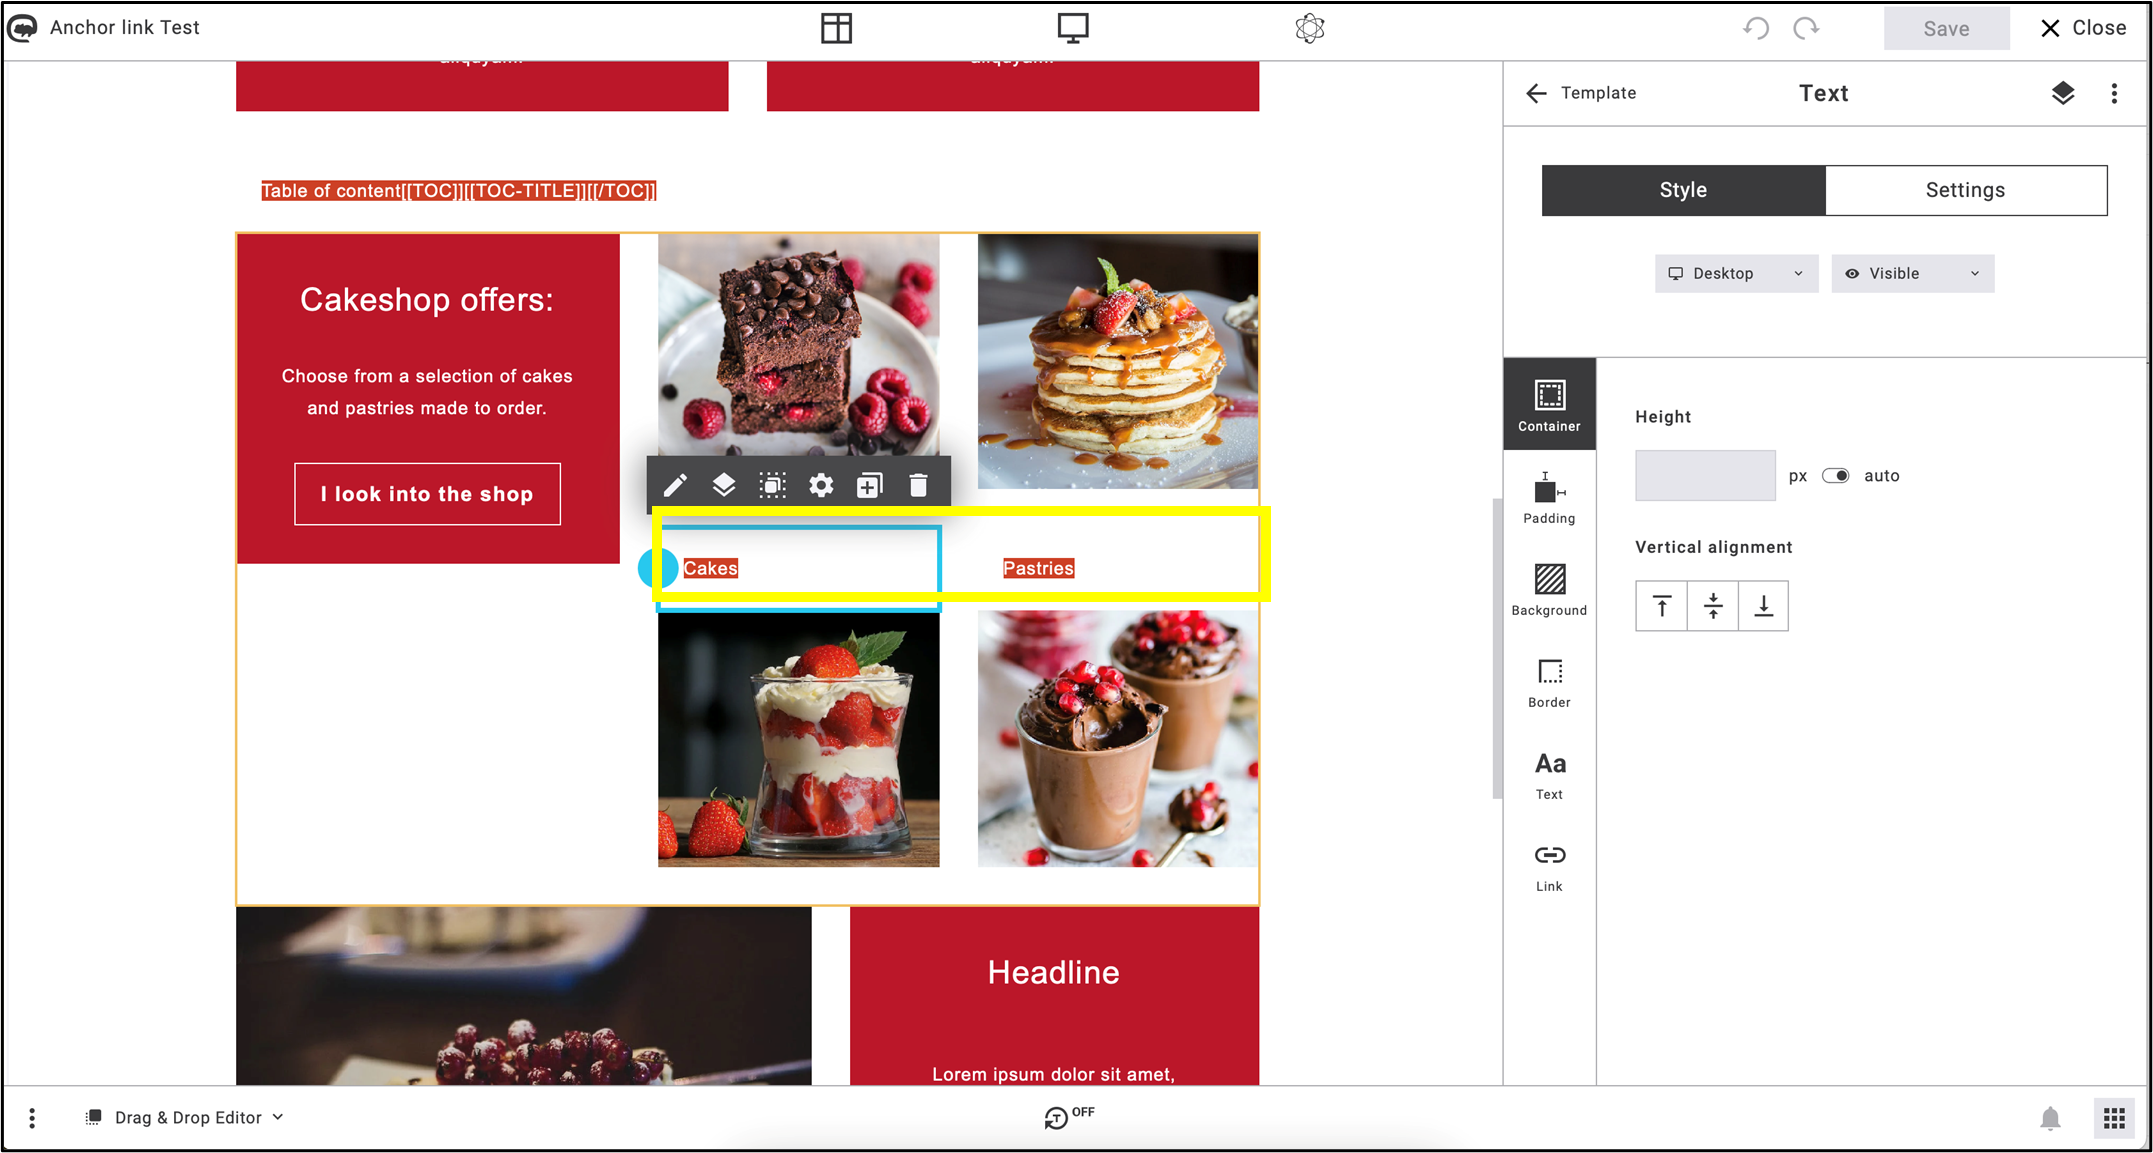
fig. 13: Edit and assign names to the blocks that the table of contents will link to.
6. Select the text in the edited textboxes, click on Heading in the menu and choose one of the Table of contents (TOC) formatting options (fig. 14).
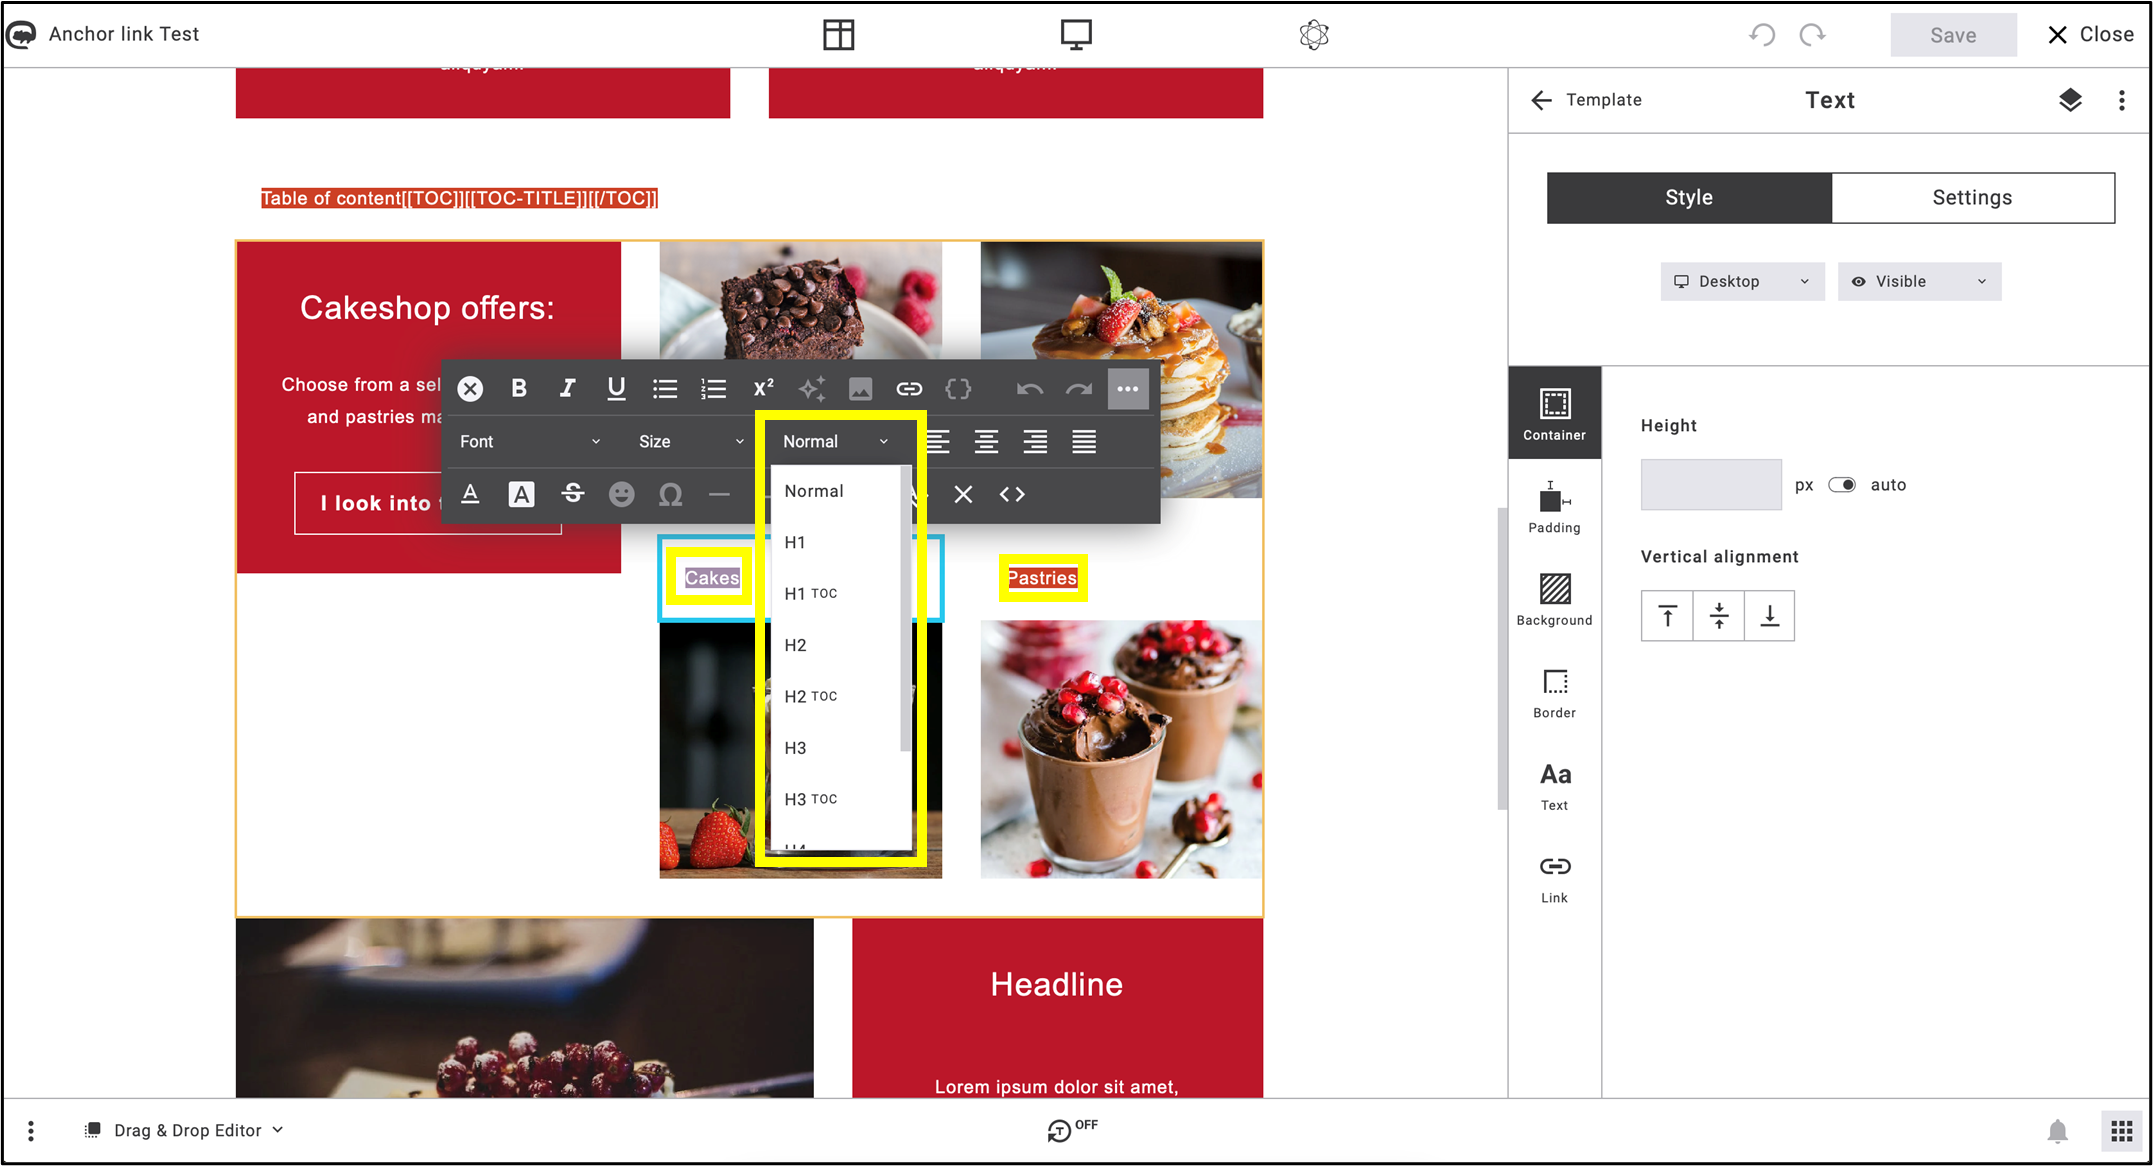
Fig. 14: In ‘Heading’, choose one of the Table of contents (TOC) formatting options.
7. To activate the jump menu between the table of contents and the textboxes, select the [[TOC-TITLE]] code of the Table of contents anchor and click on the Insert link icon (fig. 15). You are able to format the TOC text style as you want.
![the code: [[TOC-TITLE]] is marked, the Insert link button in the menu bar above it is highlighted](https://support.maileon.com/wp-content/uploads/2025/06/Insert-link-on-code.png)
fig. 15: Select the [[TOC-TITLE]] code and click on ’Insert link’.
8. Select Standard link -> Table of content anchor link (fig. 16).
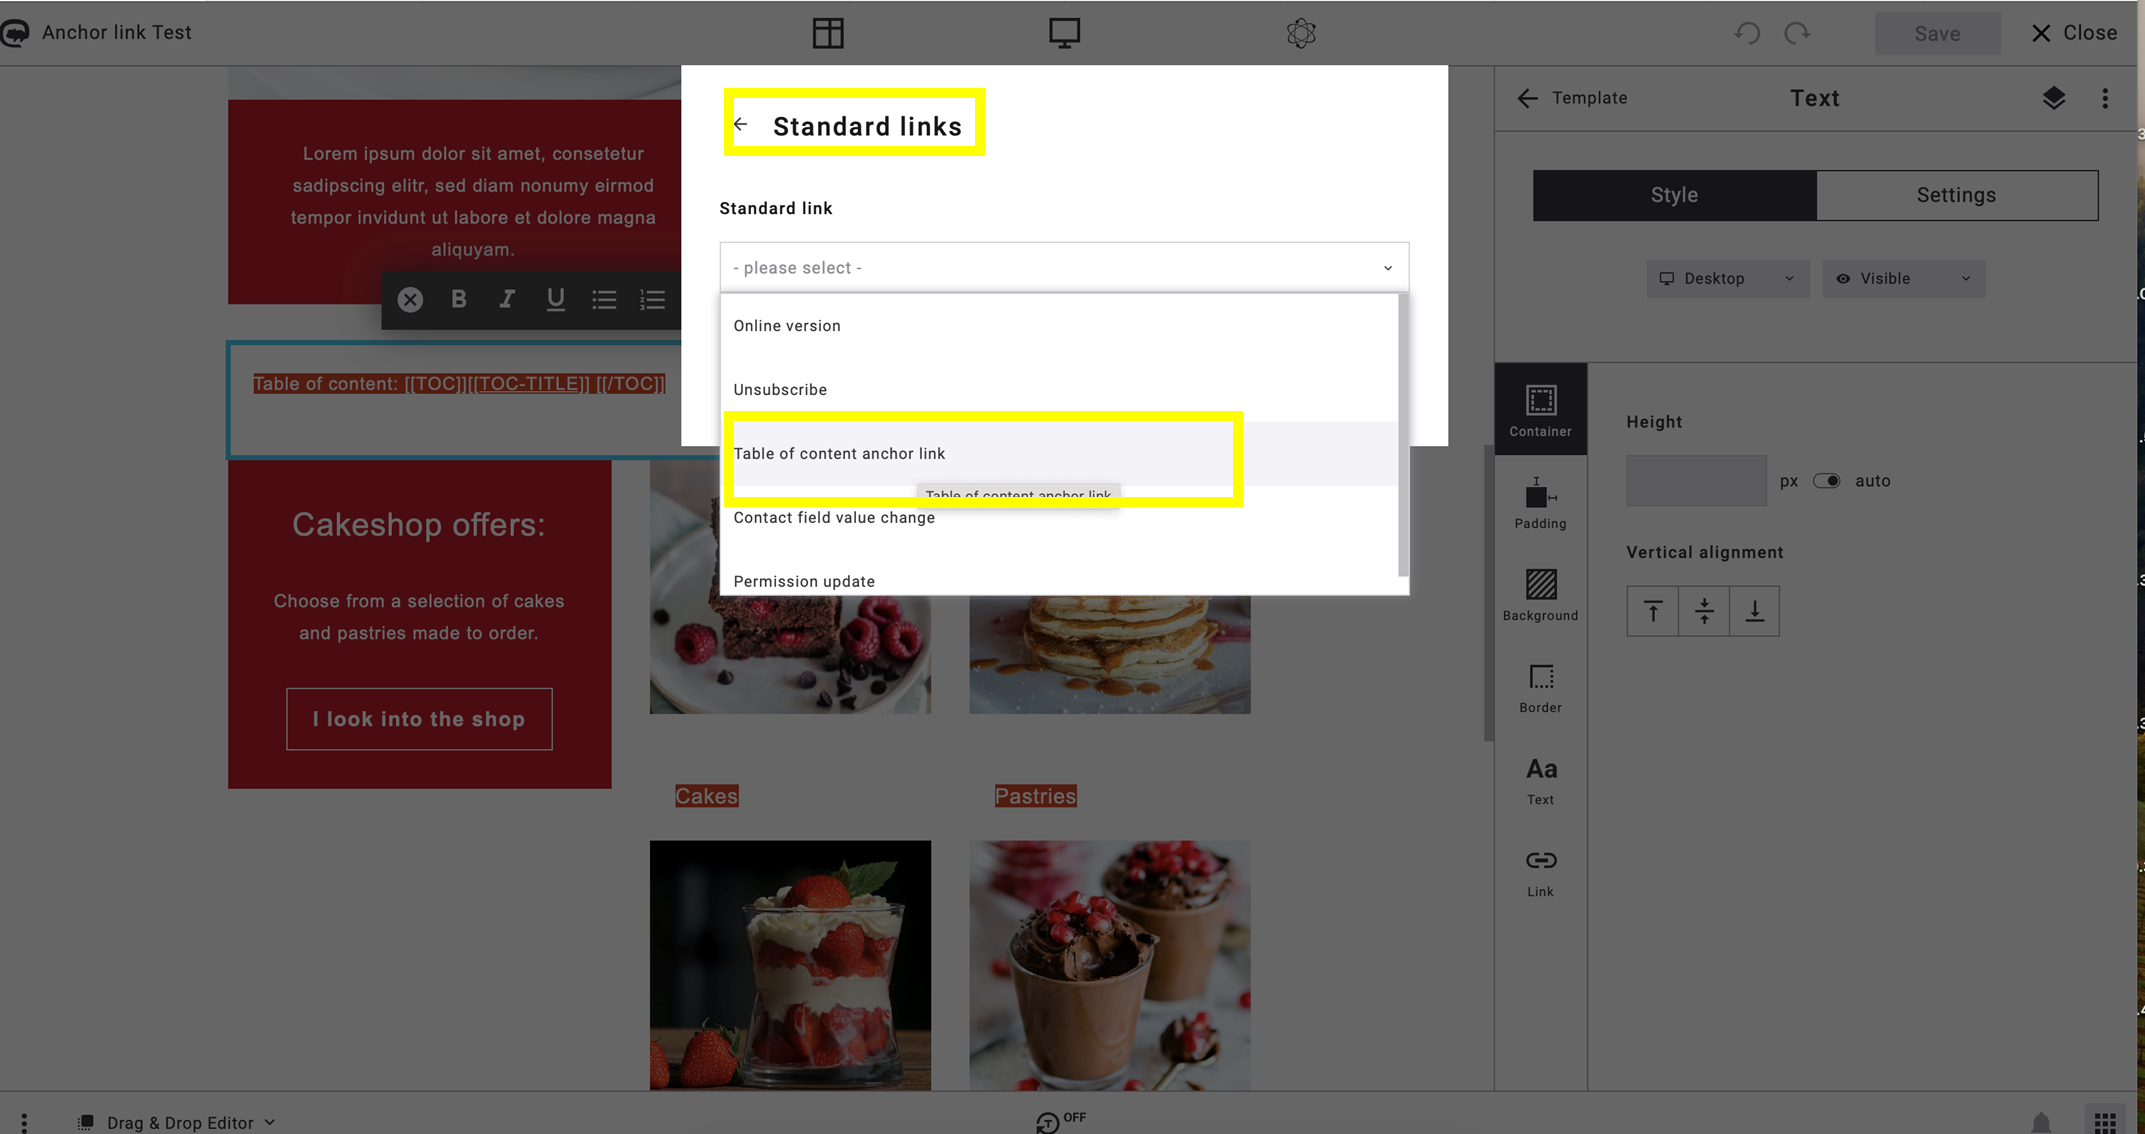
fig. 16: Select the ‘Table of content anchor link’ to take the final steps.
9. In Preview, ensure that the table of contents — which can be renamed at any time, as shown in the image below — and the selected text boxes are linked using anchor links. The underlined keywords serve as the anchor links (fig. 17).
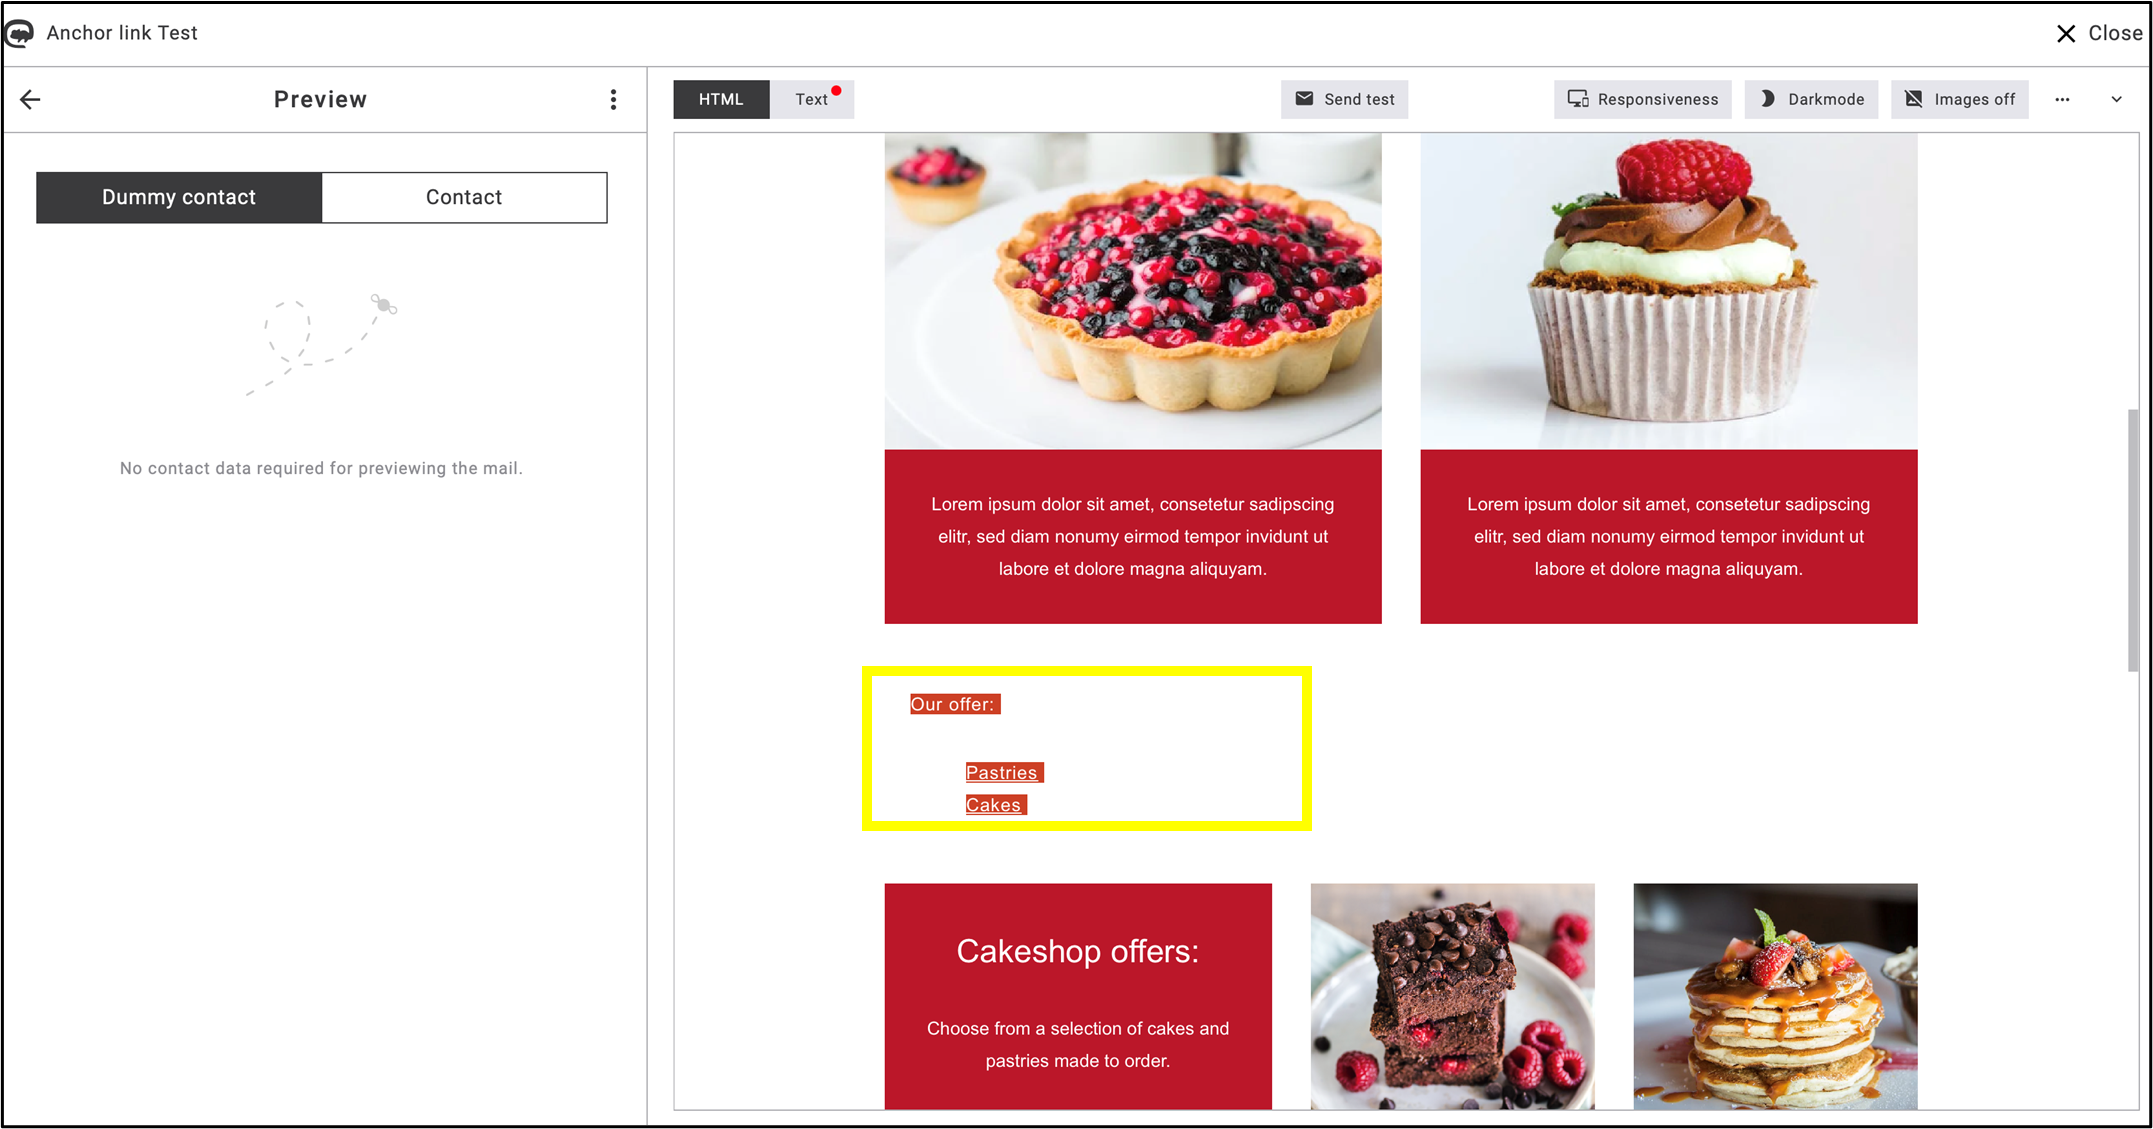
fig. 17: Running of anchor link preview.
Example of creating Table of contents via TOC-TITLE code
The following newsletter snippet demonstrates how the TOC-TITLE code functions in a completed newsletter (fig. 18).
The elements of the table of contents (‘Themenübersicht’) include the separate anchor links, which appear in separate text blocks below the table of contents, as shown in the highlighted section (‘Highlight des Monats’).

fig. 18: Anchor links as elements of table of contents.
Each item in the table of contents has a corresponding anchor link and appears as a separate text box within the mailing.