Im Maileon Help-Center finden Sie umfassende Dokumentationen zu unserem System.
Beliebte Suchanfragen: Importe | Rest-API | Integrationen | SMS
UI2 Section 1
UI2 documentation
Section 1
1. Introduction
Maileon UI2—officially known as Editor 2.0 or UI2—is the latest generation of Maileon’s email marketing platform interface. It represents a significant upgrade over the classic editor, featuring a new template editor and a completely redesigned Marketing Automation interface.
The new UI2 offers a major improvement in simplicity, usability, and performance. The interface is more intuitive, visually appealing, and supports faster workflow.
While UI2 follows the overall concept of UI1, the general workflows remain the same, though arranged in a clearer, more efficient way.
This documentation highlights the key new developments and solutions in the UI2 interface. The documentation is divided into three sections. Please find the second and the third section in Maileon’s Help Center .
Note: In case of questions about the innovations and new features of UI2, contact us at support@xqueue.com.
2. Key features of Maileon UI2
- Modern user experience (UX) with a clean, responsive, and intuitive interface. Fully optimised for desktop and tablet use and designed to reduce complexity for both new and experienced users.
- Full-screen Marketing Automation canvas that allows users to visually build workflows by combining modular elements such as triggers, filters, actions, and endpoints, supporting campaigns with advanced branching logic and precise targeting capabilities.
- Visual, drag-and-drop editor for designing fully responsive email campaigns, featuring modular content blocks for easy customisation.
- Efficient content and contact management through clear navigation for handling contact lists, segments, and campaign assets, along with seamless integration with external systems via REST API and webhooks.
- Built-in tracking and reporting tools, offering real-time campaign analytics and deliverability insights to support data-driven decision-making.
- Modern email design for responsive marketing needs.
- Full GDPR compliance.
3. Updates and changes compared to UI1
3.1. Dashboard: Enhanced interface and reporting features
A redesigned, more visually organised dashboard provides a clearer overview of key account information, including
- the account box,
- campaign evaluations,
- recipient trends, and
- detailed email campaign reports (fig. 1).

Fig. 1: The redesigned dashboard offering a clearer view of key information.
These improvements make it easier to monitor performance at a glance. Additionally, users can now perform a domain change with a single click, streamlining account management tasks (fig. 2).
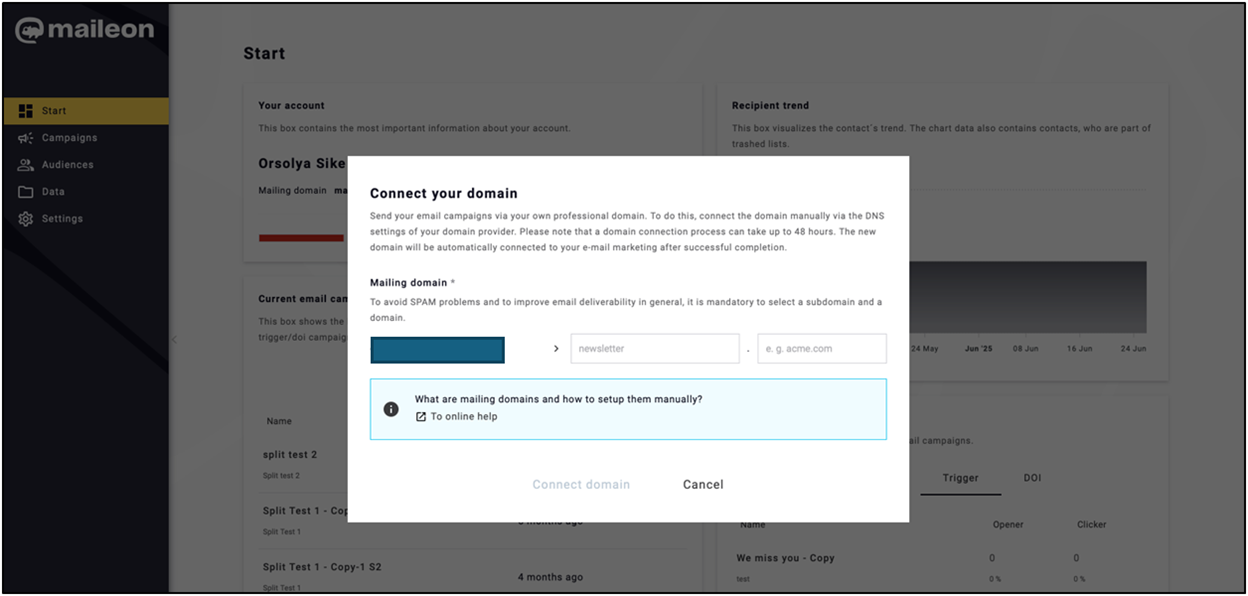
Fig. 2: One-click domain change for simplified account management.
Tap navigation is a new feature that enables a clickable interface (scroll spy) for users who cannot use a mouse (fig. 3).
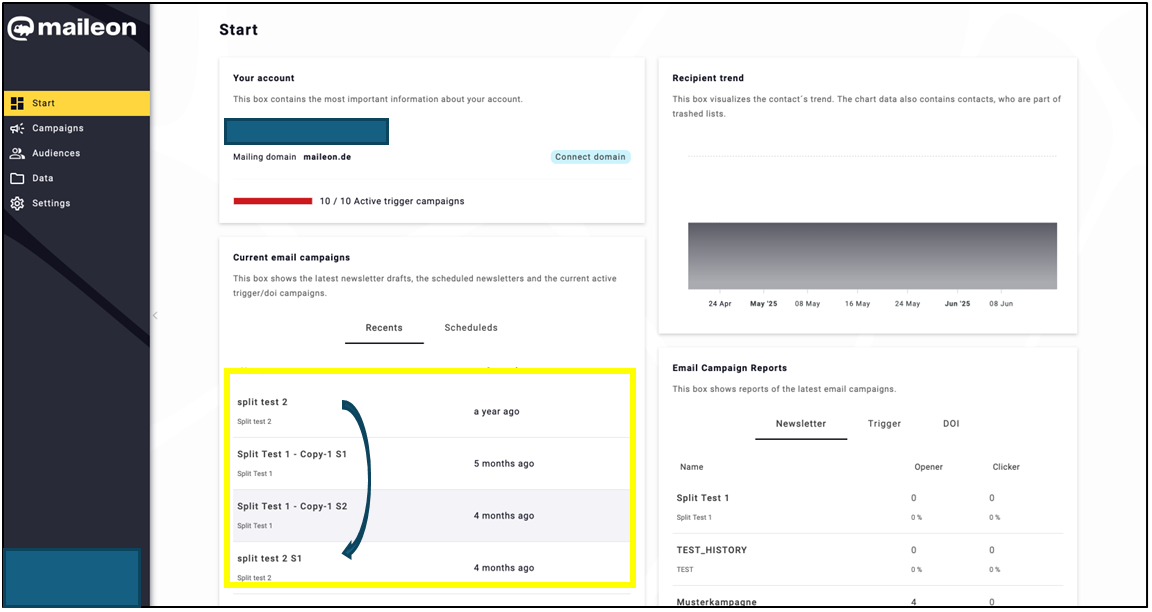
Fig. 3: Tap navigation: Clickable interface for keyboard-only users.
More transparent campaign reports presented on a cleaner interface with improved performance (fig. 4).
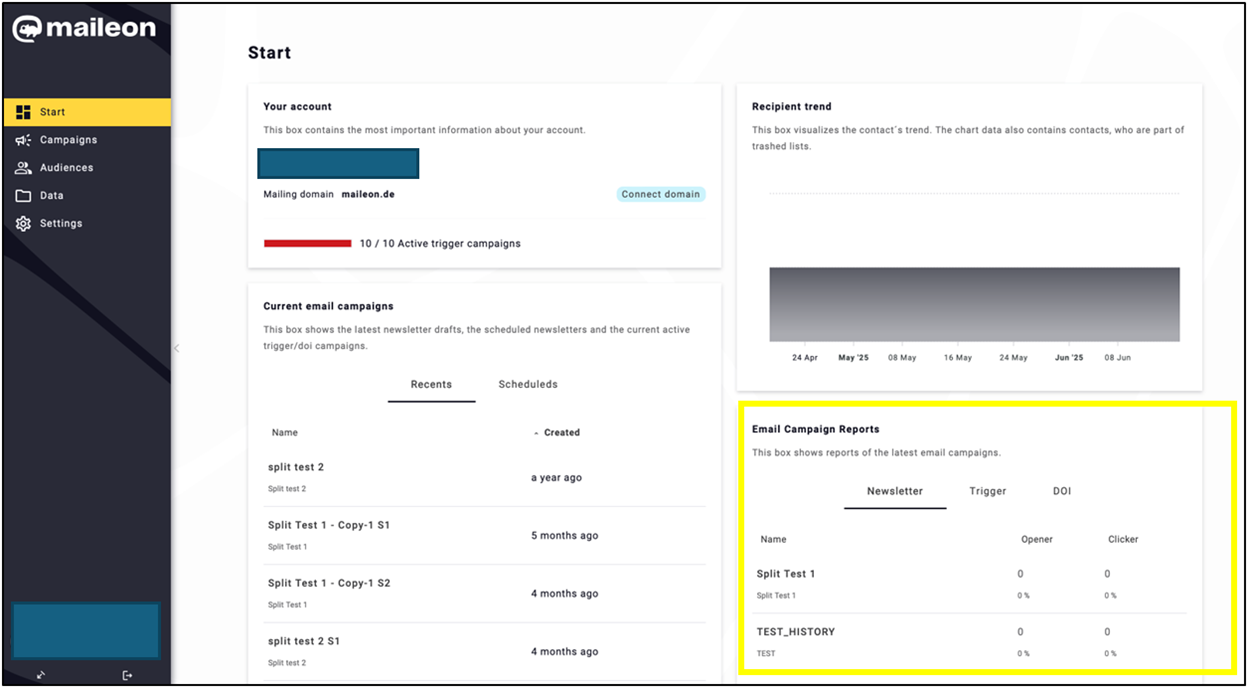
Fig. 4: Clearer campaign reports on a streamlined, high-performance interface.
3.2 Campaigns: Simplified design for ease of use
Modern, cleaner, and more transparent interface, while the structure and logic of the required steps remain similar (fig. 5).
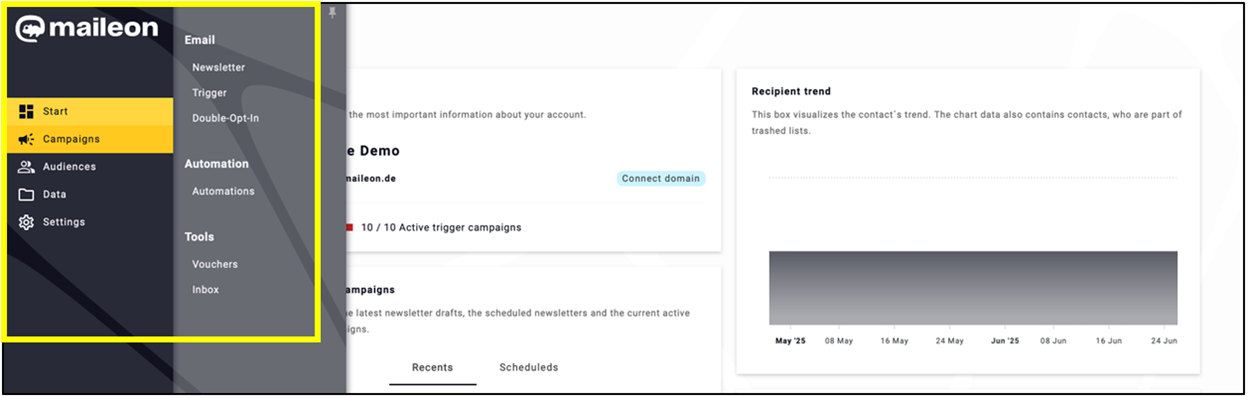
Fig. 5: More transparent interface for campaigns.
Note: The process is consistent for newsletters, triggers, and DOI mailings.
Email interfaces:
- Tab layout on the top of the page to help with transparency (fig. 6).
- By clicking on the trash bin icon, you can view deleted emails. Note: Emails moved to trash are available for 14 days, after which they are permanently deleted.
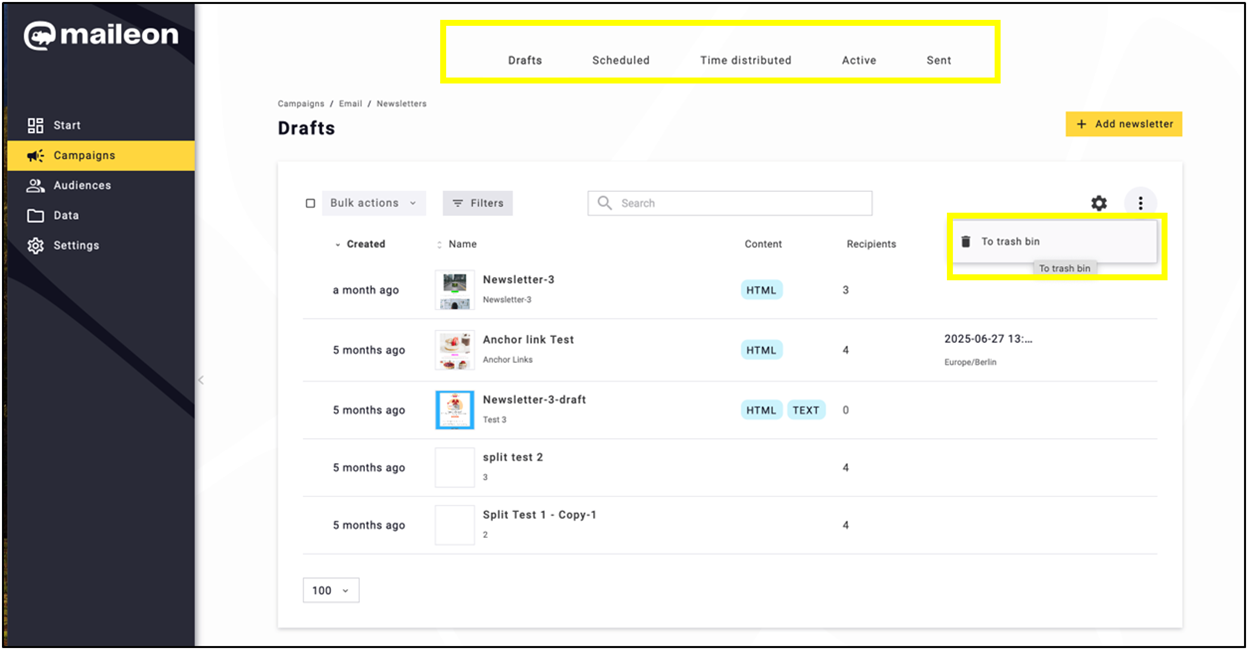
Fig. 6: The layout has been moved to the top of the page. Deleted emails are now stored in the trash bin for 14 days.
Example: If you delete a trigger draft that is actively using a contact event, the association will remain for 14 more days. After this period, it will be automatically removed when the trigger draft is permanently deleted.
To restore the email, enter the trash bin and click on the restore icon ![]() (fig.7).
(fig.7).
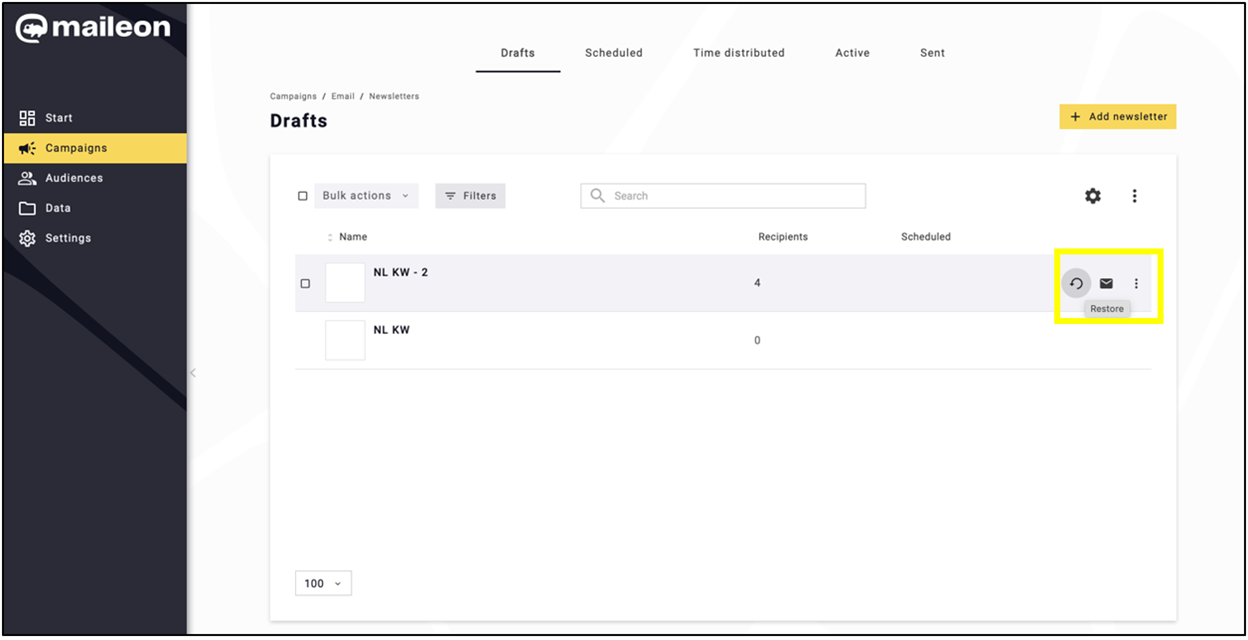
Fig. 7: Restore an email by opening the trash bin and clicking the restore icon.
Using the three dots, you can access the copy and paste options (fig. 8).
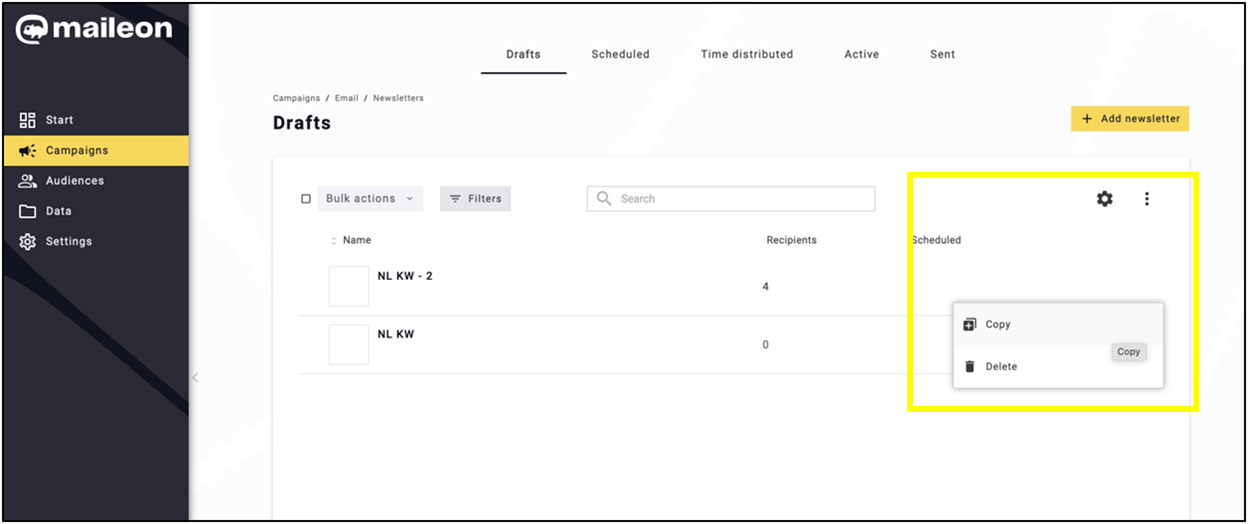
Fig. 8: Access copy and paste options via the 3-dot menu.
The configuration of the mail lists has also been updated (fig. 9).
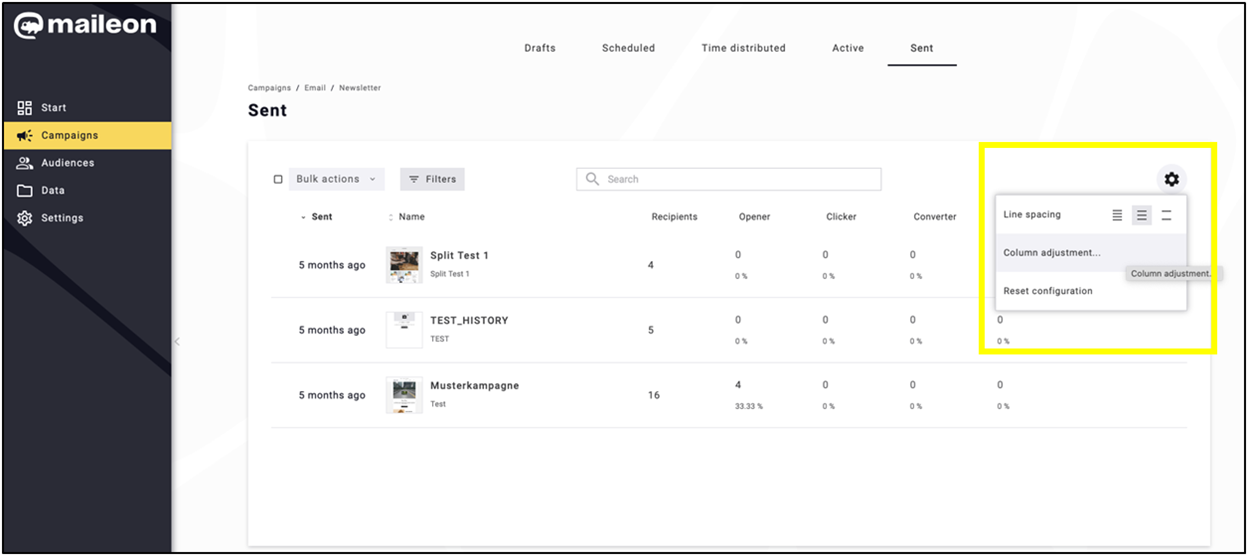
Fig. 9: Flexible list configurability.
Rearrange the column order and toggle their visibility by using the drag handles (fig. 10).
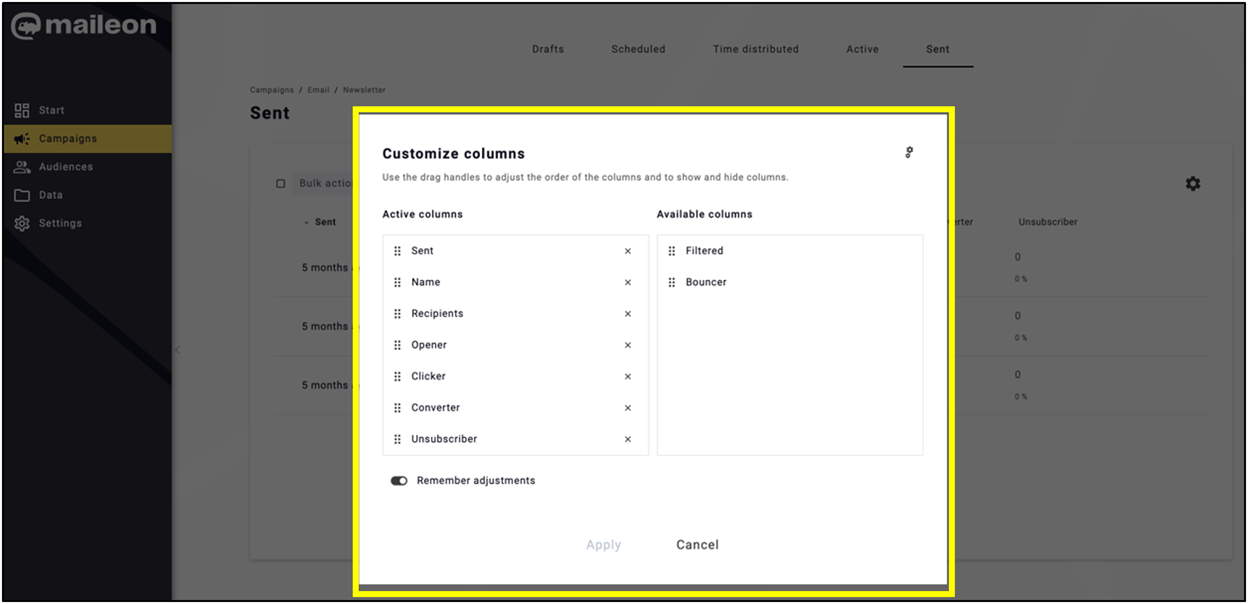
Fig. 10: Customise column order and visibility using drag handles.
The newsletter is created according to the usual steps. Set the complexity of the settings as desired (fig. 11).
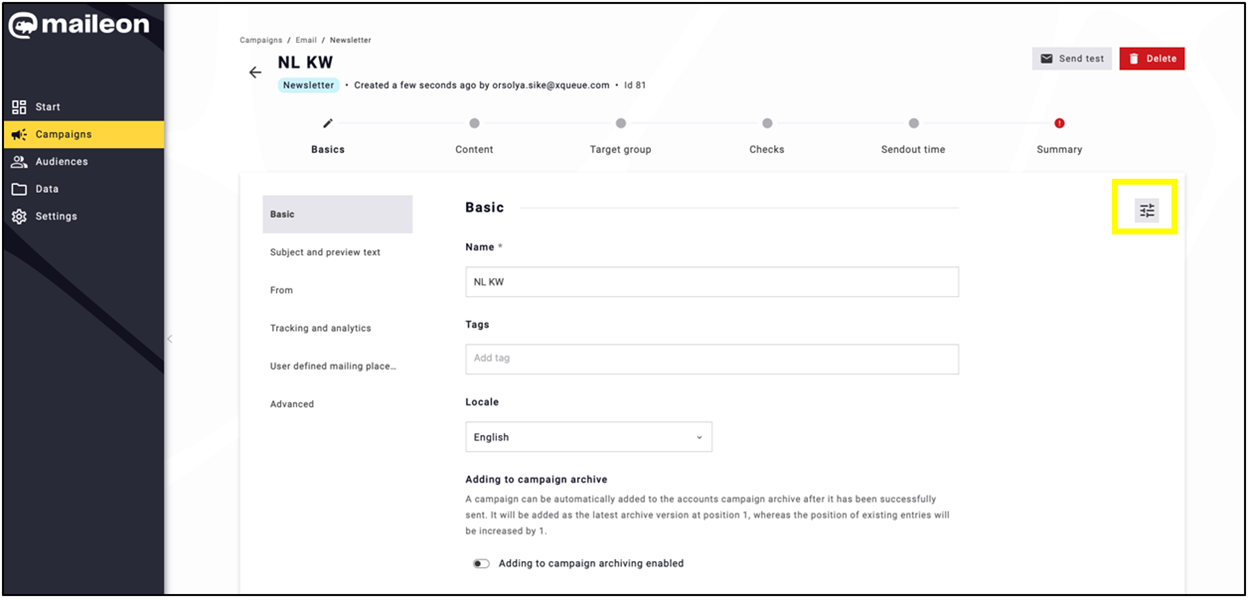
Fig. 11: Create the newsletter using standard steps and adjust settings as needed.
3.3 Content editor: A more dynamic and practical newsletter creation process
Streamlined and simplified target group definition (fig. 12).
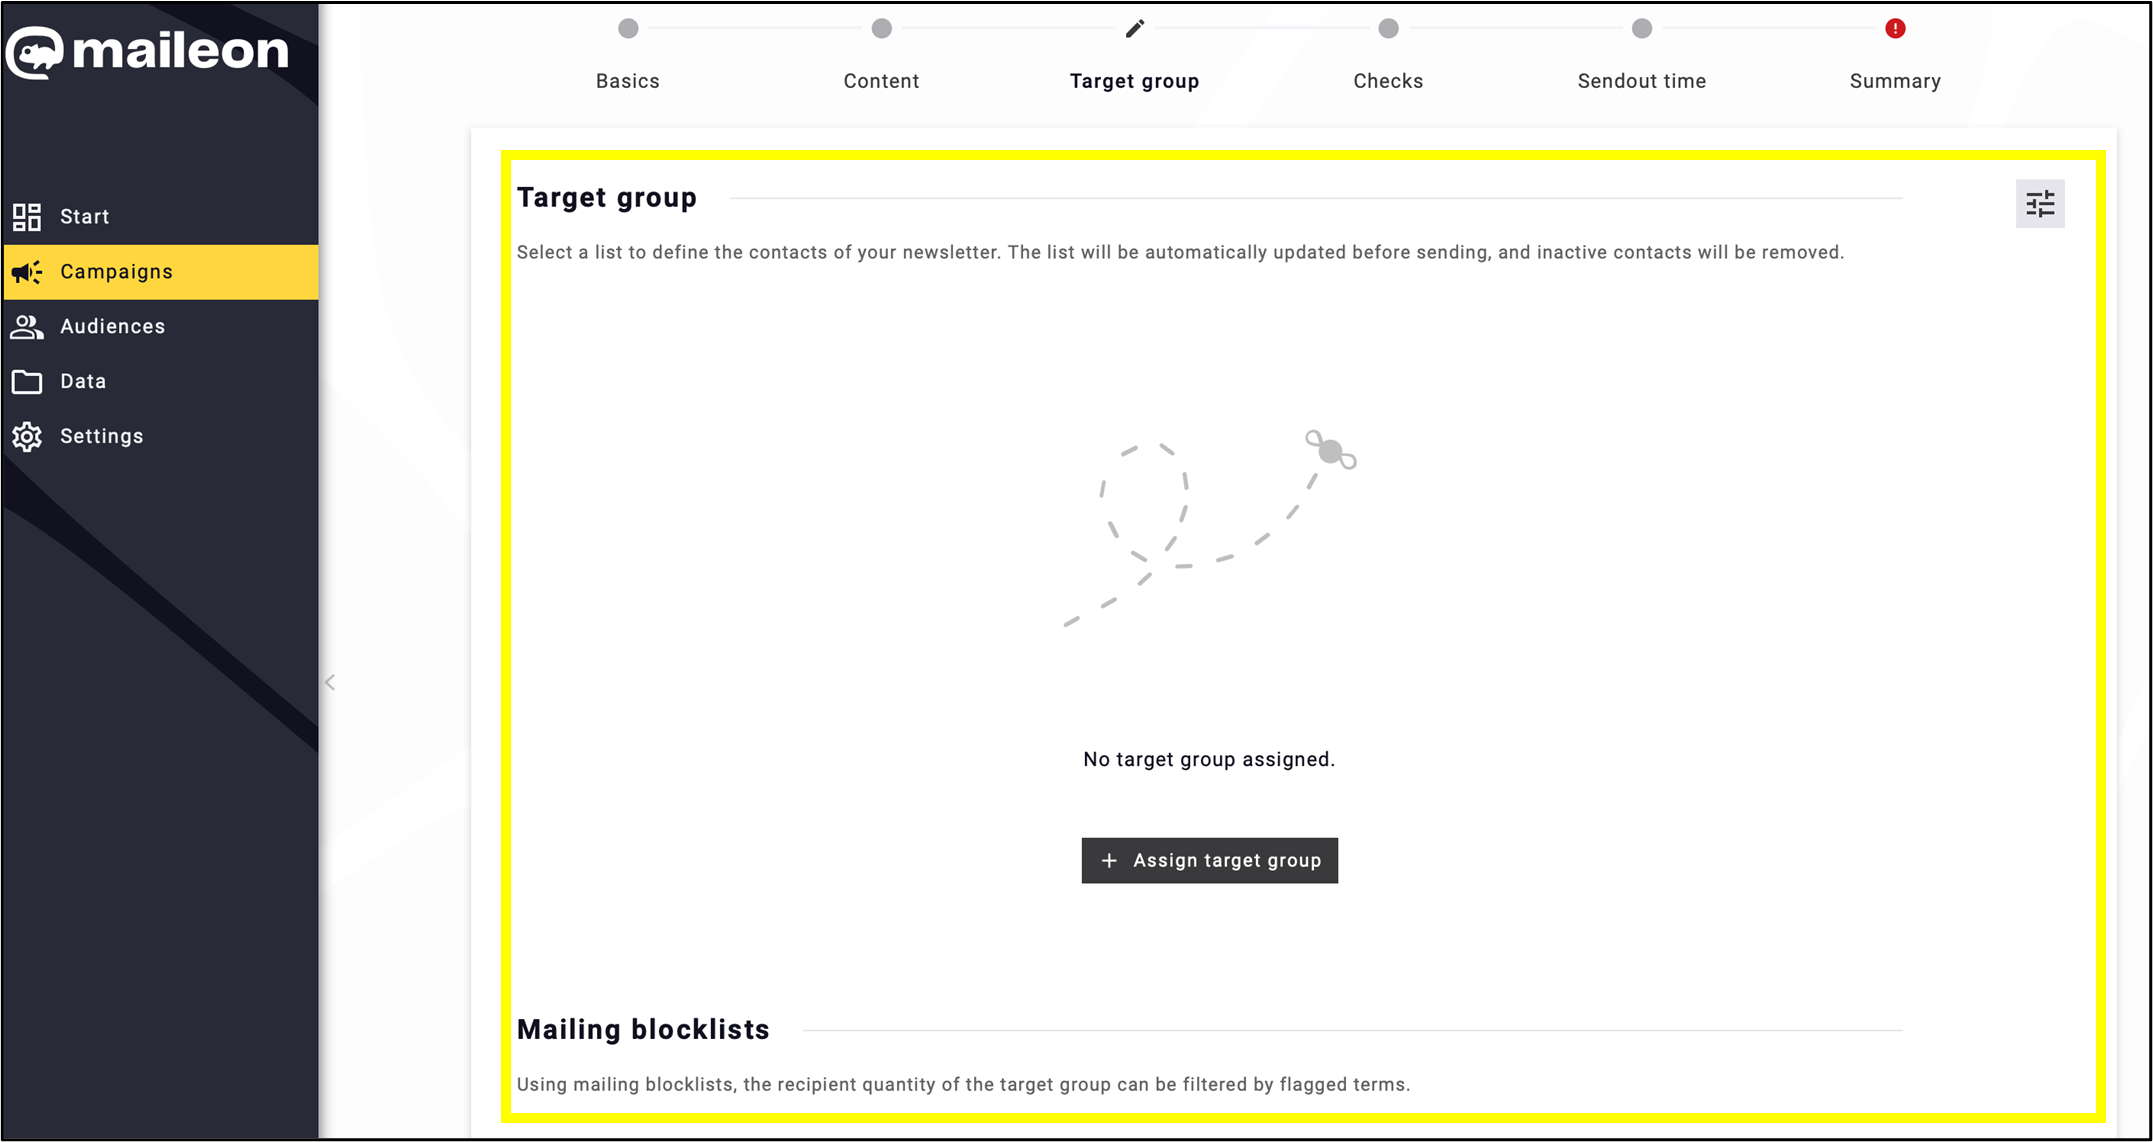
Fig. 12: Simplified target group definition for easier setup.
Grouped Checks page designed to save time and enhance transparency (fig. 13).
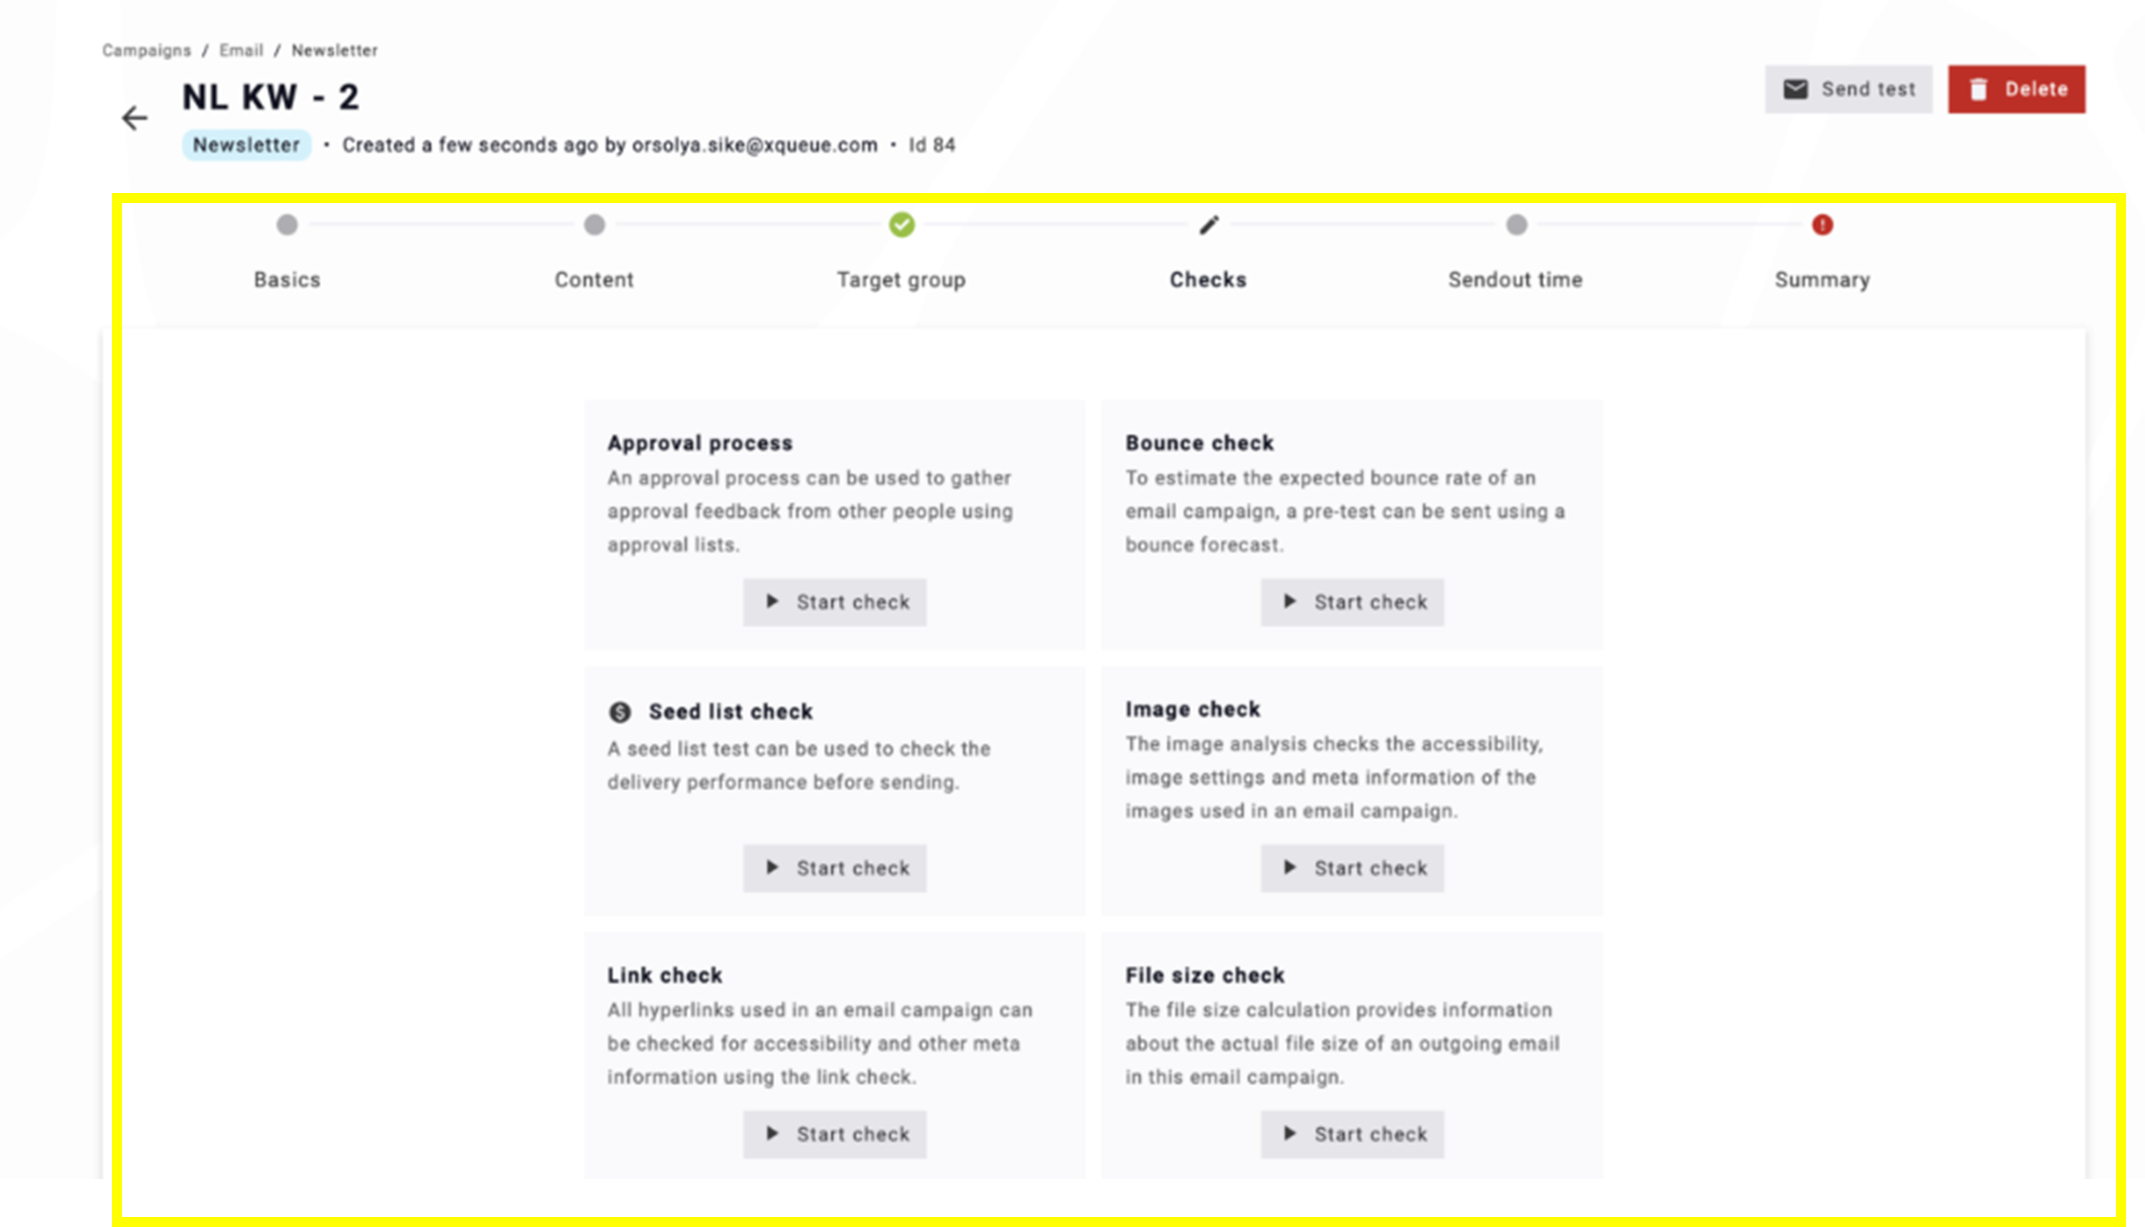
Fig. 13: Groups of the checks help transparency.
Data Extensions: The new smart content feature connects to the data extension database and retrieves information.
Note: Once Data extensions is activated for your account, find it among the apps in the ‘Edit content’ section.
Go to Campaigns and choose the kind of emailing draft you desire to edit (fig. 14).

Fig. 14: ’Data extensions’ is a new feature in the editing section of all types of emailings under ’Campaigns’.
Click the draft you desire to edit, (fig. 15) as in UI1.
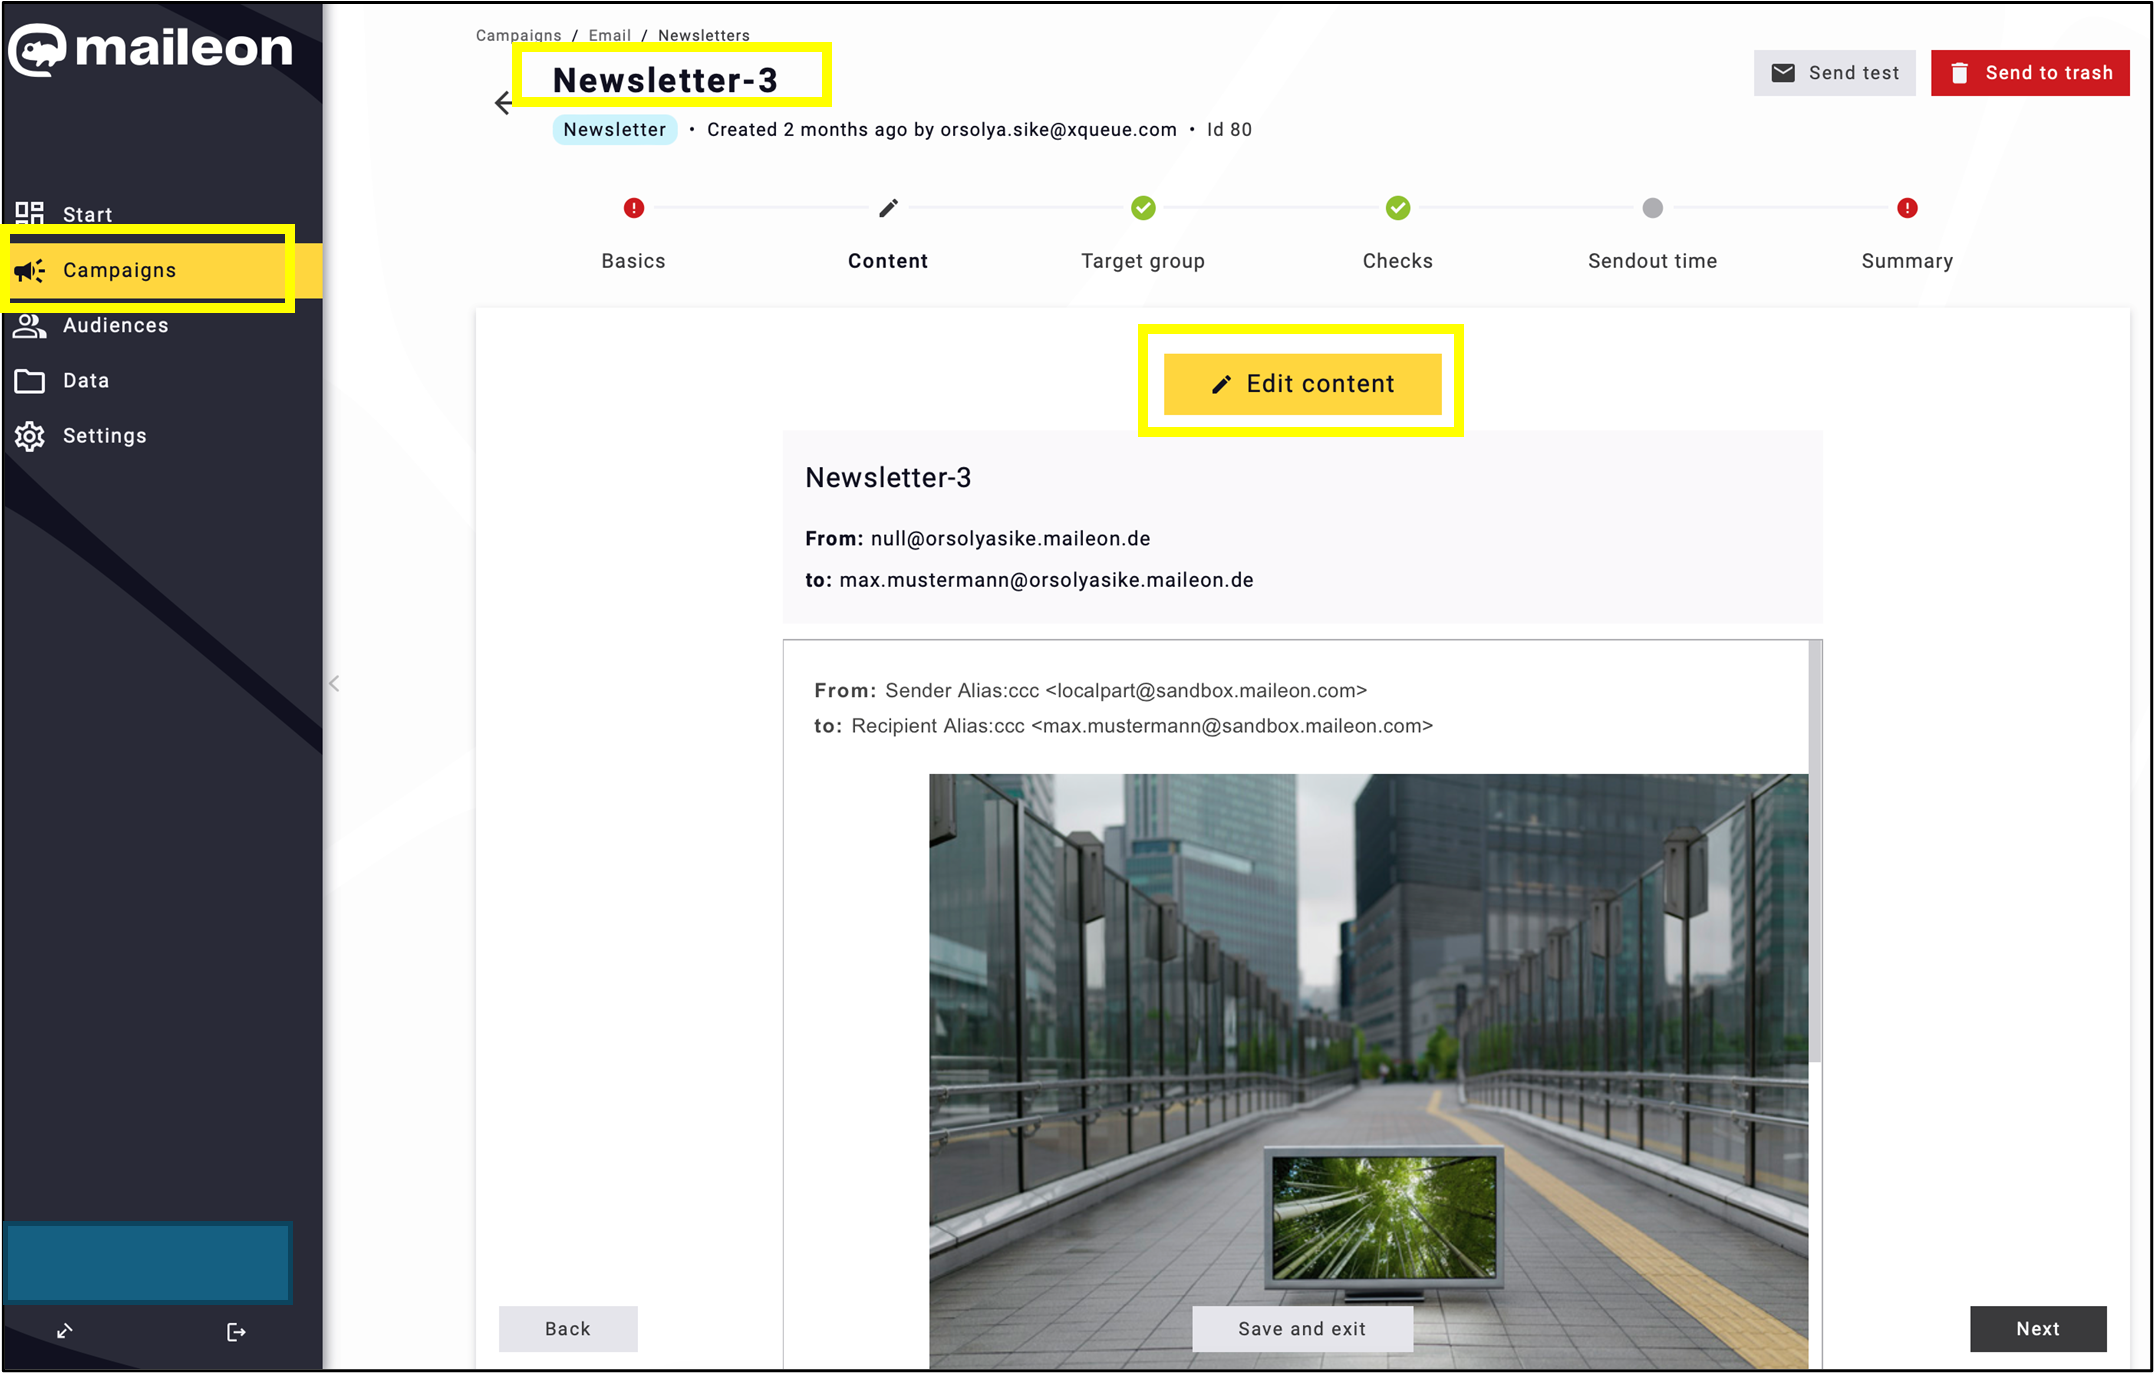
Fig. 15: If Data extension is activated for you, click on the draft and start editing.
Find Data extensions among the apps (fig. 16) and click on it.

Fig. 16: Access ’Data extensions’ from the apps.
Select a content block. It will be duplicated for each chosen feed item, and the placeholders will be replaced with the corresponding fields from that item (fig. 17).
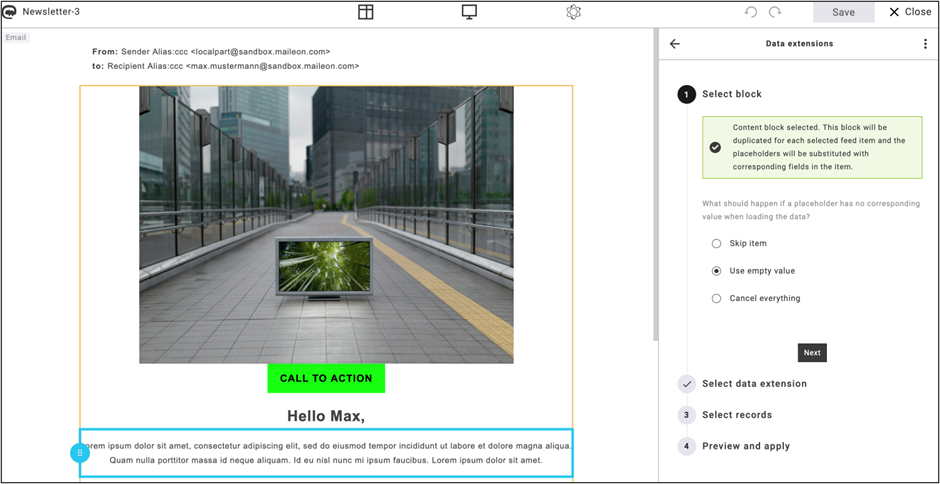
Fig. 17: Duplicate content blocks with dynamic placeholder replacement.
Click Select data extensions (fig. 18) and click Next.
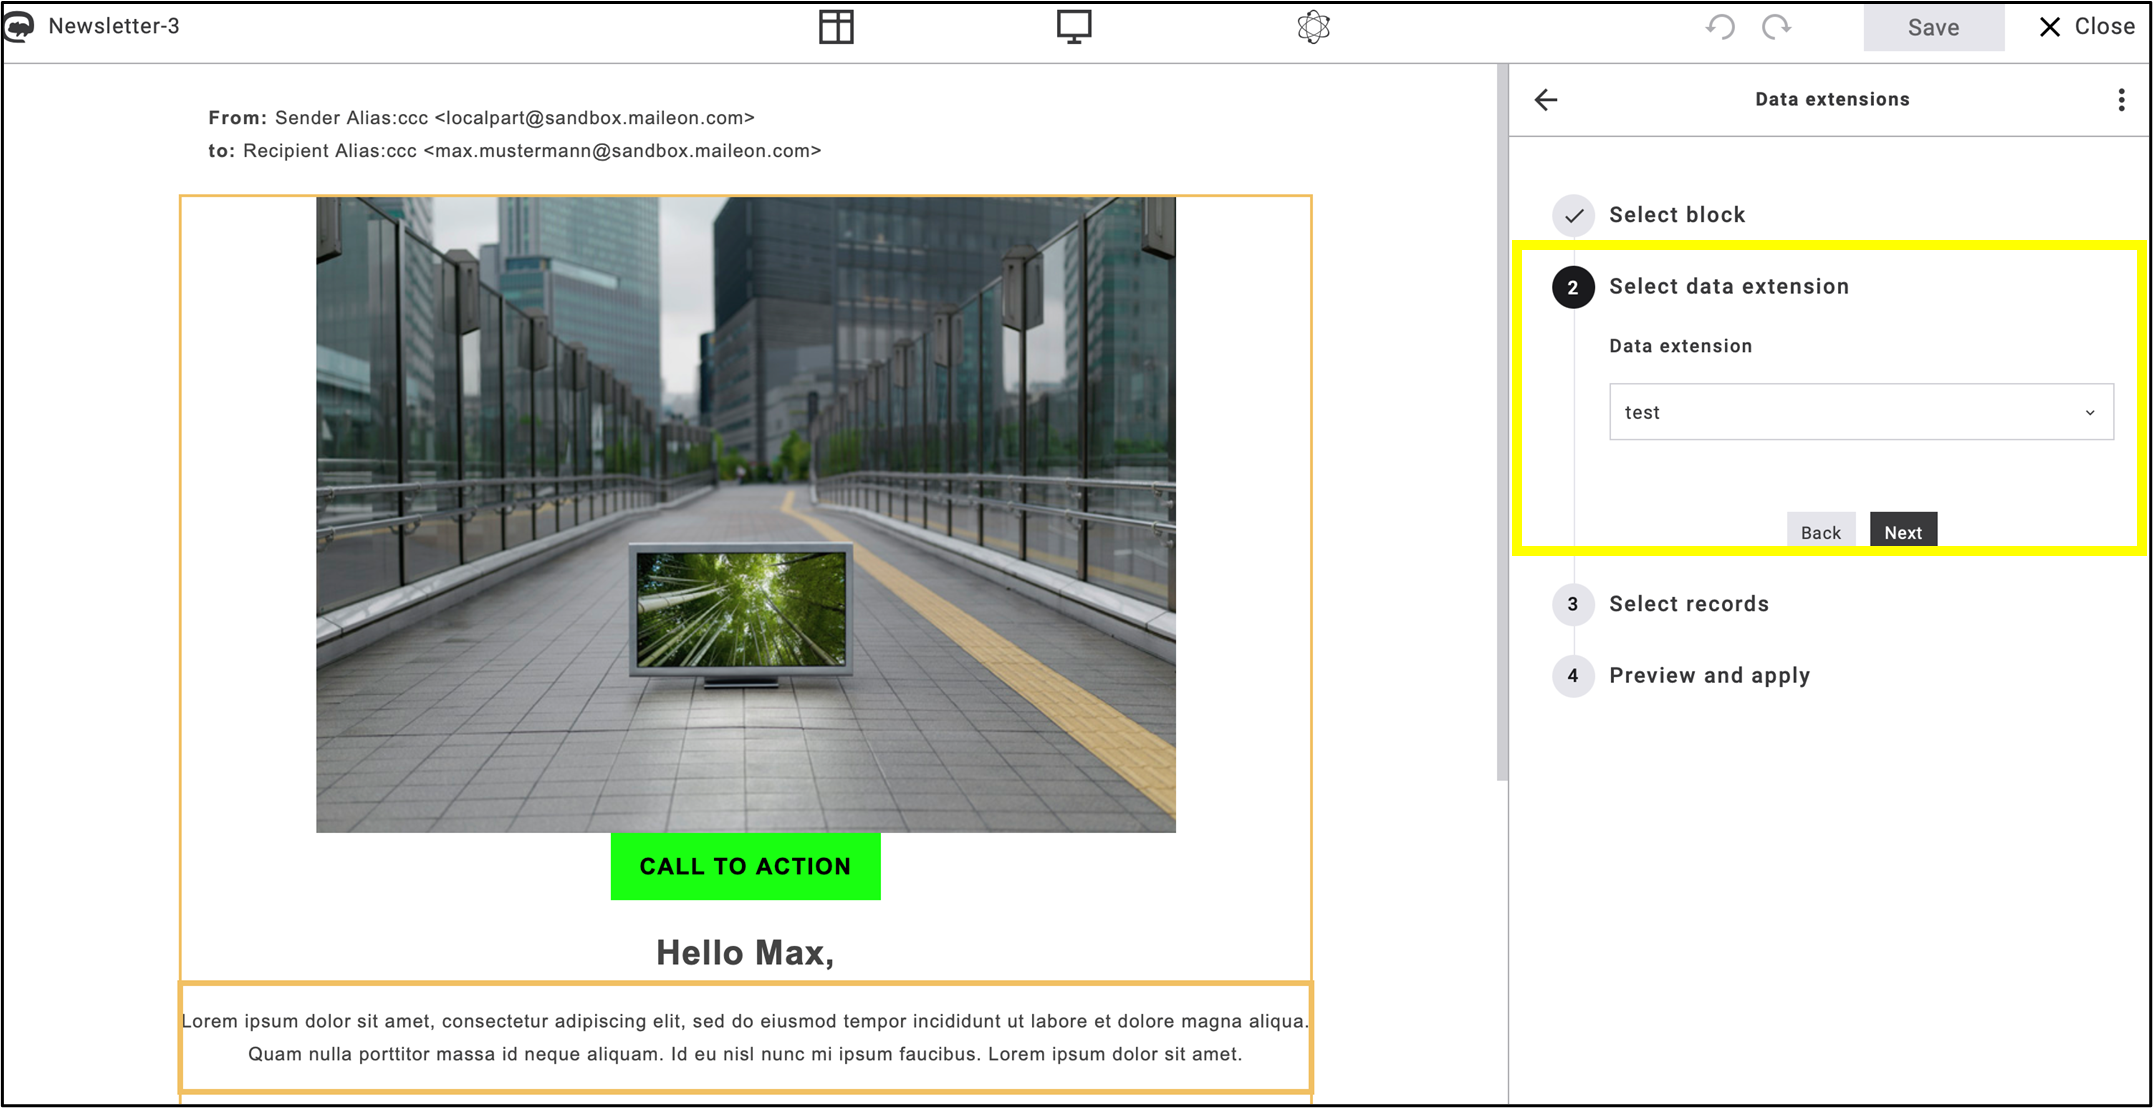
Fig. 18: Select the data extensions, then click ’Next’.
Filter the data extension by selecting records of unique ID’s (fig. 19) and click Next.
Fig. 19: Filter data extension with unique IDs, then click ’Next’.
Select the products you would like to display in the newsletter (fig. 20). By clicking Apply, the products or the information will land in the content.
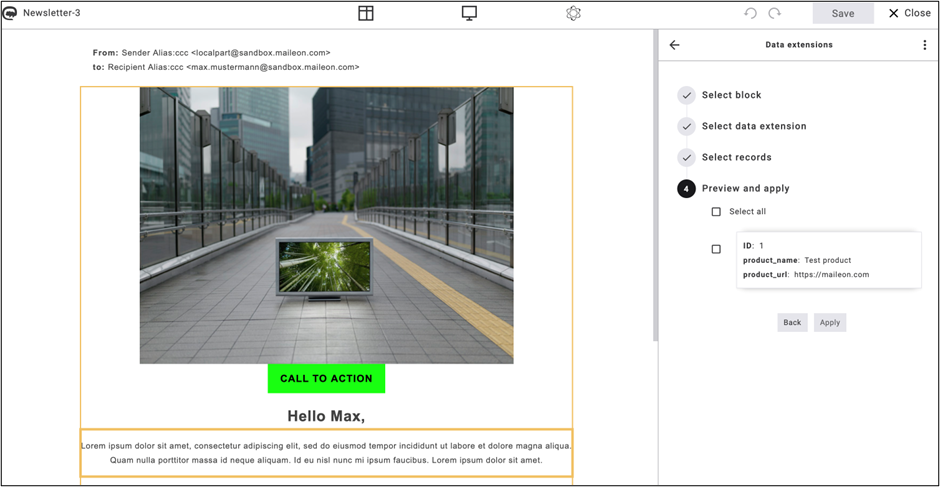
Fig. 20: Select the products and click ‘Apply’ to add them to your newsletter.
Use the brackets icon { } to select the data extension placeholder (fig. 21).

Fig. 21: Select ’Data extension placeholders’ after clicking the { } icon.
To insert the data extension placeholder, add the Field and Data type of it (fig. 22).
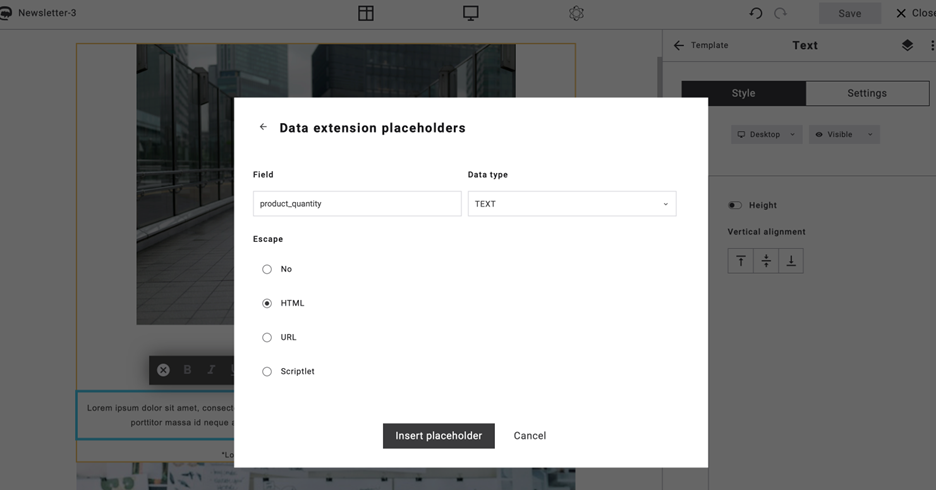
Fig. 22: Example of inserting data extension placeholders.
Find the placeholder of the data extension in the text block (fig. 23).
BILD 23
Fig. 23: The placeholder of the data extension is in the text block.
Note: There are no default articles for this feature since every data extension is specific and custom.
If you have any questions about the innovations and new features of UI2, please contact us at support@xqueue.com.